Easy Steps To Add A Recovery Email To Gmail
Google offers the possibility to add a recovery email to Gmail. The main reason for adding a recovery email is to have another email address where you can be reached in case you lock yourself out of your Gmail account. You can think of it as having a separate key for your backdoor: if you lose the key of your main door, you can still get inside with the key for your backdoor.
Adding a recovery email in your Gmail account is easy, though it does require you to have a second email address. It’s one of those computer tips and tricks that don’t take much time but can save you a lot of time later on. I will go through the steps to add a recovery email address in what follows.
How To Add A Recovery Email To Gmail - Google Protect Your Account
If you don’t already have a recovery email address or phone number in your Google account, Google may show the “Google - Protect your account” screen when you sign in. That will look like this:
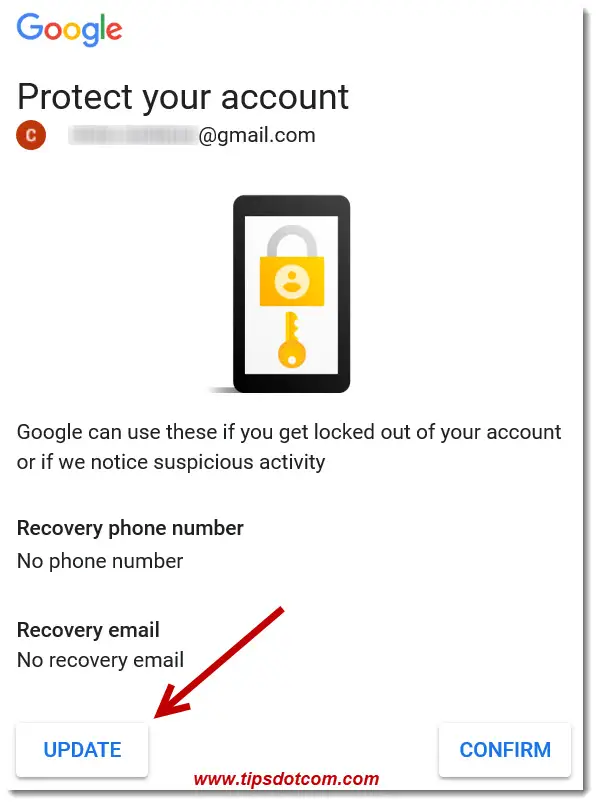
You can click the “Update” button to add a recovery email address or phone number (or you can click the “Confirm” button if you want to skip adding recovery information). If you click the “Update” button, Google will first ask for a phone number.
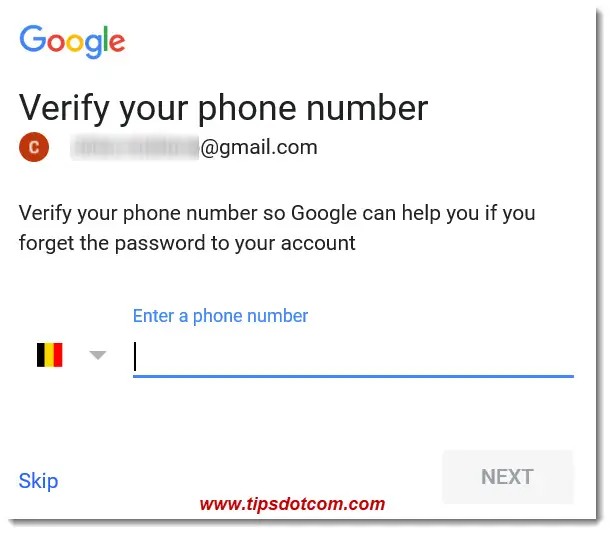
Enter your phone number and click next (or click skip if you don’t want to enter a phone number) to proceed. If you enter your phone number, Google will text a code to the phone number entered and you will need to enter that code to verify. You can also skip that step. You can read more about adding a phone number to your Google account here.
In the next screen you can enter your recovery email address.
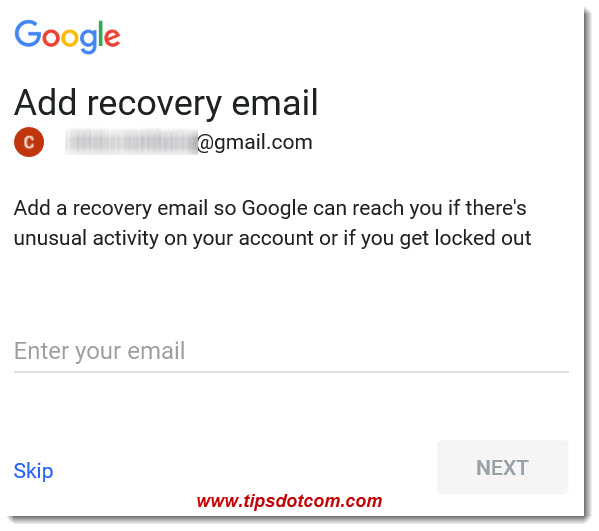
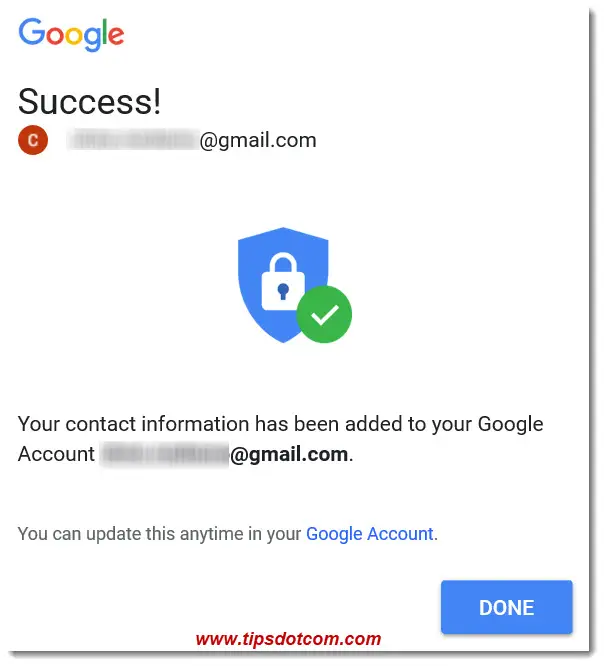
Click next to continue to the confirmation screen. You have successfully entered a recovery email address to your Google account.
Google Protect Account Doesn’t Show At Sign In?
If you don’t see the “Google - Protect Account” screen when you sign in to your Google account, you can still add a recovery email address to Gmail. Here’s how.
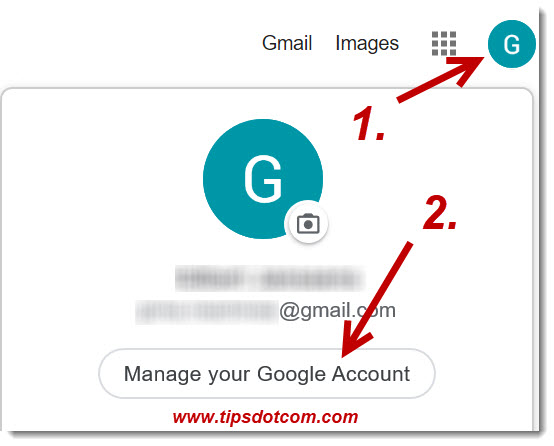
Make sure you are signed in with your Gmail account. Then look for the round account icon in the top-right corner of your screen. Click on the icon and then click the “Manage your Google Account” button to go your your Google account settings.
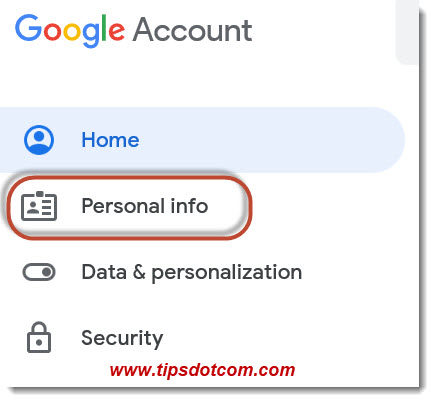
Your Google Account management screen will have a number of items on the left side of your screen. Click “Personal Info” to continue.
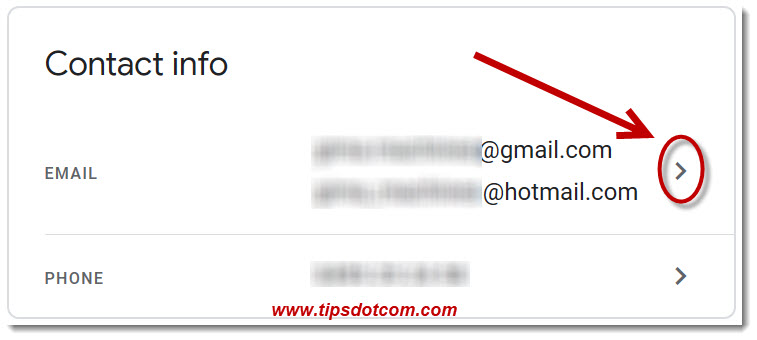
Scroll down to the “Contact Info” details and click the right-arrow next to your email address.
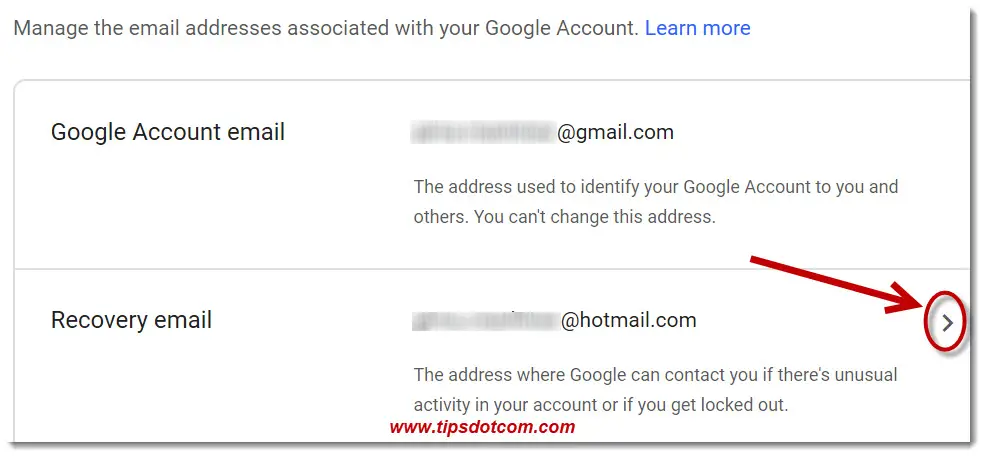
In the next screen, look for the heading “Recovery email” and click that to add a recovery email to Gmail. Please note that in the image below there’s already an email address listed as recovery email address, but if you don’t have one already, this is where you can add a recovery email to Gmail.
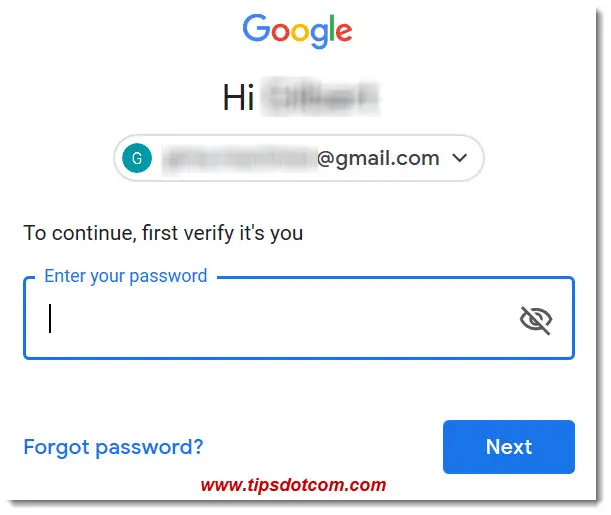
If you click to add a recovery email, Google will likely ask you to enter your password to verify that it’s you.
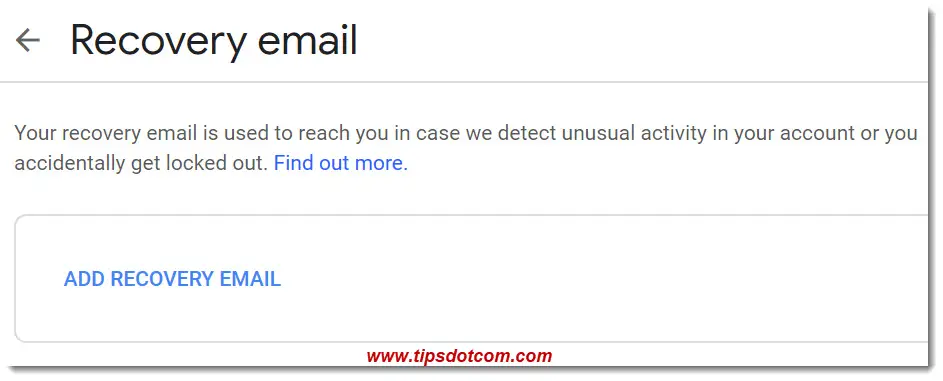
Next, in the recovery email screen, click the “Add recovery email” link.
Enter your recovery email address and click “Done”.
That's it, you have now added your recovery email address to your Google account.
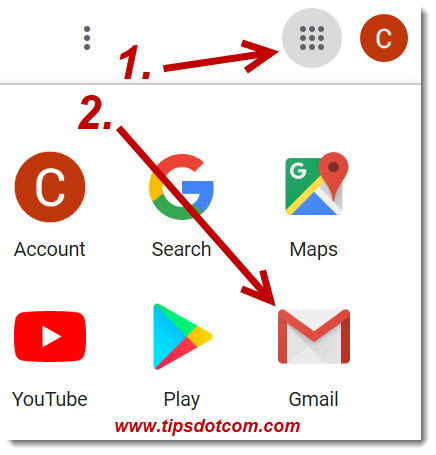
Google leaves you with the “Recovery email” screen, which may look a bit confusing if you were hoping to be taken to your Gmail account at this point.
You need to clik the Google Apps icon in the top right corner and then click the Gmail icon to go to your Gmail account.
I hope this article was helpful. If you think it was, please consider liking my page or adding a brief comment below. Thank you!
If you've enjoyed this article or found it useful, I'd appreciate it if you'd let me know by clicking the Like (or Share) button below. Thank you!


New! Comments
Have your say about what you just read! Leave me a comment in the box below.