Error code 0x8007251D While Activating Windows 10 (Or 8)
Why I even bothered to write about error code 0x8007251D? Well, this turned out to be one of those pesky little errors that affect a whole bunch of people. Including myself.
I was trying to activate Windows 10 after a perfectly smooth and spotless installation on a new computer when this annoying error told me that Windows could not be activated. No matter how much I tried, the activation did not succeed.
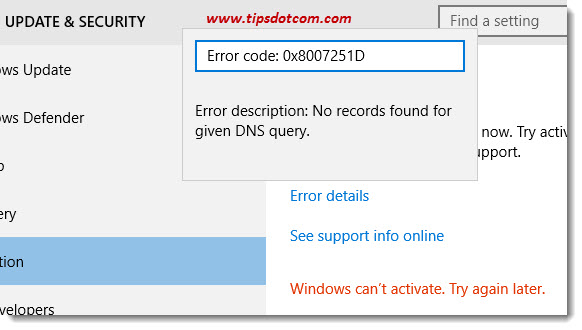
My internet connection worked fine so that couldn’t be the problem and I had used a perfectly valid Windows product key during installation, so that couldn’t be the problem either.
I started digging into this and I soon found that a lot of other people had posted requests for help about error code 0x8007251D in several specialized computer forums.
When I finally discovered the solution I decided to wrap this up in a short article and publish it online so you can benefit from it and get your Windows 10 activated. I was able to activate my Windows 10 with the quick steps described below and I believe that it will also work to activate Windows 8. I haven’t tested it on a Windows 8 installation though, so I can’t really confirm.
The complete error message I had on my system when trying to activate Windows 10 was:
Error Code: 0x8007251D.
Error Description: No records found for given DNS query.
I’m not sure if the error code reads entirely the same on Windows 8 systems, but the steps to solve this problem should work just as well on Windows 8.
Steps To Fix Error code 0x8007251D
You’ll need to enter a couple of command in a command window to fix this. Don’t worry if you’re not used to working with a command prompt, it’s super-easy and I’ll take you through the process step by step. Actually there are only two commands to enter so no need to panic or worry that you’ll mess something up.
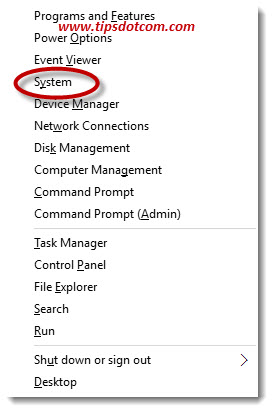
First open up the Quick Access menu by pressing the Windows key + x on your keyboard.
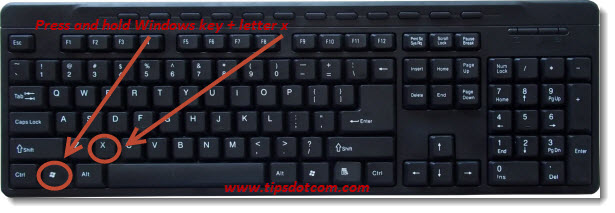 Press the Windows key + x combination to open up the Quick Access menu
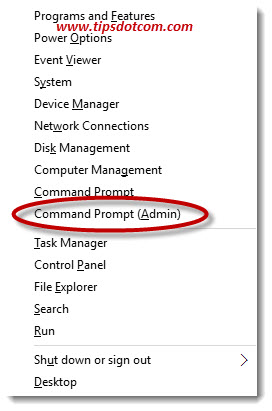
In the Quick Access menu, select “Command prompt (Admin)” to open your command prompt window where you will enter your commands.
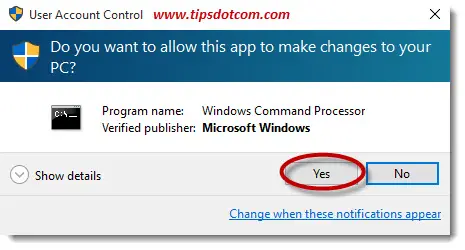
If a user account control window comes up, click yes to continue.
Windows will now open a command prompt window allowing you to enter commands.
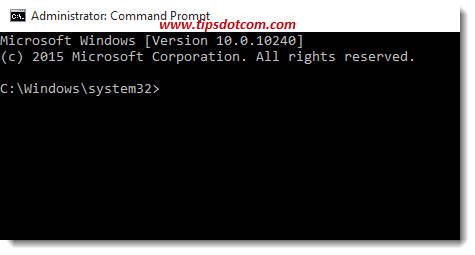
Type the command
slmgr.vbs –ipk <your Windows product key>
exactly like shown here and press ENTER. Replace the <your Windows product key> part with your own product key.
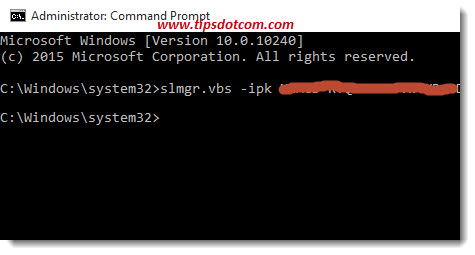
Ready? Almost done!
Now enter the following command, exactly like this:
slmgr.vbs -ato and press ENTER
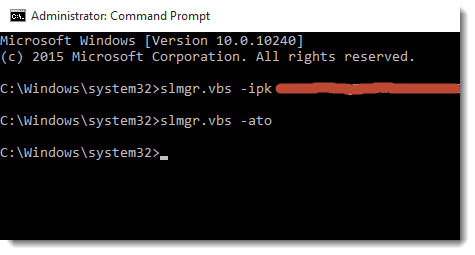
You should now see a message that Windows 10 successfully activated. Type exit in the command window and press ENTER to quit the command box.
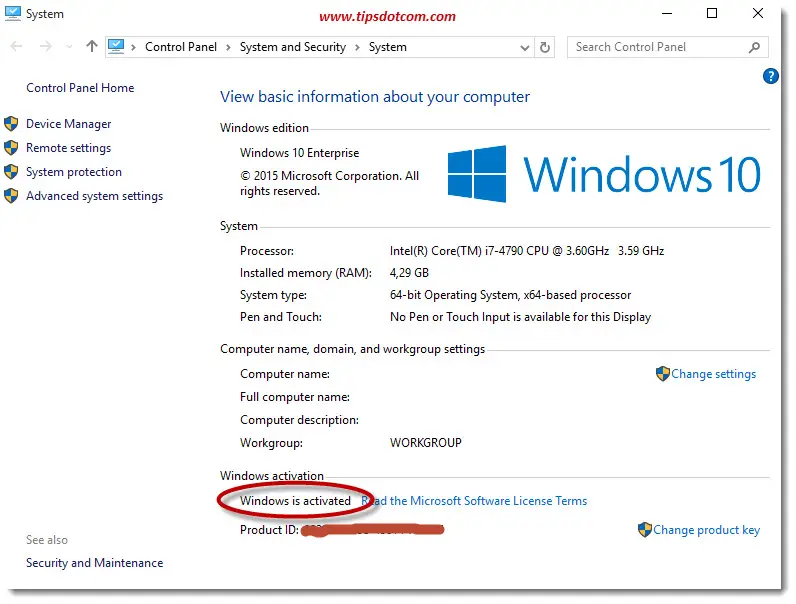
You can check the activation by going to the system properties window. Press the Windows key + x keyboard combination again on your keyboard to open the Quick Access menu and select “system”.
In the system properties window, you should now see that your Windows is activated.
That wraps it up, this should help you deal with the Error code: 0x8007251D during activation of your Windows setup. I hope it served you well.
If you've enjoyed this article or found it useful, I'd appreciate it if you'd let me know by clicking the Like (or Share) button below. Thank you!



New! Comments
Have your say about what you just read! Leave me a comment in the box below.