Performing the Microsoft Office 365 Outlook Manual Setup
There may come a time when you need Office 365 Outlook manual setup settings. I mean, the simplified method of just entering your Office 365 e-mail address and password is easy, straightforward and it works. Until it doesn’t.
Unfortunately, the default approach for setting up your Office 365 account in Outlook doesn’t always work. Or maybe you just prefer to manually configure server settings or additional server types when configuring a new Office 365 account in Outlook. Whatever your reasons, in what follows I will describe the settings for your Office 365 mail server name and user name. And a few other settings.
The Office 365 Outlook Manual Setup Procedure
For me, it happened when I was trying to configure an Office 365 account and Outlook decided to give me this message: "something went wrong and outlook couldn’t set up your account. please try again. if the problem continues, contact your email administrator."
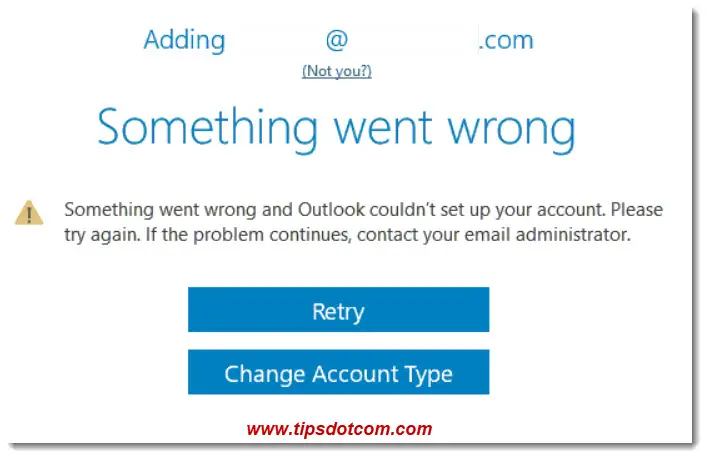
Time for an Office 365 Outlook manual setup.
Here are the step by step instruction and screenshots to guide you through setting up your Office 365 account in Outlook via the option to manually configure server settings.
First you need to close Outlook and create the Office 365 e-mail account via the e-mail configuration icon in Control Panel.
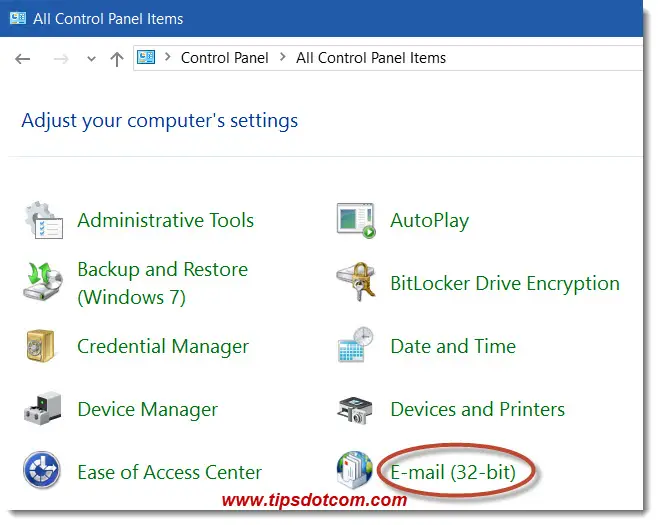
Then, select the option to “Manually configure server settings or additional server types”:

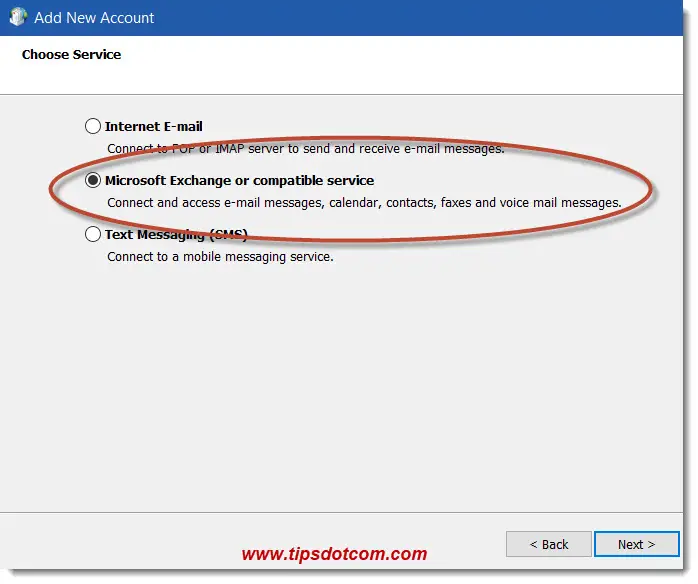
Next, select “Microsoft Exchange or compatible service” (connect and access e-mail messages, calendar, contacts, faxes and voice mail messages).
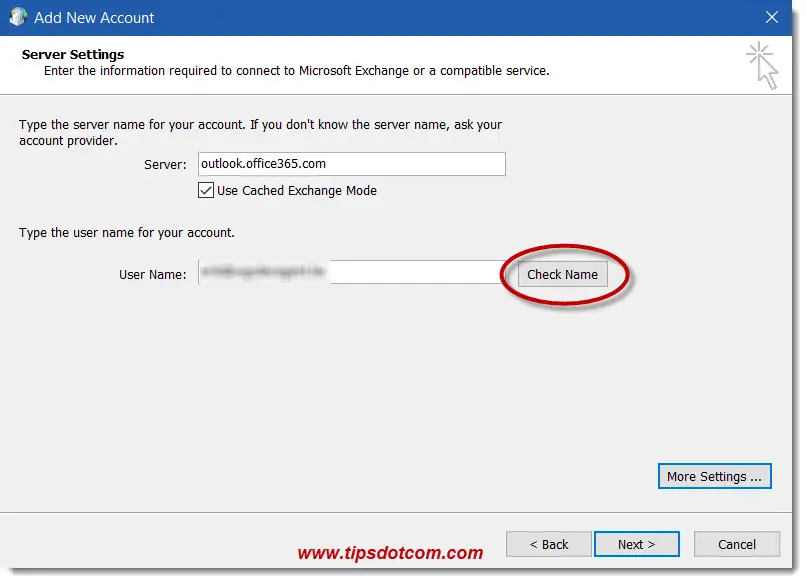
In the next screen enter “outlook.office365.com” (without the quotes) in the server name field and the Office 365 e-mail address in the user name field (blurred out in the image below).
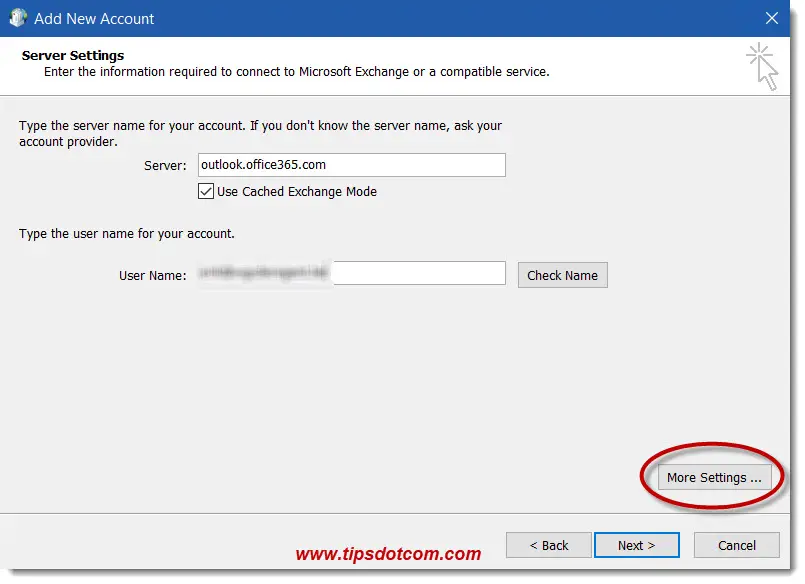
With this information filled out like that, you now need to click the “More settings” button to continue (see image above).
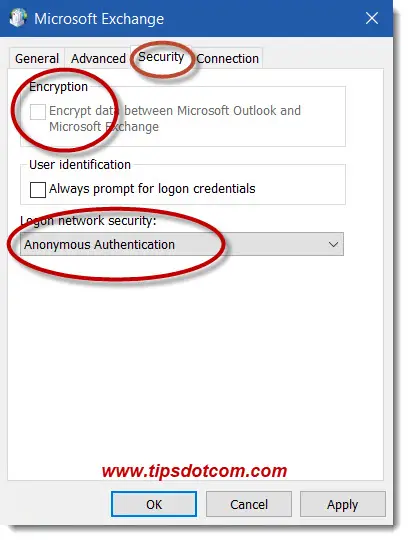
Now make sure to switch to the “Security” tab (image below) and deselect the checkbox next to “Encrypt data between Microsoft Outlook and Microsoft Exchange”. Also select “Anonymous Authentication” from the Logon network security drop-down menu.
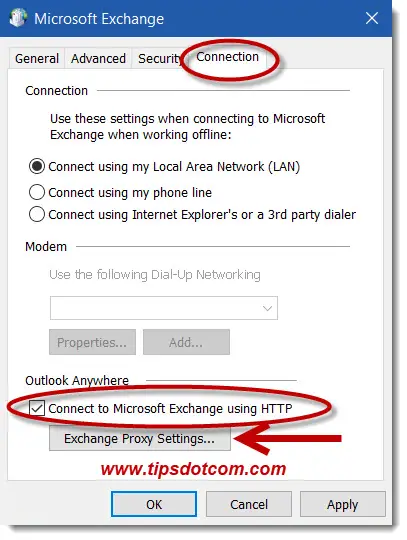
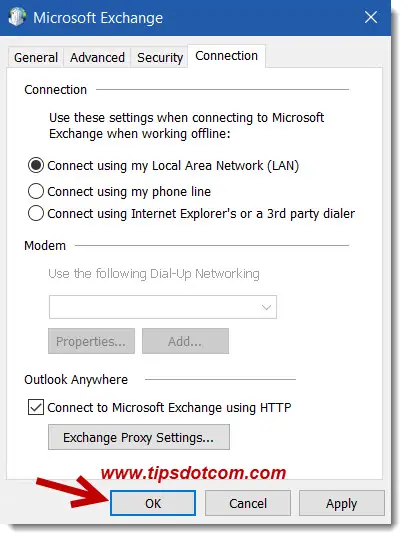
Then click on the “Connection” tab, check the box next to “Connect to Microsoft Exchange using HTTP” and click the “Exchange proxy settings” button.
Now look for the “Use this URL to connect to my proxy server for Exchange” field and type outlook.office365.com.
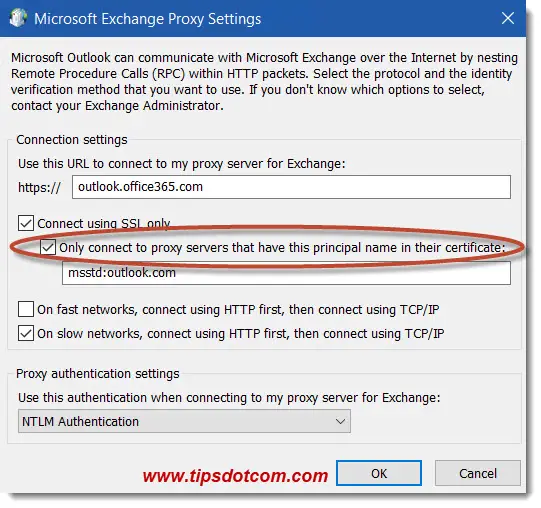
Make sure to check the box next to “Only connect to proxy servers that have this principal name on their certificate” and enter msstd:outlook.com
Also check the box next to “On fast networks, connect using HTTP first, then connect using TCP/IP” and select “Basic Authentication from the Use this authentication when connecting to my proxy server for Exchange” from the drop-down menu.
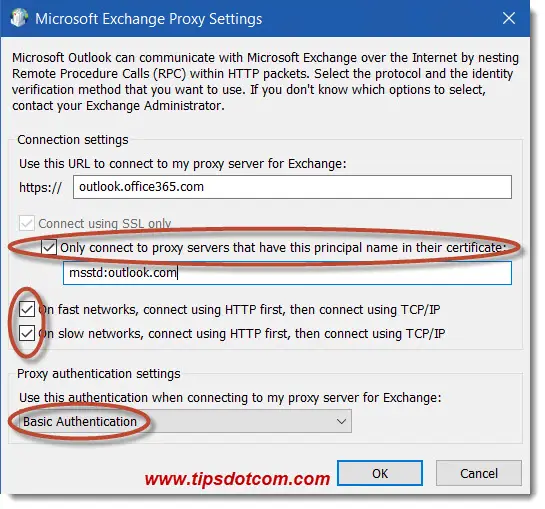
With all the above settings checked, you are all set for your Office 365 Outlook manual config, so click ok.
You’ll land back in the Microsoft Exchange screen, click ok once more.
Now you’ll arrive in the “add new account” window again. Click the “Check name” button.
A popup window will appear asking for credentials for the Office 365 mail account.
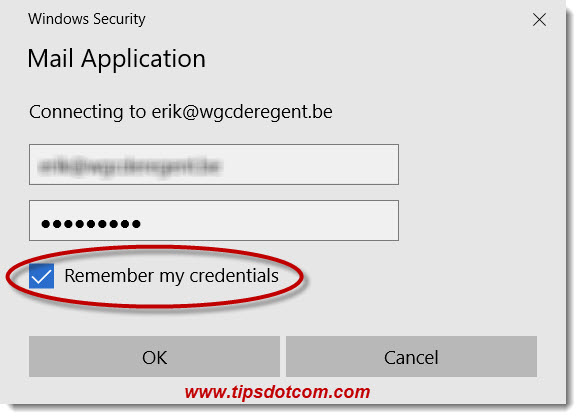
Enter the e-mail address and password and make sure to check the box to “Remember my credentials”. Then click ok.
You will then see the server name change in the new account window and when you click next your Office 365 Outlook manual setup is complete.
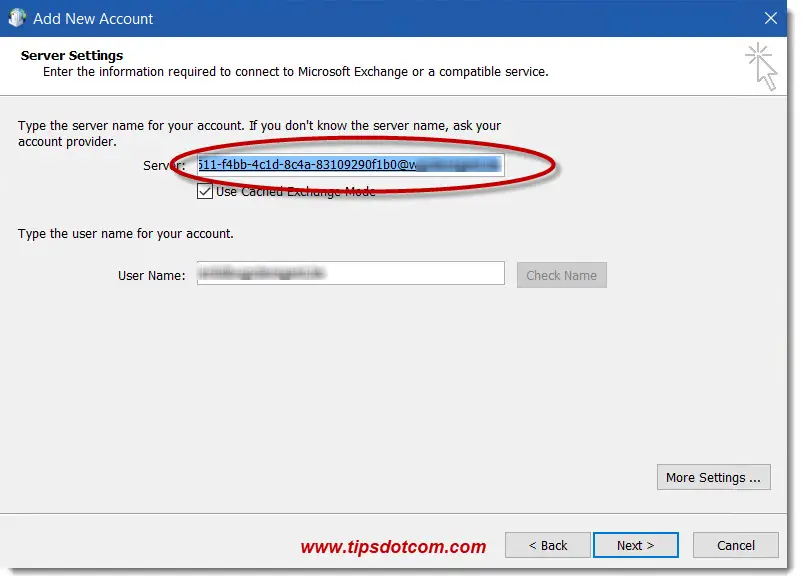
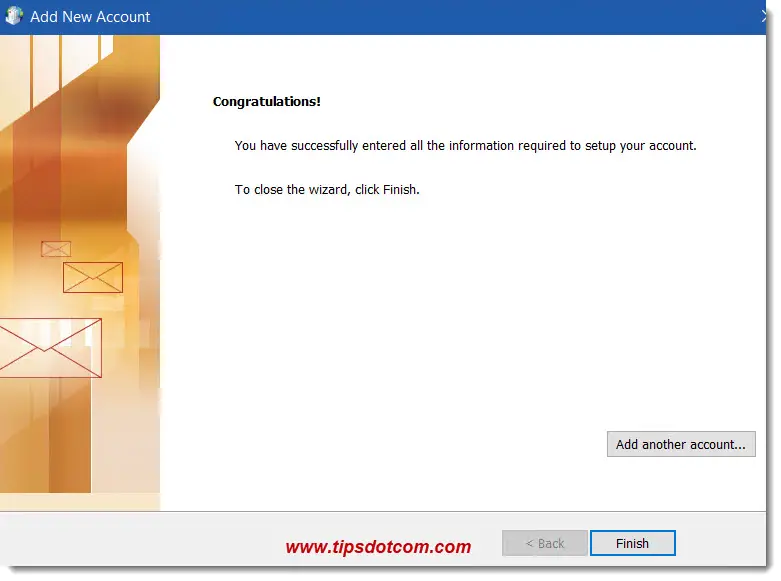
In the above screenshots I shared the images for Microsoft Outlook 2010 because this version appears to experience more hiccups when configuring an Office 365 account. Nevertheless, the same settings apply for other, more recent version of Microsoft Outlook as well and the configuration steps are the same.
The error message that "something went wrong and outlook couldn’t set up your account. please try again” is a pretty common one and unfortunately it doesn’t provide much information about *what* exactly it was that went wrong. For me, the Office 365 Outlook manual setup helped me fix the problem quickly and relatively easily.
I hope you’ve found my article useful, please leave a short comment below and like my page if you did, I’d appreciate it!
If you've enjoyed this article or found it useful, I'd appreciate it if you'd let me know by clicking the Like (or Share) button below. Thank you!


New! Comments
Have your say about what you just read! Leave me a comment in the box below.