Auto History Wipe - Google Chrome Extension
What’s up with Auto History Wipe? It’s a Google Chrome extension to delete your browsing history (and potentially other stuff you want deleted). You can use it if you want to have your internet history wiped clean each time you use Google Chrome. There are a few things you need to consider when using this extension, but it can be a useful addition to your Chrome browser if you use it correctly.
One of the main considerations is that Auto History Wipe deletes your internet browsing history as you start Google Chrome and not as you close it. This means that your internet history is still sitting there on your computer after you have closed your last browsing session. I’ll come back to this in a minute.
Another important thing to keep in mind if you consider using this extension is the fact that it may not work if you use Google’s sync feature to sync your browsing history.
Google Chrome does not have a feature to remove your browsing history on exit, which can be a little annoying for some. I have written before about a workaround to delete Chrome internet history and this time I want to take a closer look at the extension Auto History Wipe.
Auto History Wipe - Every Time Chrome Starts
Chrome extensions cannot run when Chrome exists unless they have “background” permission. This means that they keep running in the background even when you are not using Chrome. This can slow down your computer. That’s why Auto History Wipe runs each time Chrome starts. It wipes your internet history when you start Chrome, not when you shut it down.
The result is that you start with a clean browsing history every time, but if you are worried that someone else might search through your internet history, Auto History Wipe may not be for you. (Right-clicking on the Google Chrome icon allows you to access the internet history when Chrome is not running.)
On the other hand, if you’re not worried about someone spying on you and you just want a solution to start with a clean browsing history every time you’re using the internet, then Auto History Wipe might get you what you’re looking for. (Unless you’re using the sync feature in Chrome, which may break the functionality of Auto History Wipe).
With that out of the way, let’s take a look at how this works.
Installing Auto History Wipe
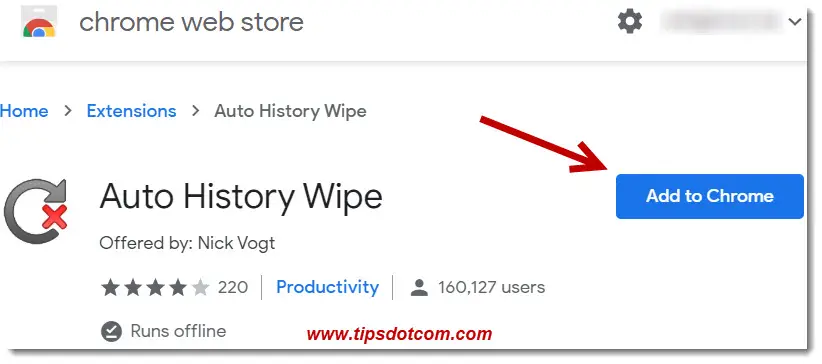
To get started, go to the Auto History Wipe extension page. On that page, you will see something like this:

Click the “Add to Chrome” button to continue.
Chrome will now display a confirmation dialog box:

Click “Add extension” to proceed.
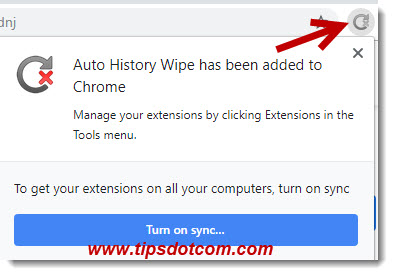
Next you will get a notification that Auto History Wipe has been added to Chrome.

You’ll also see a message saying that “To get your extensions on all your computers, turn on sync”. As I’ve mentioned above, using the sync feature might break the Auto History Wipe functionality, so I suggest you don’t do this now. Using sync can be useful if you want to get a more uniform Chrome experience across multiple computers, but I’ll talk about this in another article.
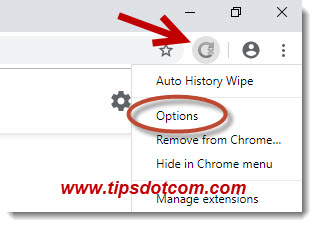
For now, let’s see what options you can set when you click the Auto History Wipe icon in your Chrome window and select “Options”:

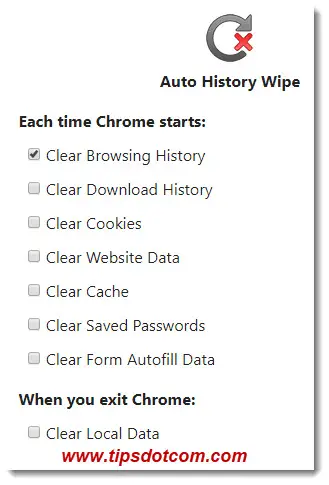
As I mentioned in the introduction, you can see here that there are several other options that you can check in Auto History Wipe, such as download history, cookies, website data, cache and more. It’s also clear that your internet browsing data is indeed deleted each time Chrome starts (which was also mentioned in the introduction).

Conclusion
This free Chrome extension may not be perfect (may not work in combination with the sync feature of Chrome plus data is not wiped until you start Google Chrome), but it’s still a quite popular extension and many people like it. Whether or not it’s a good fit for you depends on what you expect from the extension. Understanding it’s possible shortcomings in advance can save you the disappointment when you decide to give it a try.
If you found this article useful, please click the like button below or feel free to leave a comment to let others know what you think about the Auto History Wipe extension.
If you've enjoyed this article or found it useful, I'd appreciate it if you'd let me know by clicking the Like (or Share) button below. Thank you!


New! Comments
Have your say about what you just read! Leave me a comment in the box below.