Windows 11 Device Manager - Fixing Devices That Don’t Work
Windows 11 device manager is the place to look when you have a device that doesn’t work properly. Windows uses device drivers to communicate with hardware that’s inside your computer or connected to your computer. Whether it’s an internal or external hard drive, a printer or a graphics card, Windows needs a proper device driver for your devices to function correctly.
Normally Windows 11 will automatically recognize a new device and locate the appropriate driver for it, or it will automatically get the driver from the internet. That’s what the term “Plug and play” refers to. Unfortunately, sometimes things get a little more complicated than that.
Whenever you are dealing with a device that doesn’t work as it should, it’s always worth checking out the device drivers. Device drivers can be located in device manager.
How to Open Device Manager in Windows 11 (or Windows 10)?
To open device manager in Windows 11 or Windows 10, simply right click on the Windows start button and select “Device Manager” from the menu that appears. This will open a new device manager window, where you can update drivers and perform other device-related tasks.

The device manager Window will look similar to this, listing all devices inside or connected to your computer.
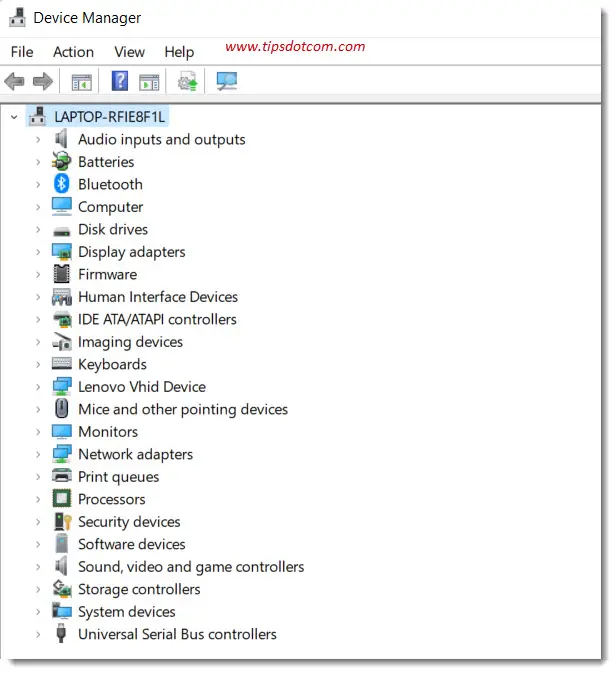
Most of the time Windows 11 does a pretty good job of recognizing devices and coughing up the right driver, but every now and then things don’t work out as expected.
If you are having trouble with malfunctioning devices you should always check in device manager. Problematic devices will be marked with a yellow triangle and an exclamation point.
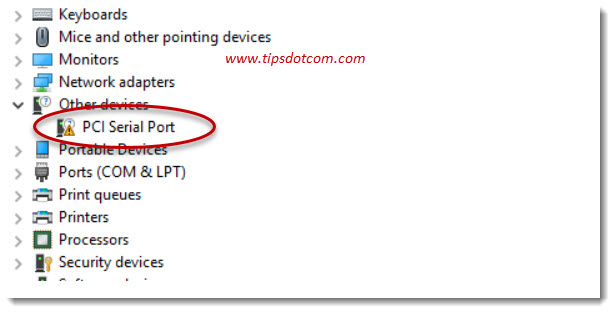
Any device that is listed like that in your Windows 11 device manager is likely to have a problem with its driver, which means that Windows hasn’t been able to automatically find the right driver.
You can always spur Windows to search again for the correct driver by right clicking the problematic device and selecting “Update driver” from the menu. Then select the option to search automatically for drivers. Usually, however, if Windows wasn’t able to locate the correct driver the first time around, it will also not manage when you tell it to look again.
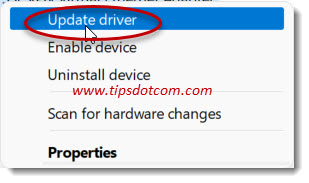
If that’s the case, you’ll need to step in and try to locate the driver manually. It can be very frustrating and time consuming to track down the right driver for a specific device and your chances of success depend heavily on the manufacturer’s efforts in providing the appropriate drivers for their devices.
You’ll need to visit the manufacturer’s website and look for a section called “Support”, “Downloads”, “Drivers” or anything that looks like it may lead you towards a location where you can download a driver for your device.
Sometimes manufacturers have a search box on their support pages where you can search for your model number or you can select your device from a list.
Once you have found and downloaded a suitable device driver for your device you can install it.
The best drivers will install automatically through an installation wizard if you double click on the downloaded device driver, but sometimes you may need to manually install it via device manager.
To do so, open up Windows 11 device manager, right click the problematic device and select “Update driver”.
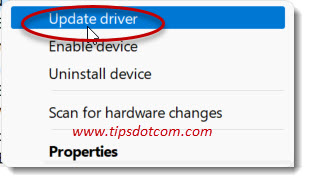
Windows will now display a window where you have the option to search automatically for drivers and an option to browse your computer for drivers (Locate and install a driver manually).
Click the second option to install the device driver manually.
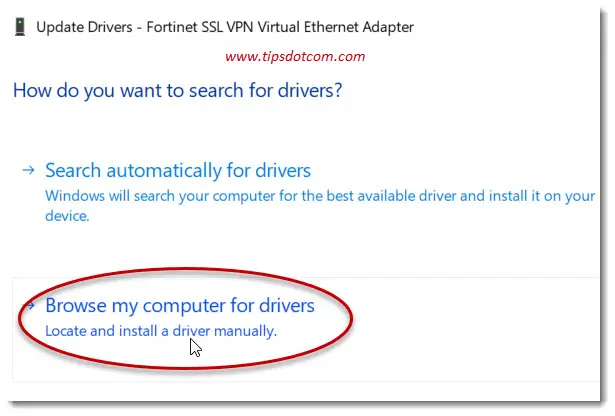
Now browse to the location where you downloaded the driver for your device and select it. If all goes well, Windows will now be able to correctly manage your device and the yellow triangle should disappear from your Windows 11 device manager.
As mentioned above however, finding the right driver for your device can sometimes be a nightmare and it all depends on whether or not the manufacturer provides decent support via their website or customer service.
Help - I can’t Find Windows 11 Device Manager!
Sometimes device manager is missing from the quick link menu when you right click on the Windows start button. Luckily there are a few other ways to open device manager as well. I will go over a few of them here.
Windows Tools Menu
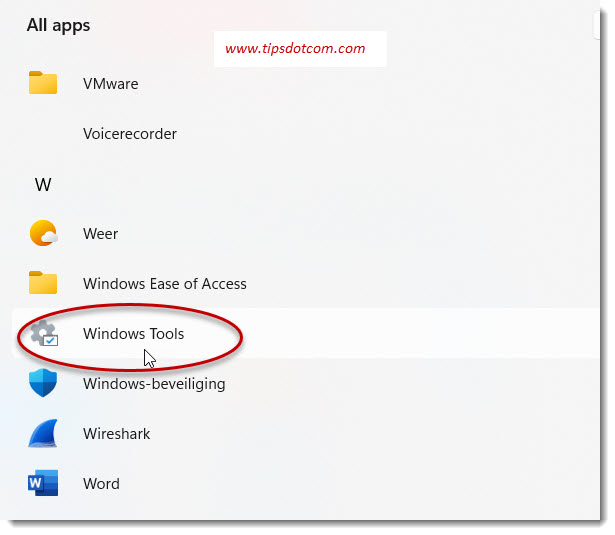
You can also open Windows 11 device manager via the Windows tools menu. To do so, click the Windows start button and select “All apps”. Then scroll down to Windows tools and click it.
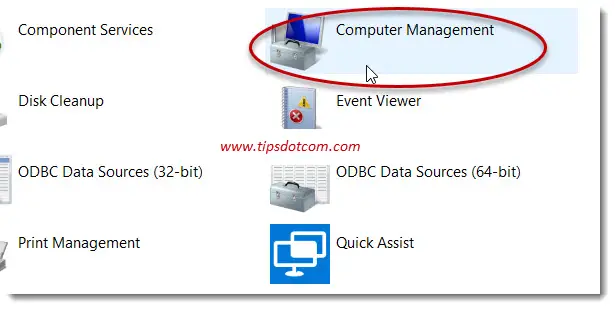
Then, in the Windows tools window, double click “Computer management”.
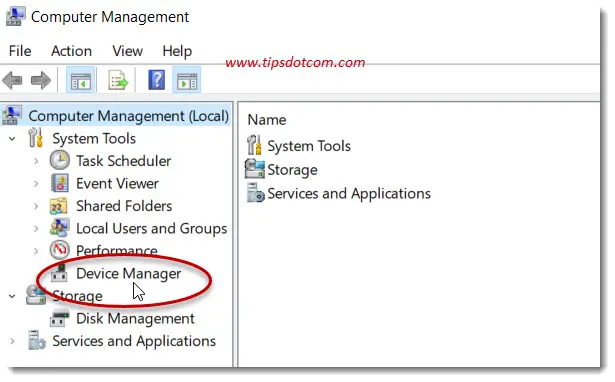
Now, in the computer management window, under “Computer Management (Local)”, you’ll see another way to access Windows 11 device manager.
Using the Search Utility
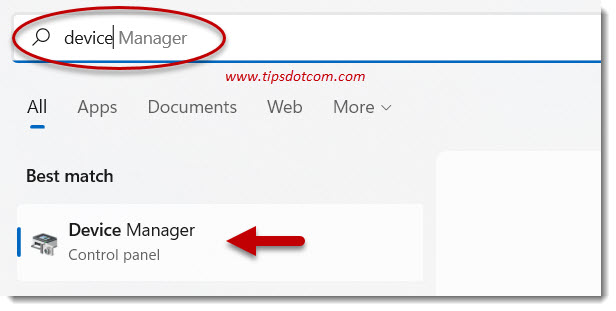
Whenever you can’t find anything in Windows 11, you can always try the search utility. It will also help you to locate device manager. Simply click the Windows 11 start button and type device manager in the search box. Windows will come up with device managers under “Best match” from where you can also access Windows 11 device manager.
Using the run box
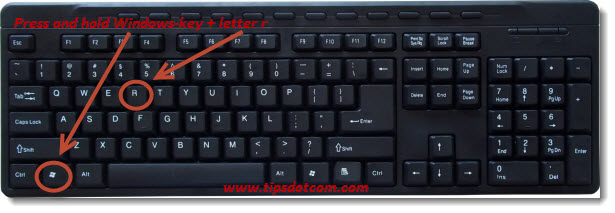
You can also press the Windows logo key + r on your keyboard to bring up the run box.
In the run box, type “devmgmt.msc” (without the quotes) and click ok or press ENTER.
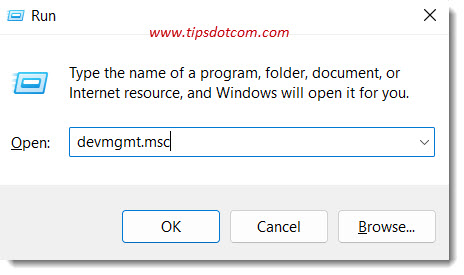
This will also open up Windows 11 device manager.
Via File Explorer
In File Explorer, right click “This PC” and select “Show more options” from the menu.
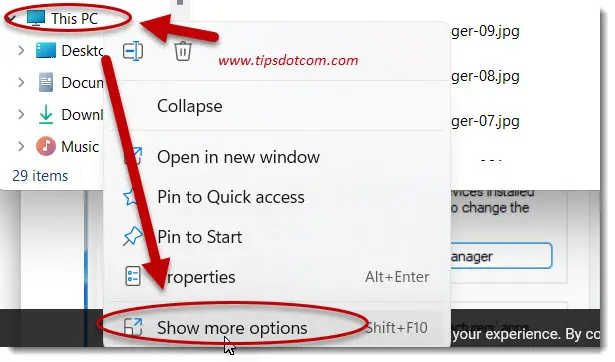
Now select “Properties” from the list.
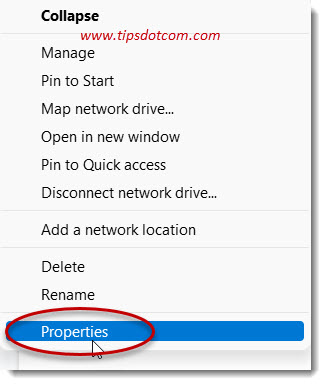
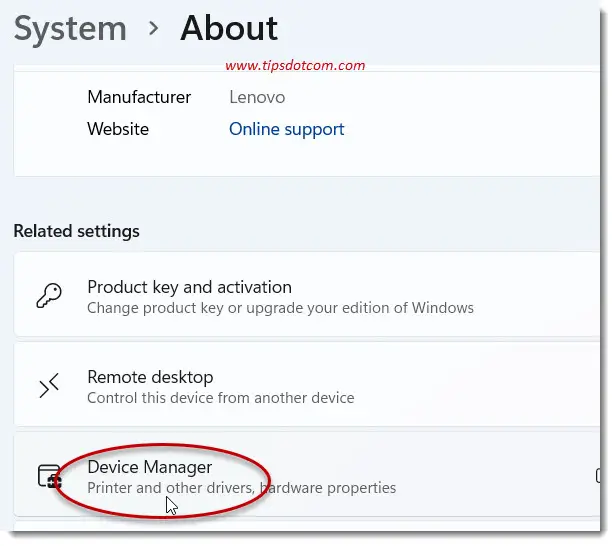
Then, in the screen that appears, scroll down to related settings and click Device Manager to open up Windows 11 device manager.
With these options you have a few different methods at your disposal to open up Windows 11 device manager. Even if device manager is missing from the quick links menu, you will always be able to use one of these methods to get to your devices in Windows.
If you are curious about other tips and techniques using the Windows 11 start menu, you can always find out more in my Windows 11 start menu articles.
If you've enjoyed this article or found it useful, I'd appreciate it if you'd let me know by clicking the Like (or Share) button below. Thank you!


New! Comments
Have your say about what you just read! Leave me a comment in the box below.