How to Remove Chat From The Windows 11 Taskbar?
The chat icon can easily be removed from the Windows 11 taskbar by right-clicking an empty spot on the taskbar and selecting “Taskbar settings”. In the taskbar personalization settings, simply set the “chat” slider to the disabled position, close the settings window and you’re done.
There are a few other interesting methods to remove the chat icon from the Windows 11 taskbar (like through group policies or a method that allows you to remove the chat icon for ALL the user accounts on the computer), which I will come to in a moment. No TipsDotCom guide is complete though without the screenshots that go with it, so allow me to illustrate the basic steps to remove chat from the Windows 11 taskbar more in detail first.
As mentioned above, first right click on an empty spot on the Windows 11 taskbar and select “Taskbar settings”.

Windows 11 will now open up the taskbar settings window, where you can customize a number of settings for your taskbar according to your preferences.
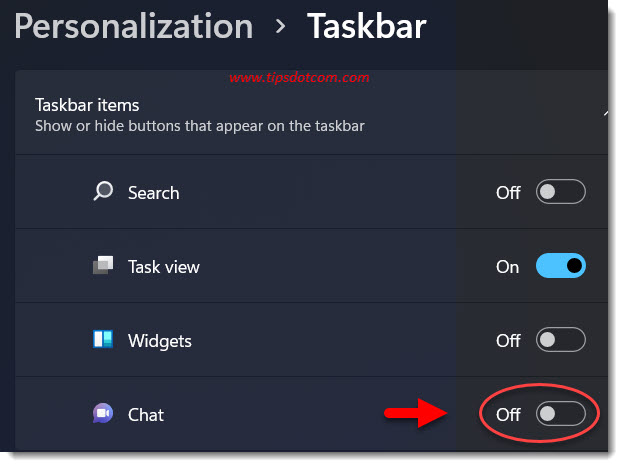
As you can see in the image above, you can disable chat on the Windows 11 taskbar if you want to get rid of the chat icon on your taskbar.
While you’re at it, you can also disable the “Widgets” icon on your Windows 11 taskbar, as well as the “Task view” and “Search” icon. Feel free to experiment with the settings as Windows 11 will instantaneously show the changes on your taskbar as you go ahead and change them.
Don’t worry, you can’t break anything by changing these settings and you can just as easily activate the chat icon on your taskbar again if later on you decide to use it anyway.
Indeed, if you remove the chat icon from your Windows 11 taskbar, the chat functionality (which is part of Microsoft Teams that comes with Windows 11) will still be available on your computer, it’s just the icon that will be removed from your taskbar. This will free up space for other icons that you use more frequently.
As promised above, you can also disable the chat icon on the Windows 11 taskbar via group policy settings. Let’s take a closer look.
How to Remove Chat From The Windows 11 Taskbar With Group Policy Editor?
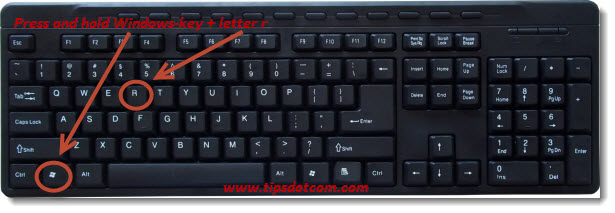
To remove chat from your Windows 11 taskbar through group policies, press the Windows logo key + r on your keyboard to bring up the run box.
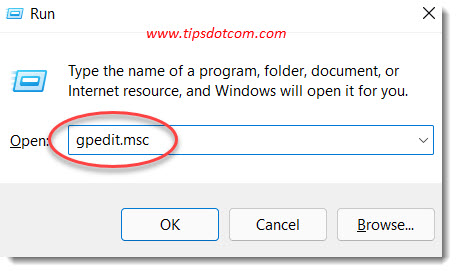
In the run box, type “gpedit.msc” (without the quotes) and click ok or press ENTER.
The Windows 11 local group policy editor will now open.
Navigate to “Computer Configuration” -> “Administrative Templates” -> “Windows Components” -> “Chat”.
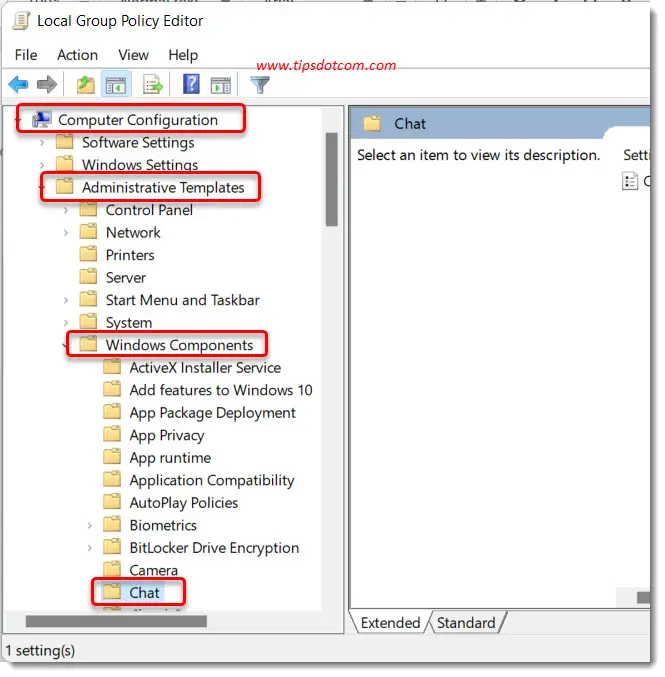
Now, in the right hand side of the screen, double-click on the item that says “Configures the chat icon on the taskbar”.

By default, in Windows 11, this setting will be “Not Configured” in the local group policy. Change the selection to “Disabled” if you want to go ahead and remove the chat icon from your Windows 11 taskbar through a local group policy.
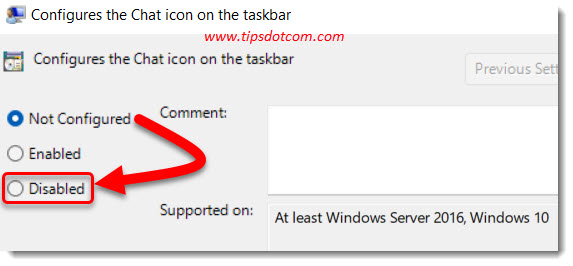
Next click ok to close the local group policy editor.
Please note that the chat icon will not immediately disappear from your taskbar if you remove it with this method. You will need to restart your computer for the changes to take effect.
How to Get Rid of The Chat Icon on The Taskbar in Windows 11 For All User Accounts?
If you want to remove the chat icon from your Windows 11 taskbar for all the user accounts on the computer, you can get this done by changing a setting in the Windows registry.
To do so, press the Windows logo key + r on your keyboard to bring up the run box again.

Now type “regedit” (without the quotes) to open the Windows registry editor and click ok or press ENTER.
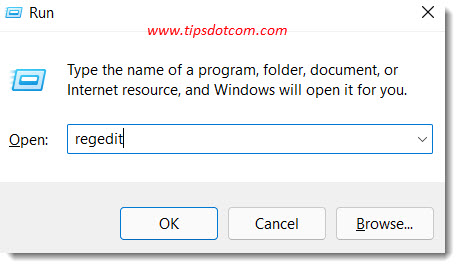
When the user account control screen comes up asking whether you want to allow this app to make changes to your device, click yes.
In the registry editor, navigate to:
HKEY_LOCAL_MACHINE\SOFTWARE\Policies\Microsoft\Windows\
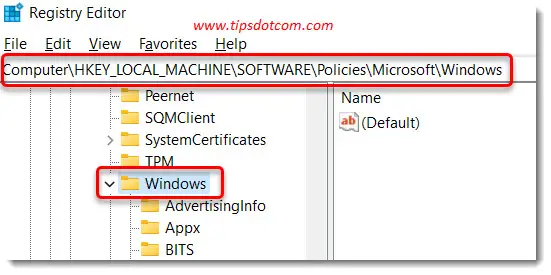
Now you need to create a new key to hold the setting to disable the chat icon on your taskbar. To do so, right click in the right hand side pane of the registry window and select “New key”.
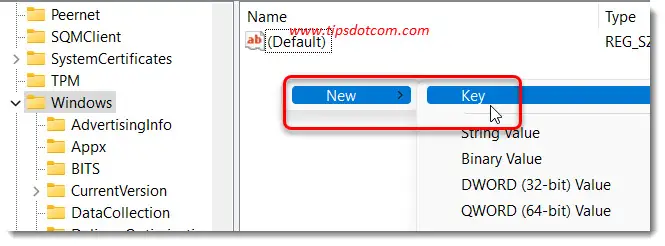
A new key entry will appear under the “Windows” key. Type “Windows Chat” (without the quotes and exactly like that - case sensitive) for the name of the new key and press ENTER to confirm.

Now, with the new “Windows Chat” key selected on the left, right-click once again in the right hand pane of the registry editor screen and select “New” and then “DWORD (32 bit) value” this time.
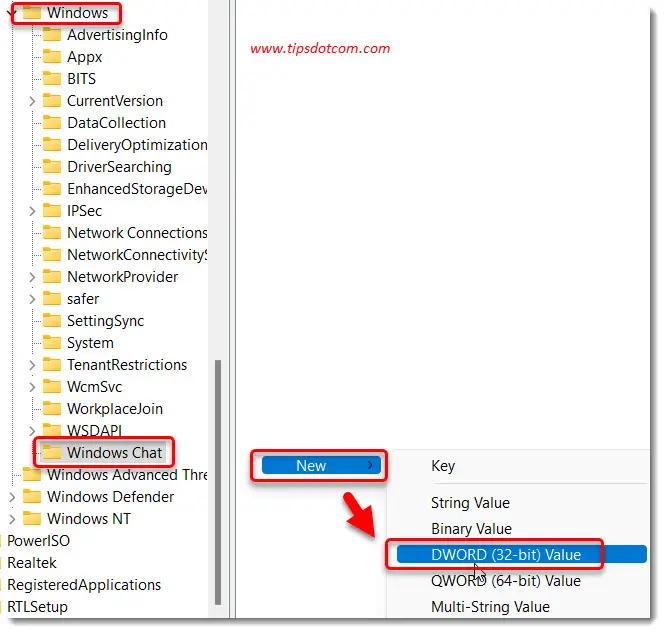
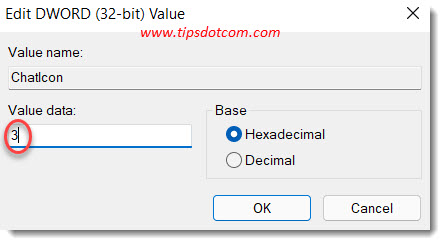
Name the new DWORD “ChatIcon” (without the quotes) and double-click the item to give it a value.
Now set the value of your new Chaticon DWORD to 3 and click ok to confirm.
That’s it, you’re ready. That’s all you need to do in terms of registry editing to remove the chat icon from your Windows 11 taskbar. You can now close the registry editor and reboot your computer for the changes to take effect.
This is how to remove chat from the Windows 11 taskbar for all user accounts on the computer.
Each new user account that will be created on the computer from now on will not have the chat icon on the taskbar. If you ever want to undo this behaviour, you can simply navigate to the same key in the registry and remove the Chaticon DWORD.
I hope you found this article helpful and if you did, please consider leaving a short comment or like below.
If you've enjoyed this article or found it useful, I'd appreciate it if you'd let me know by clicking the Like (or Share) button below. Thank you!


New! Comments
Have your say about what you just read! Leave me a comment in the box below.