This PC Doesn’t Currently Meet All The System Requirements For Windows 11
Are you being told that this PC doesn’t currently meet all the system requirements for Windows 11? Come on Microsoft, what’s up with that, right? What system requirements are you even talking about? Clearly the chaps at Microsoft have cooked something up that’s causing a lot of frustration in the personal (and business) computer industry. But what does this mean for you? And can you still run Windows 11 on your computer, or is this verdict final?
You can find out all about that in this helpful Windows 11 upgrade guide. Maybe you want to find out whether or not you can get Windows 11 to run on your computer. Or maybe you don’t care all that much about Windows 11 and you just want to know if you can stick with Windows 10. If either one of the above is you then this guide is for you. So let’s get started.
This PC Doesn’t Currently Meet All The System Requirements For Windows 11 - The Notification
If you’ve been using Windows for more than a couple of days, you’re probably familiar with Windows update, which automatically keeps your operating system up to par with modern security standards. Windows update has its own space in the Windows settings screen and it is right there that you might encounter the message that this PC doesn’t currently meet all the system requirements for Windows 11.
It looks like this:
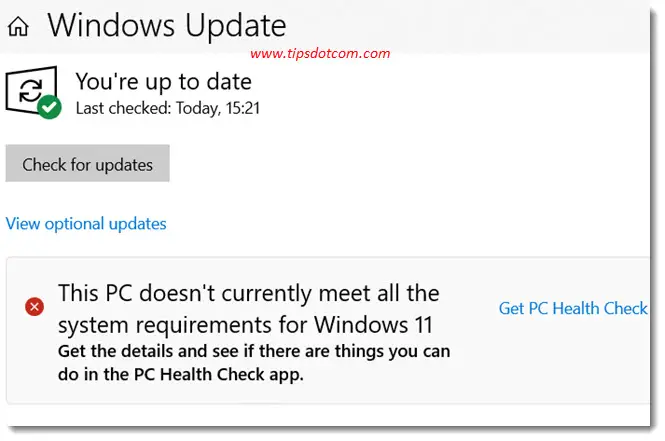
It will also suggest to get the details and see if there are things that you can do in the PC Health Check app.

First of all, if you’re not interested in Windows 11 and you want to continue working with Windows 10 then there’s nothing you should do. You can safely ignore the message and still be confident that the updates for your current Windows 10 will still continue to be applied according to Microsoft’s schedule. At least until October 2025 that is.
If, on the other hand, you’re more of an adventurous person and you’d like to upgrade your Windows 10 to Windows 11 for free while you can, you need to find out why exactly it is that this PC doesn’t currently meet all the system requirements for Windows 11.
You might have guessed it: the best way to start finding that out is via the PC Health Check app, so go ahead and click that little guy up there.
Windows might ask you how you would like to open this link.
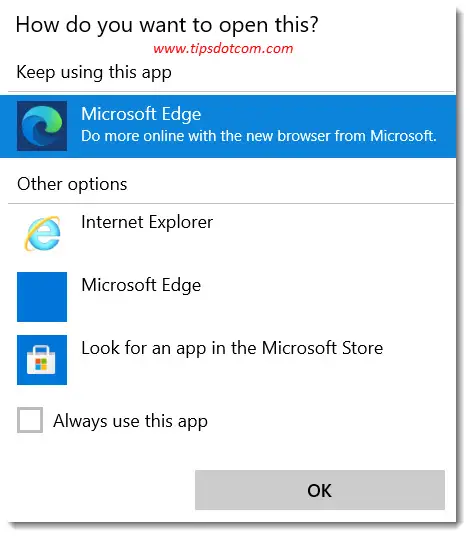
You can select Microsoft Edge or another browser if you prefer or depending on your settings the link may already have opened automatically. You will then see something like this.
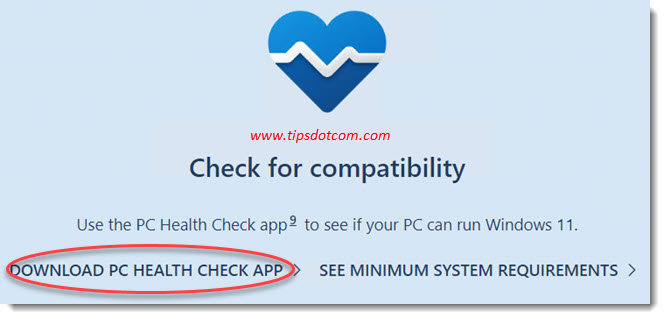
Click “Download PC Health Check app”. Open the file once it has been downloaded.
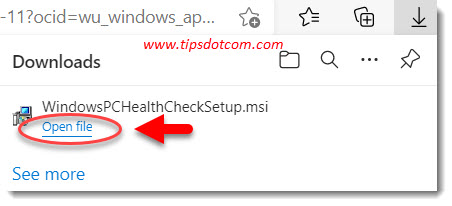
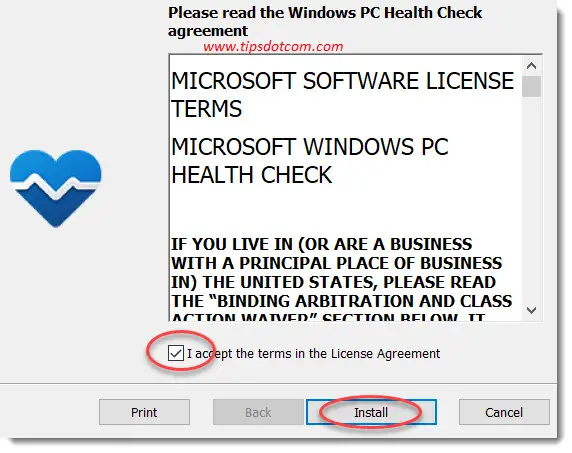
Accept the terms in the license agreement and click install.
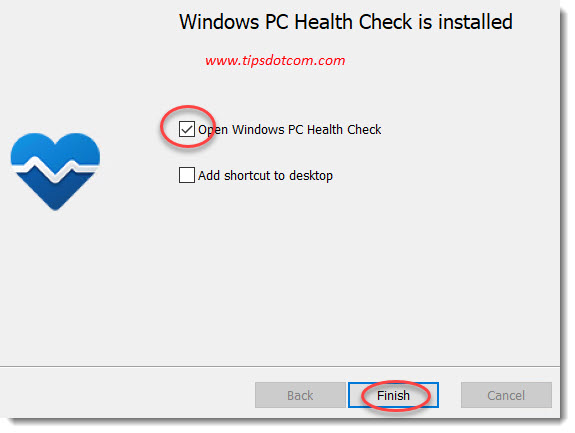
Make sure to leave the box checked to open Windows PC Health Check and click finish.
In the introductory screen click check now.

An instant later you’ll see why Windows is complaining about your PC not being able to run Windows 11.
Two of the most common reasons that a computer won’t meet all the system requirements for Windows 11 are captured in the image below.
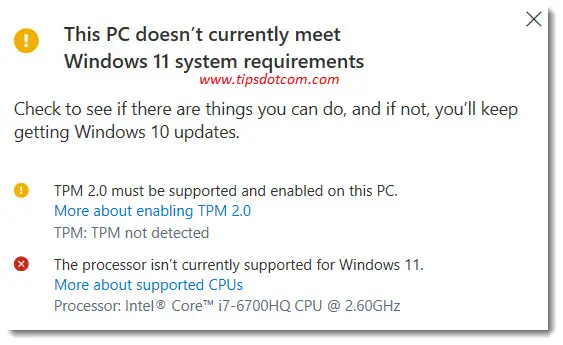
The first reason is that TPM 2.0 must be supported and enabled on this PC and the second is that the processor isn’t currently supported for Windows 11. Both of these have to do with security.
Let’s first take a look at the TPM 2.0 requirement. If you get this message, that probably means that TPM just isn’t enabled in your computer’s BIOS and that you can comply by enabling this option in the BIOS. TPM stands for Trusted Platform Module and is an important component for enriched security. Most computers offer the option to enable TPM (unless your computer is really, really old - 15 years or so).
How you can get in your BIOS settings will depend on the manufacturer of your computer (motherboard) but usually involves hitting the F2 or DEL key on your keyboard when your computer is starting up (before it starts to load Windows).
Once in the BIOS, look for a TPM setting (usually on the security tab) and enable the setting. Then save your BIOS configuration settings and restart your computer. That should already fix the TPM 2.0 system requirement in the PC Health Check app.
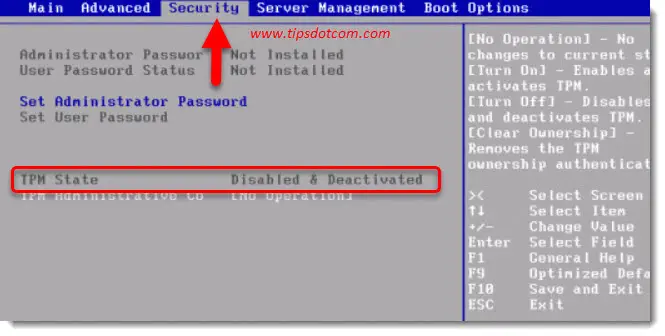
Enabling the TPM setting in your BIOS should take care of the TPM 2.0 requirement in Microsoft’s PC Health Check app. This brings us to the next one of the requirements mentioned above.
The processor isn’t currently supported for Windows 11
If you happen to be running an Intel Core i7 you might be surprised to see that even these types of CPU’s with quite a lot of processing power are not supported. The main reason these are not supported has to do with the generation number of your processor rather than the Core i7, Core i5, Core i3 or even Celeron family type. Microsoft has published a list of supported processors for Windows 11 here.
Anyways, if you’re really persistent and you still want to run Windows 11 on your computer even if your processor isn’t on the list of supported CPU’s, there is a common registry hack that you can use to bypass the requirement. Please be aware that doing that is at your own risk and that it might have an impact on your overall system stability. That might especially be the case if you’re running a build with some exotic hardware parts that require special drivers. As a full disclaimer though I can testify that I have used the hack myself on a Lenovo laptop with an unsupported Core i7 processor and it’s been running absolutely fine for several months already.
Some sources even say that this is a Microsoft approved hack but I haven’t been able to verify this as of yet.
So let’s take a look at the registry hack to run Windows 11 on an unsupported processor.
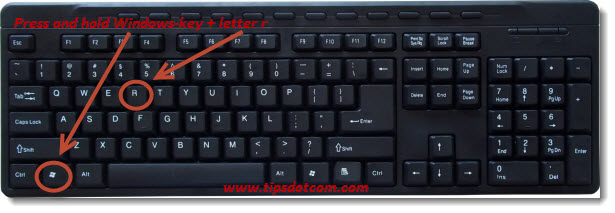
You will need to start the Windows registry editor first so press the Windows logo key + r keyboard combination to bring up the run box.
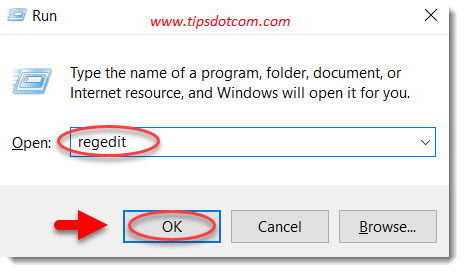
This will open the run box, where you type regedit and click ok.
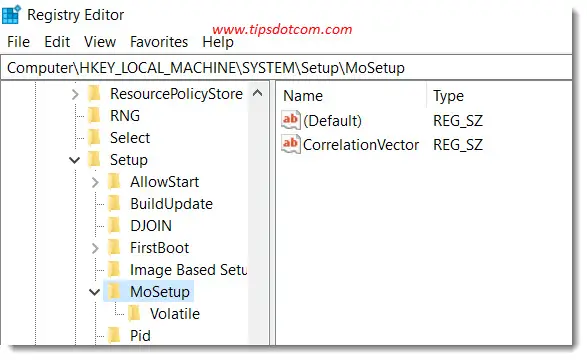
In the Windows registry editor, navigate to
Computer\HKEY_LOCAL_MACHINE\SYSTEM\Setup\MoSetup
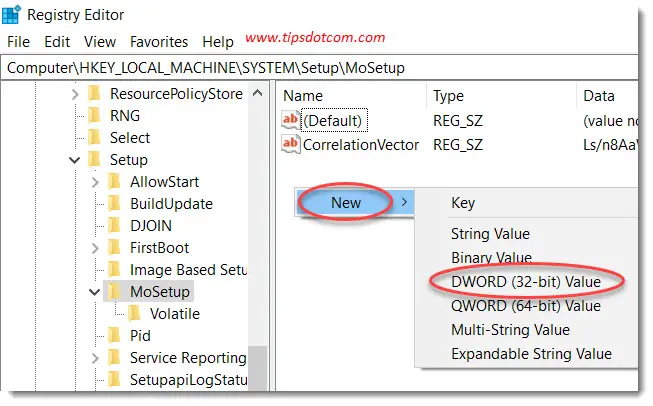
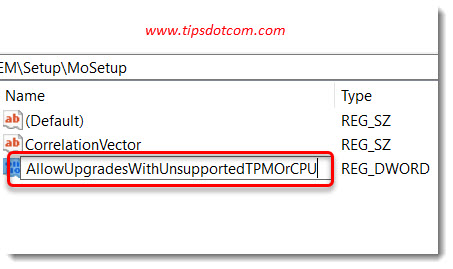
Next, in the right-hand side of the screen, right click and select New DWORD (32-bit) value.
Enter the name “AllowUpgradesWithUnsupportedTPMOrCPU” (without the quotes) for the new DWORD and press ENTER. Make sure to enter the name exactly as written here (case-sensitive), copy-paste it to avoid mistakes. It will not work if the name of the registry DWORD is not exactly right.
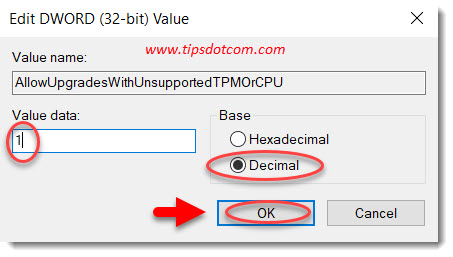
Now double-click the newly created DWORD and enter decimal 1 as its value. Then click ok.
That’s it, you should now be able to upgrade Windows 10 to Windows 11 even if your computer isn’t officially supported.
It should be noted though that the upgrade assistant might show a warning message that the upgrade isn’t supported, but at least you can click to consent and still move forward with the update.
The actual procedure of the upgrade itself is a whole different story and is too long to be included in this article as well, but I might create a separate article about that soon. I hope this article has been helpful in understanding the message that this PC doesn’t currently meet all the system requirements for Windows 11 and has helped you on the path towards running Windows 11 on your “older” computer.
If you've enjoyed this article or found it useful, I'd appreciate it if you'd let me know by clicking the Like (or Share) button below. Thank you!


New! Comments
Have your say about what you just read! Leave me a comment in the box below.