Problem Steps Recorder
Windows Problem Steps Recorder (PSR) is a small utility for big problems. Well, actually not necessarily big problems, but it can be used to document or illustrate any kind of computer problem in Windows 7 or Windows 8.
What can it do for you?
This utility “records” your actions and mouse clicks in a (zip) file that you can send to someone more knowledgeable so he or she can see what exactly your problem is and where you are stuck.
If you’ve ever dealt with a problem or annoying issue on your computer and tried to explain it over the phone to a person who was trying to help you, you probably realize how frustrating it can be to try and explain something that the other person cannot see in front of his own eyes.
Windows 7 Problem Steps Recorder was introduced to help you explain what the problem is (Windows 8 Problem Steps Recorder is pretty much the same in functionality and features).
Of course you can also use Problem Steps Recorder if you are working on software documentation or tutorials and training materials.
Using Windows 8 Problem Steps Recorder
Please note: using Windows 7 Problem Steps Recorder is pretty much identical to using PSR in Windows 8, so you can follow these steps for both operating systems.
This little utility seems to be somewhat “hidden” in Windows, which means that you won’t find any prominent icons or shortcuts to it in the Windows start screen or desktop.
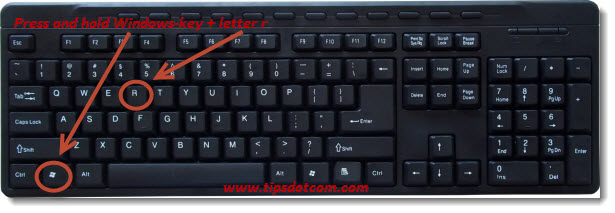
In order to launch psr, press the Windows key + r on your keyboard to open up the run box.
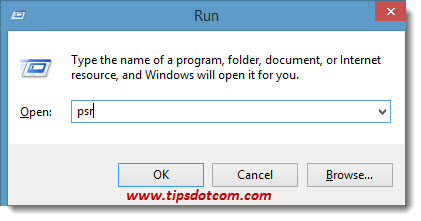
In the run box, type “psr” (without the quotes) and click ok.
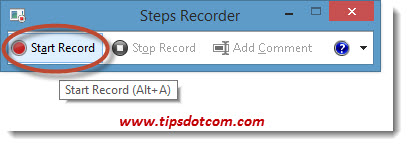
This will launch the Problem Steps Recorder utility, which will show up as a little steps recorder control panel on your screen. The interface is pretty simple. There’s a small bar with buttons to start and stop recording and a button to include comments in your recordings.

Click the “Start record” button (or press ALT+a on your keyboard) to start the recording. As long as PSR is recording, it makes a screenshot of your display on every click of your mouse or keyboard action. PSR does not record your actions in a video, but rather makes a file with the chronological screenshots, actions and comments if you include them.
Each time you click your mouse, PSR will show a little red circle where you click, so you know that your actions are being recorded.

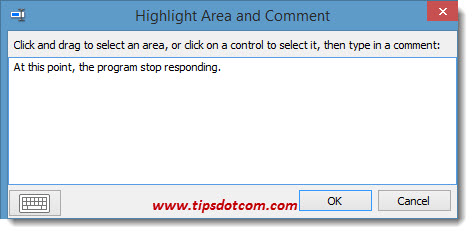
Anytime you want to include a comment to describe your actions, click the “Add comment” button to bring up the “Highlight area and comment” window.

PSR now offers you the opportunity to type your comments to illustrate your current action and optionally you can also click and drag to select an area, or click on a control to select it on your screen. Then click on the ok button to continue your recording.
Since the recording contains screenshots of anything that happens during your actions, it’s important to realize that any sensitive information will also be contained in the recording, even if it only appears briefly on your screen. This is not the time to check your bank account statements or very private photographs :-)
If you have completed all the steps, click on the “Stop record” button (or press the ALT+o shortcut on your keyboard) to finalize the recording.

PSR now shows the steps recorder window where you can review your recorded steps.
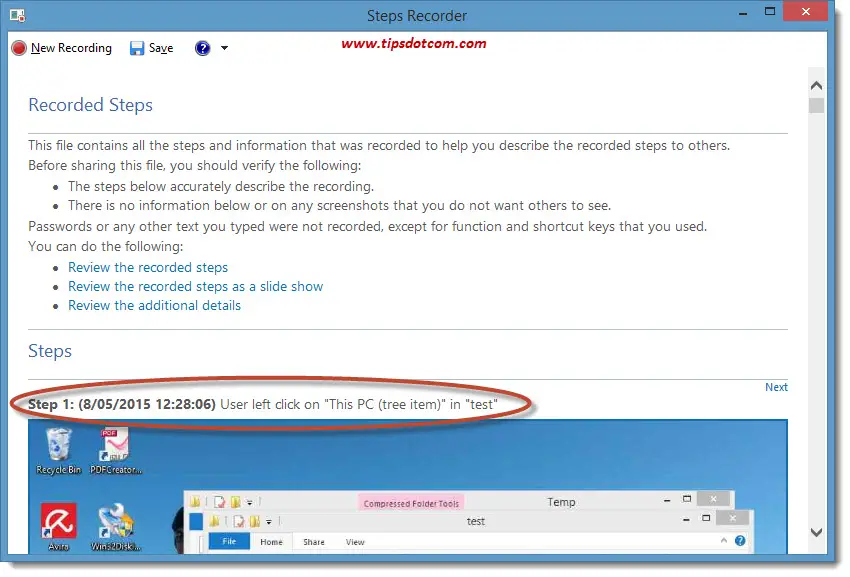
Click the save button to save your recorded steps in a zip file.
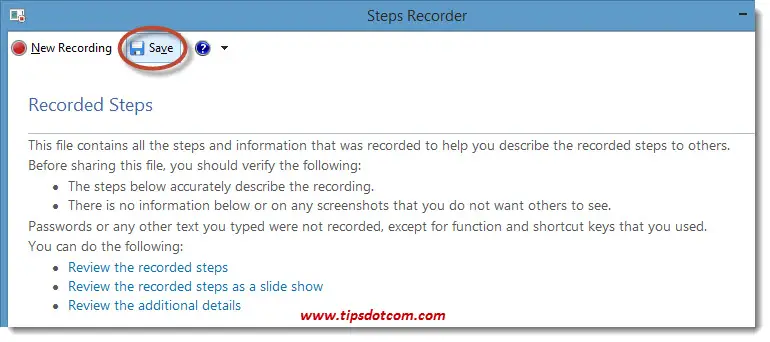
You can send this file to the person who’s trying to help you or help desk, etcetera.
Reviewing Your Recordings
Surely it can be interesting to have a look at what your recordings actually look like before sending them off to anyone. If you are using PSR to create software instructions or documentation, you probably also want to edit the material with extra texts, images and descriptions.
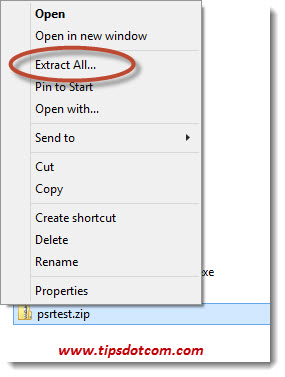
To take a look at your recordings, navigate to the file that you saved in PSR. The recordings are saved in a zip file, so right-click the file and select “Extract all”.
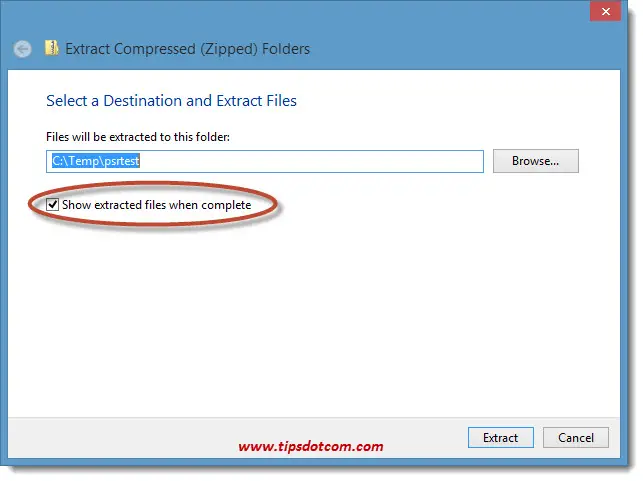
In the “Extract compressed folders” window, make sure to leave the “Show extracted files when complete” option checked and click extract.
Once extraction is complete (this shouldn’t take long), a new window will open up which contains the mhtml file with the recorded steps of your actions.
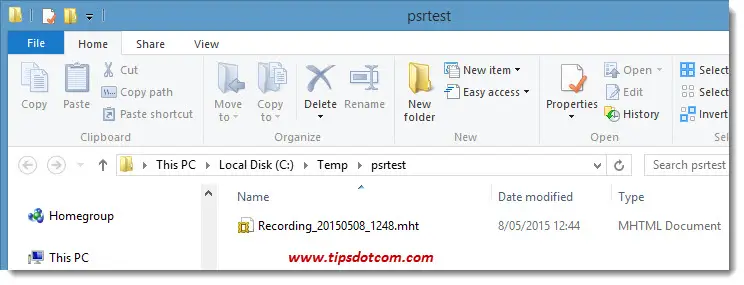
You can double-click this file to open it with your default internet browser or you can use Microsoft Word to look at the contents of the file. At the top of the report you will find the option to review the steps as a slideshow. You can stop the slideshow at any time and you can navigate back and forth in the steps of the slideshow.
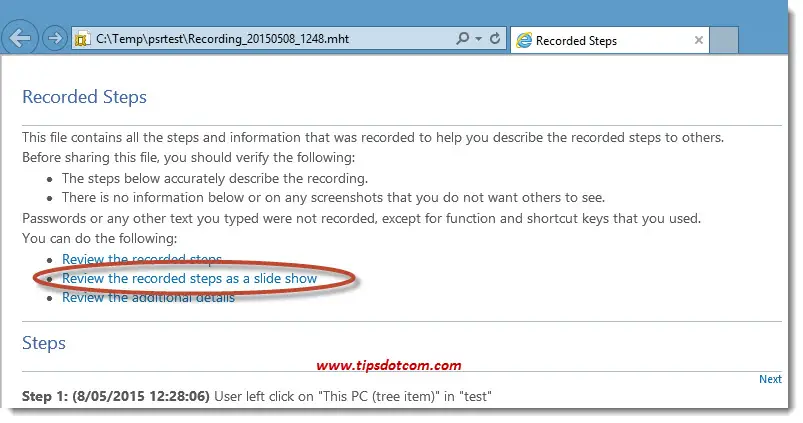
At the bottom of the report you will see a number of additional technical details, which are meant for techs or programmers in order to get a better understanding about the cause of the problem.

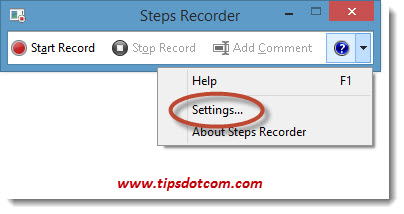
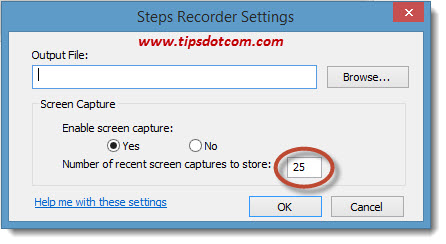
Please note that Windows Problem Steps Recorder will only record a total of 25 screenshots by default. If you need to make longer recordings, click the settings button (or press the ALT+g shortcut on your keyboard) to open the settings window.

Click the settings menu item to go to the settings screen.
Here you can change the number of screen captures to store if you need more than 25 screenshots in your recording.
Conclusion: Windows 8 Problem Steps Recorder (of Windows 7
Problem Steps Recorder, for that matter) is one of those useful new
utilities that didn’t exist in previous versions of Windows. Indeed,
there’s no Problem Steps Recorder in Windows XP or Vista.
Although
it’s not (yet) very widely known among computer users, it can come in
quite handy to illustrate a series of steps or actions on the computer.
Personally, I still also use the Windows snippet tool (or even better,
the “Snagit” screen capture software from Techsmith) from time to time
in cases where I only need a quick, one-time image of a screen, but it
can indeed be of great help to produce technical documentation.
Please take a short moment and leave a comment in the section below, I’d appreciate it, thanks!
Related article: Techsmith Snagit Capture Hotkey.
If you've enjoyed this article or found it useful, I'd appreciate it if you'd let me know by clicking the Like (or Share) button below. Thank you!


New! Comments
Have your say about what you just read! Leave me a comment in the box below.