Allow Remote Connections to This Computer
You’ll need to visit the setting “Allow remote connections to this computer” if you want to be able to use your computer remotely through Microsoft remote desktop connection. Microsoft remote desktop connection is a great way to work on your (office) computer from a distance, but it does require a bit of configuration to get it to work correctly.
In my other article about remote desktop (RDP) I’ve already explained how to obtain your computer’s ip address for remote desktop connection and now I will walk you through the steps to set up your computer for remote access.
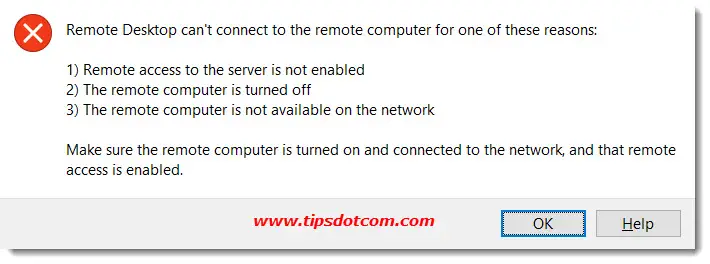
By default, the setting to “Allow remote connections to this computer” is turned off, so if you’d try to connect to your computer remotely before enabling remote access, you will get an error message saying that “Remote desktop can’t connect to the remote computer for one of these reasons:”
Enable “Allow Remote Connections to This Computer”
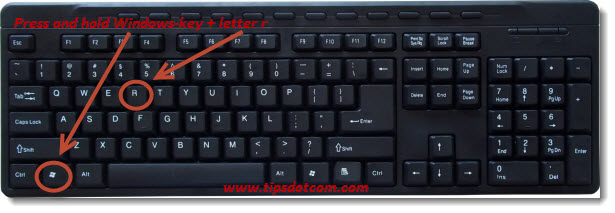
To enable remote desktop in Windows 10, you'll need to go to the screen where you can enable the setting to “Allow remote connections to this computer”. To get started, press the Windows logo key + r on your keyboard to open the run box.
The run box will then appear on your screen:
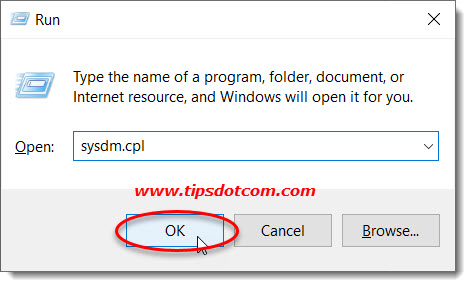
Type “sysdm.cpl” (without the quotes) and click ok to continue.
Windows will now open the system properties screen, where you need to select the “Remote” tab to get to the relevant settings.

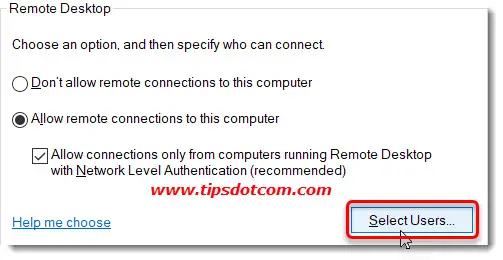
Here you will see the option to “Allow remote connections to this computer”. Make sure to select the option by clicking on the radio button. There’s an additional option to “Allow connections only from computers running remote desktop with network level authentication”. It’s best to also enable this option for enhanced security (in my article on remote desktop authentication errors I also discuss this option if you want to find out more).
If your Windows user account has administrative privileges on your computer then you automatically have the necessary privileges to connect remotely. If not, then you’ll have to click the “Select users” button to define the user accounts that have remote access.
Windows will then show the “Remote desktop users” screen, where you can manage who can remotely access the computer. If you need to add your user account, click the “Add” button to go to the user selection window.
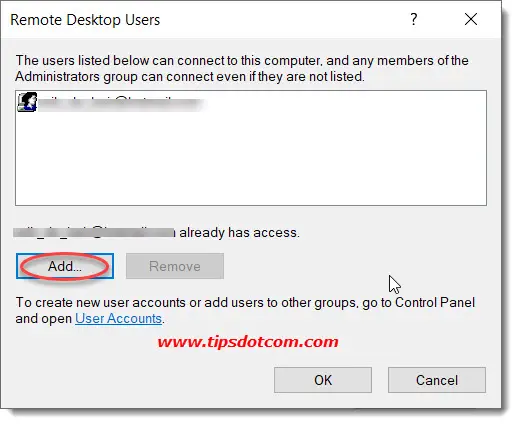
Type the name (or part of the name) of your user account and click the “Check names” button.
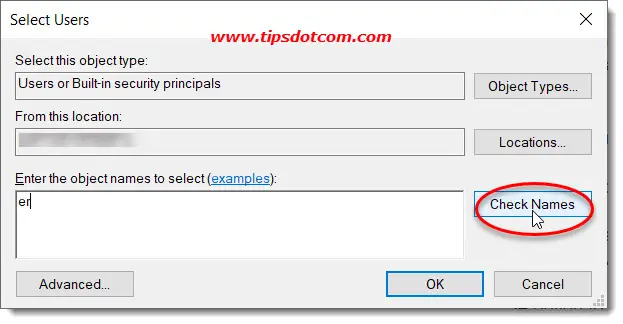
The user name will then appear underlined in the box and now you can click the ok button to confirm.
Click ok again to close the remote desktop users window and ok one more time to close the system properties window.
This is how you enable the “Allow remote connections to this computer” setting, which should set you up correctly to start using your computer remotely via Microsoft remote desktop connection. You might also want to check out other useful computer tips about how to change your RDP listening port if you want to use remote desktop connection over non-default network ports. This will help you if you want to be able to access multiple office computers remotely.
Did you know that you now can also shadow remote sessions? I have another article that explains how to shadow a remote desktop session in Windows 10. Feel free to check it out, it can be super helpful to be able to shadow a user's session to offer help.
If all of a sudden you can no longer connect to your remote computer because there's a message that says "Please wait" that won't go away, then you've hit the known issue where remote sessions sometimes get stuck in a loop. Luckily there a solution for the remote desktop "Please wait" blue screen.
If you've enjoyed this article or found it useful, I'd appreciate it if you'd let me know by clicking the Like (or Share) button below. Thank you!


New! Comments
Have your say about what you just read! Leave me a comment in the box below.