Create User Profile
Normally you don’t need to create user profile or user account icons on a daily basis. Unless you’re a systems administrator of course, but let’s assume you’re not. Even then, you might want to consider creating multiple user accounts in Windows. Why? In a typical household situation you’ll find one or more computers that are shared between family members. Ideally you’ll create a user account for each person in your household who will be sharing a computer.
A separate user profile for each member of your household will keep you out of trouble in many different ways. First of all, no more arguments about whose picture you will stick on the user account. Everyone gets to choose his or her own personalized image. Next, no more debate about the desktop background. That can be personalized as well. Internet favorites? Everyone gets their own, personalized list. Personal documents or mails? You guessed it!
You can get as methodical or chaotic as you like without the frustration about your family member’s inability to organize their stuff.
What’s more, if any of your existing user profiles gets corrupted, you can always use another one to straighten things out.
Update: Also check out my article on user management in Windows 10.
Create User Profile Icons
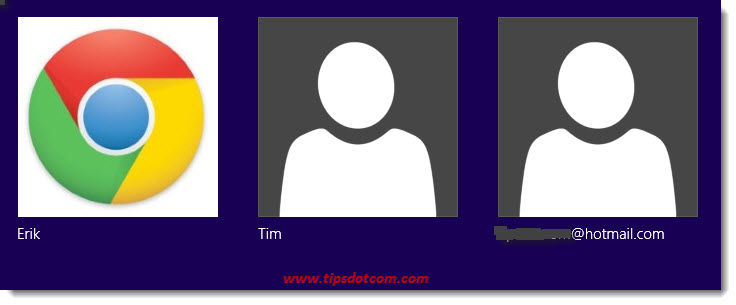
On a typical Windows computer with multiple user accounts, you’ll see the user account icons on the logon screen.
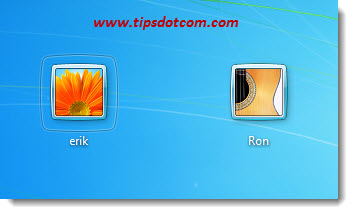
Or in Windows 10 it will look rather like this.
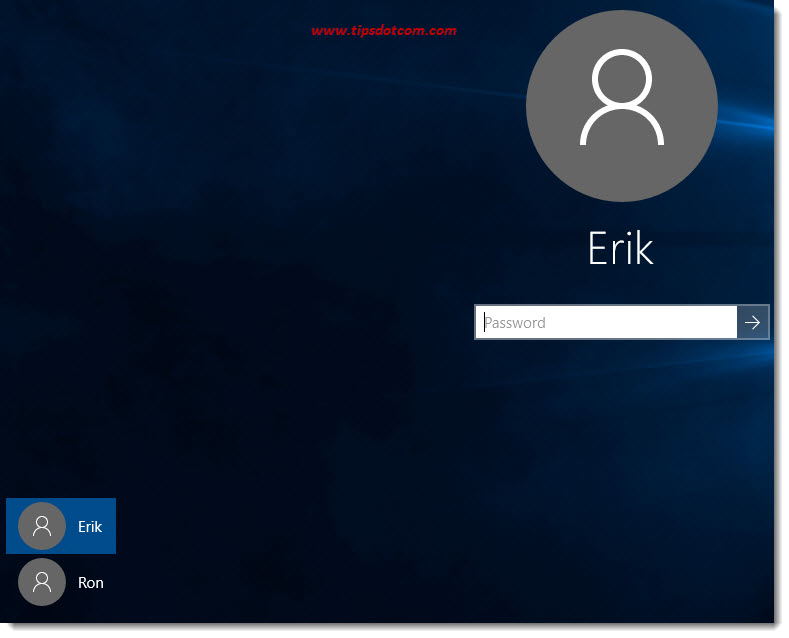
To create user profile icons like that requires a different approach in Windows 7, Windows 8 and Windows 10 so I’ll go over them separately.
Create user profile icons in Windows 7
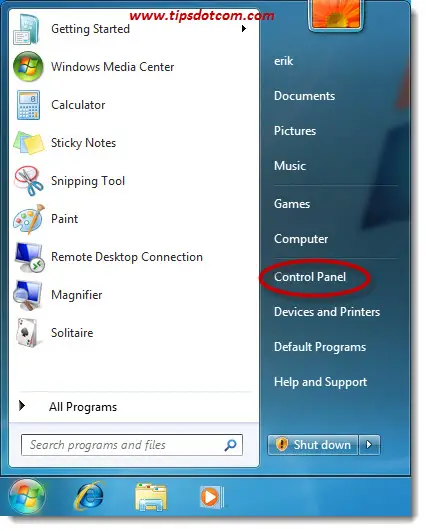
Click the Windows 7 start button and select control panel.
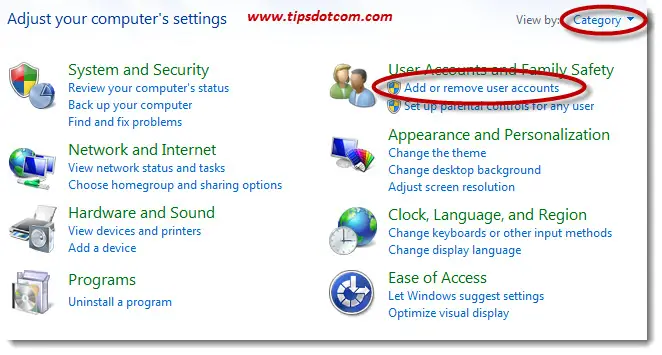
In control panel, make sure that “Category” is selected next to “view by” in the top right corner and select “Add or remove user accounts”.
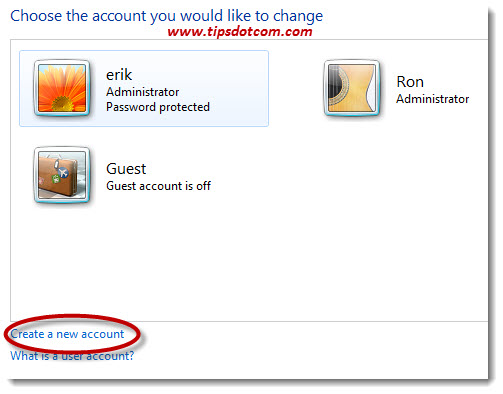
In the user accounts screen, click “Create a new account”.
Next, type the name of the new user account that you want to set up and select whether or not this new user will have administrative rights on the computer. A standard user account can use the computer but cannot install software or hardware (think printers, scanners etc) and cannot affect other user accounts. For instance if someone has forgotten his or her password, it requires an administrator account to be able to reset a password for another user account. Some computer tips and tricks will also require an administrator account to change system settings.
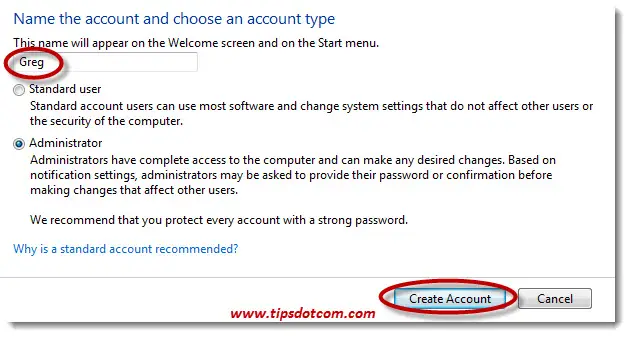
Click the create account button to proceed.
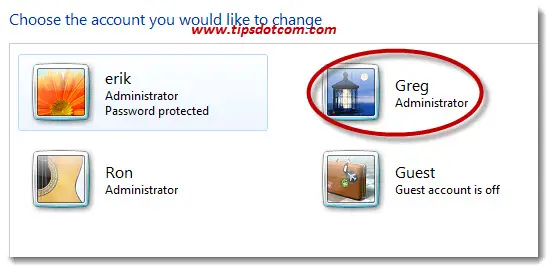
The new user account will now be created.
Now click the new user account to set a password.
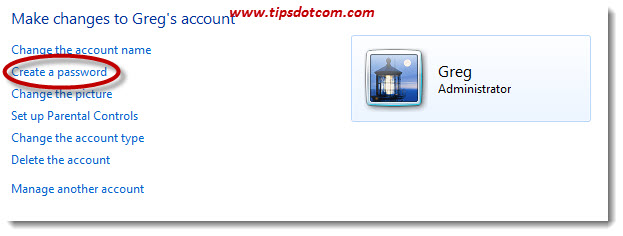
In the next screen, click create a password.
Type a password, repeat the password in the second password confirmation field and don’t forget to enter a password hint in the password hint box (this is a required step) before you click the create password button.
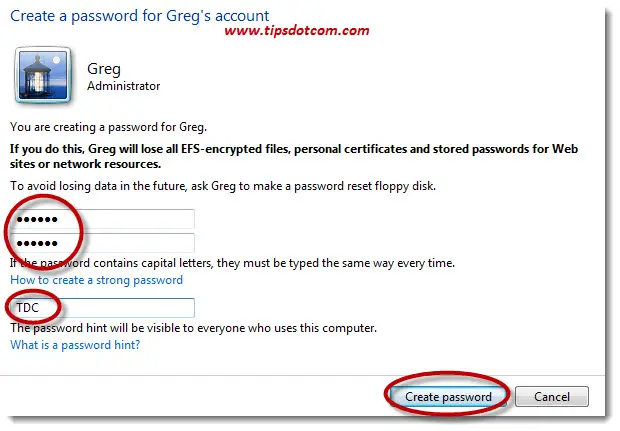
That’s it! Your new Windows 7 user account is now ready.
Create user profile icons in Windows 8
To create user profile icons in Windows 8 is slightly more complicated, because with the arrival of Windows 8, Microsoft has introduced a new type of accounts: Microsoft accounts. That means that, if you are creating a new user account in Windows 8 (and Windows 10) you get to choose between two types of accounts: a local account or a Microsoft account. Please refer to my article on creating a Microsoft account for more details on this.
Microsoft accounts are quite a bit different from local accounts. To understand the differences, it’s best to think of a situation where you have more than one computer in your house. For instance you can have a desktop computer and a laptop or a Microsoft Surface tablet computer.
You can think of a local account as an account which only lives on one specific computer. Let’s say that you create a local user account called Bob on your desktop computer, then only your desktop computer will know about the account. The laptop or tablet will not know of the existence of your local user account and you will not be able to log in on the laptop or tablet with the new Bob account.
However, if you create a Microsoft account on any of your computers, the information of that account is stored on Microsoft’s servers via your internet connection. NOT locally on your computer.
The advantage of this is clear: whenever you use your Microsoft account to log on to one of your other computers, your personal settings will automatically follow you on this “new” computer. Your internet favorites, browser history, desktop background picture, color scheme, Microsoft OneDrive contents and other personal settings will automatically follow you to any computer that you log on to with your Microsoft account.
Create user profile icons for a Microsoft account (Windows 8)
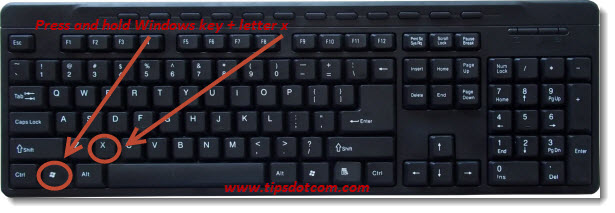
Press the Windows logo key + x on your keyboard to open the quick link menu.
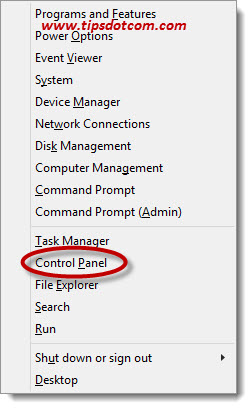
In the quick link menu, click “control panel”.
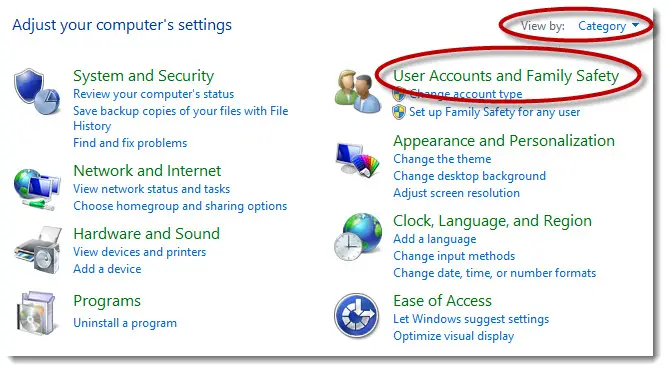
In control panel, make sure that the “view by” setting is set to “category” (top right corner) and click “User accounts and family safety”.
Next click “User accounts”.
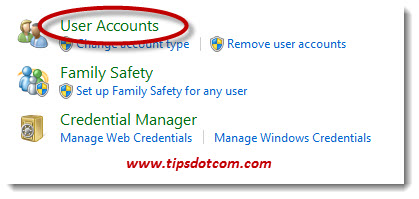
In the next screen, click “Manage another account”.
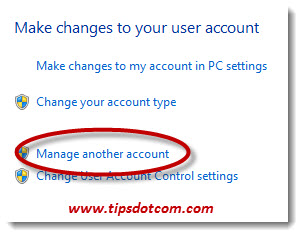
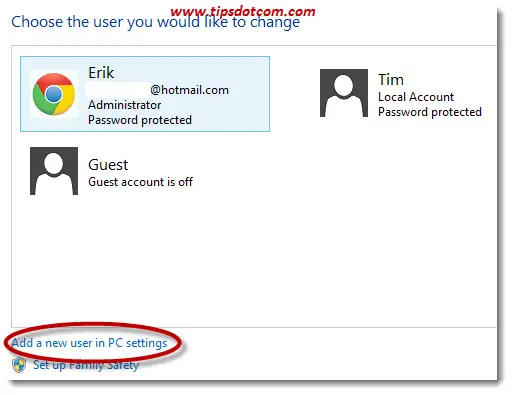
Next click “Add a new user in pc settings”.
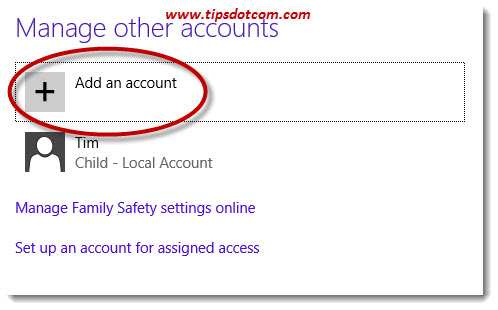
In the account management window, click “add an account”.
Now enter the e-mail address associated with the new user’s Microsoft account and click next.
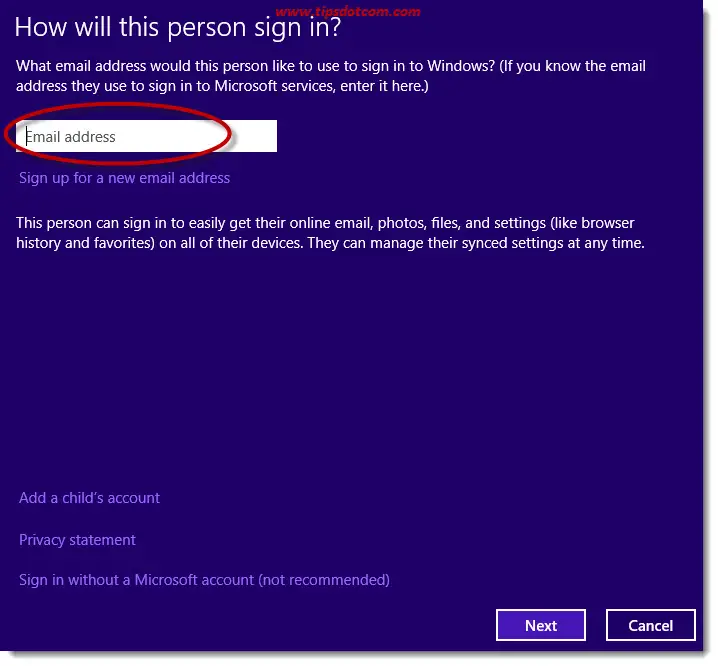
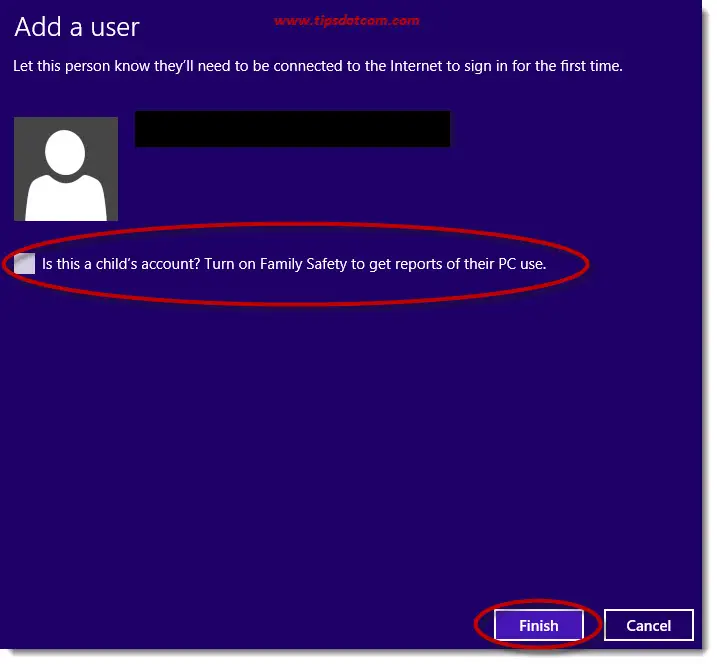
In the next screen, you can set this account as a child’s account, which offers you a number of parental control features that you can use and apply to the new account.
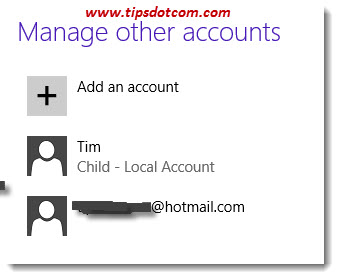
Now you’ll be taken back to the account overview screen, where you’ll see your newly created account.
These steps create user profile icons for new accounts, which you will see in your Windows 8 logon screen.
Related article: Disable your login password in Windows 10.
Feel free to leave a comment in the section below if this article was helpful. I'd appreciate it a lot, thank you!
If you've enjoyed this article or found it useful, I'd appreciate it if you'd let me know by clicking the Like (or Share) button below. Thank you!


New! Comments
Have your say about what you just read! Leave me a comment in the box below.