Disable Notifications in Windows 10
It’s a good thing you can disable notifications in Windows 10. I’m not saying that notifications can’t be useful, but sometimes there are just too many. Or at the very least they can become annoying and can even block your system tray icons, which can be irritating.
What’s also not fun about Windows notifications (or Chrome or Edge or any other app for that matter) is that they seem to sneak up on you and start appearing on your screen even if you can’t remember giving your permission to start showing up.
In this article I’m going to show you how to disable notifications in Windows 10 and I’ll also explain where they come from so you get a better understanding and be able to prevent them from reappearing later on.
But first, let’s see how to get rid of these annoying notifications in Windows 10.
How to Easily Disable Notifications in Windows 10
One of the first and easiest things you can do is nip them in the butt right at that moment when they appear. If you take a closer look at any particular notification message, you’ll see that there are a few things to learn about the notification itself. For one, you’ll notice that they have a gear icon in the top right corner (right where the mouse pointer is in the image below).
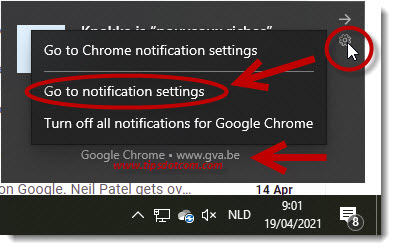
Another important piece of information that you can find in the notification is where it actually comes from (Google Chrome in the example above, and more in particular from the website www.gva.be ). This can be very helpful if you want more fine-grained control over which notifications you will allow to appear and which ones you want to mute.
You can click that gear icon which will give you a couple of options to disable notifications in Windows 10. The option “Go to notification settings” (indicated in the image above) will take you to your Windows 10 notifications settings screen. Click that on and you’ll see a screen like this:
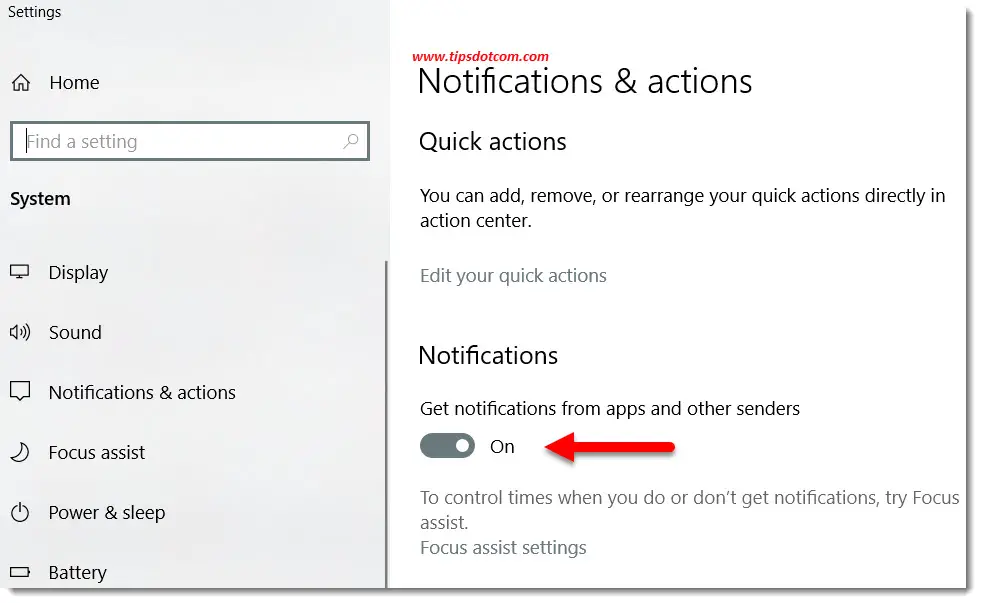
You’ll immediately see the notifications slider button (“Get notifications from apps and other senders”, indicated by the red arrow), which you can slide to disable notifications in Windows 10 alltogether. Doing this will help you get rid of all notifications and may sound a bit drastic, but nothing you disable here is permanent. You can always switch your notifications back on if you feel you’re missing out on stuff (which is doubtful).
Basically, switching this slider to the off position is the quickest and easiest way to disable notifications in Windows 10, so if that’s all you wanted to accomplish, you’re done here. Close the notifications and actions window and enjoy your computer without any notifications distractions.
But you can of course explore a few other options while you’re at it.
Getting Rid of Notifications in Windows 10 Through Focus Assist Settings
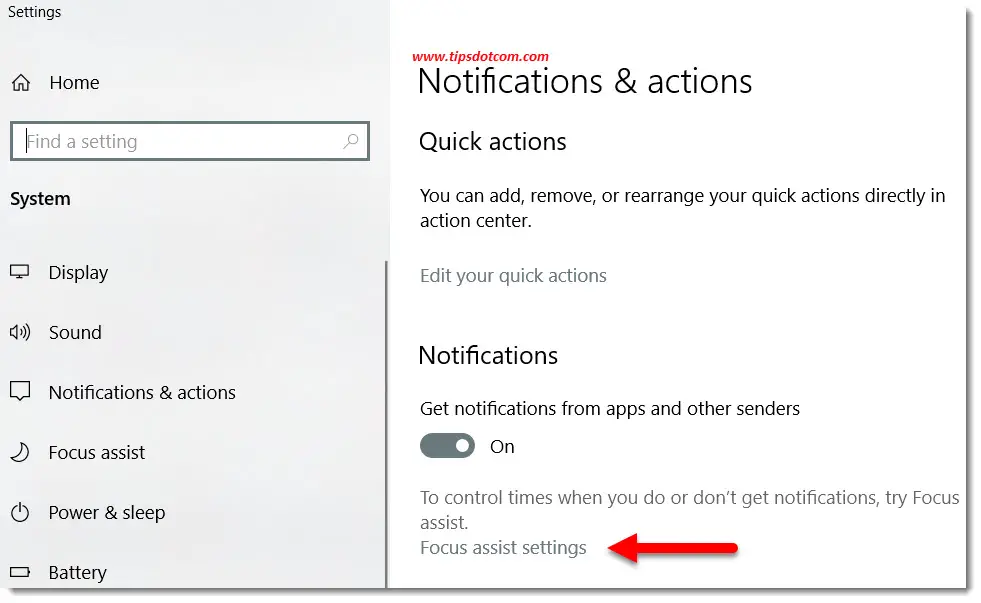
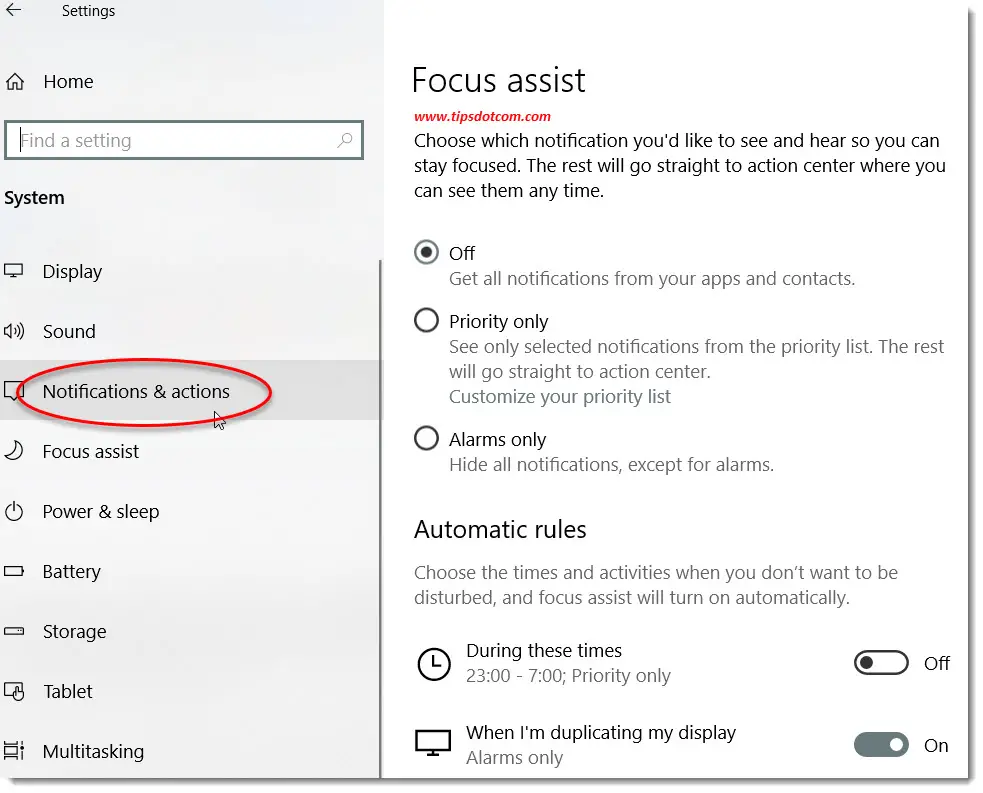
If we take another look at the Windows 10 notifications and actions screen, you’ll notice that there’s also an option called “Focus assist settings”, which will allow you to choose which notifications you’d like to see (if any) and also to define automatic rules when you don’t want to be disturbed by notifications.
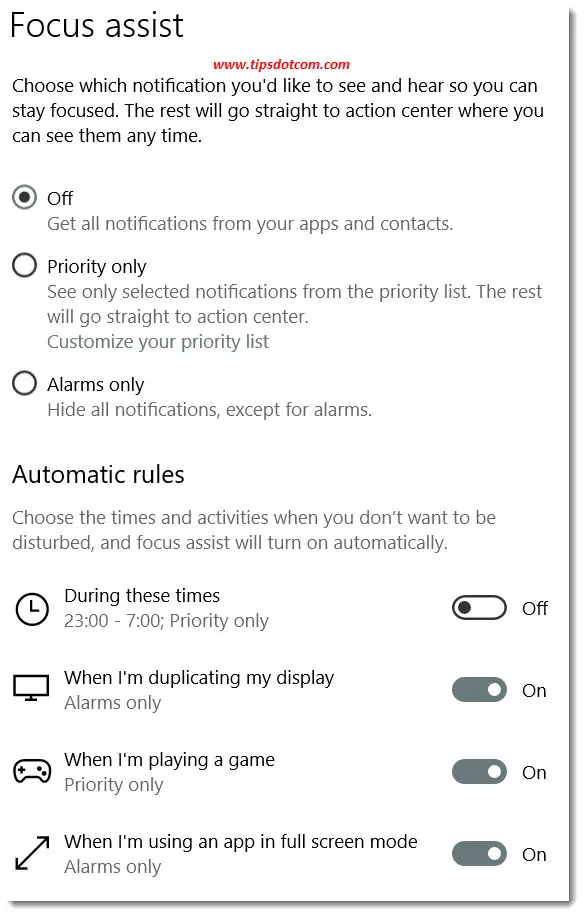
Let’s take a look at the focus assist settings screen.
Here you can set times when you want to automatically disable notifications in Windows 10, or for instance when you’re duplicating your display or playing a game.
Once you have defined your focus assist settings, you can quickly switch to focus assist mode by clicking the notifications icon in the bottom right corner of your screen and then clicking on the focus assist tile.
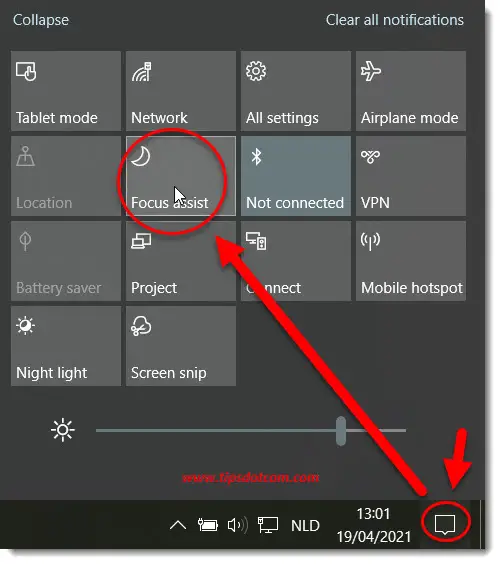
To explore some more Windows 10 notifications options, click “Notifications and actions” to go back to the main notifications settings screen.
If you scroll a little bit down in the right-hand side of the screen, you’ll also find a number of different options that you can use to block notifications in Windows 10.
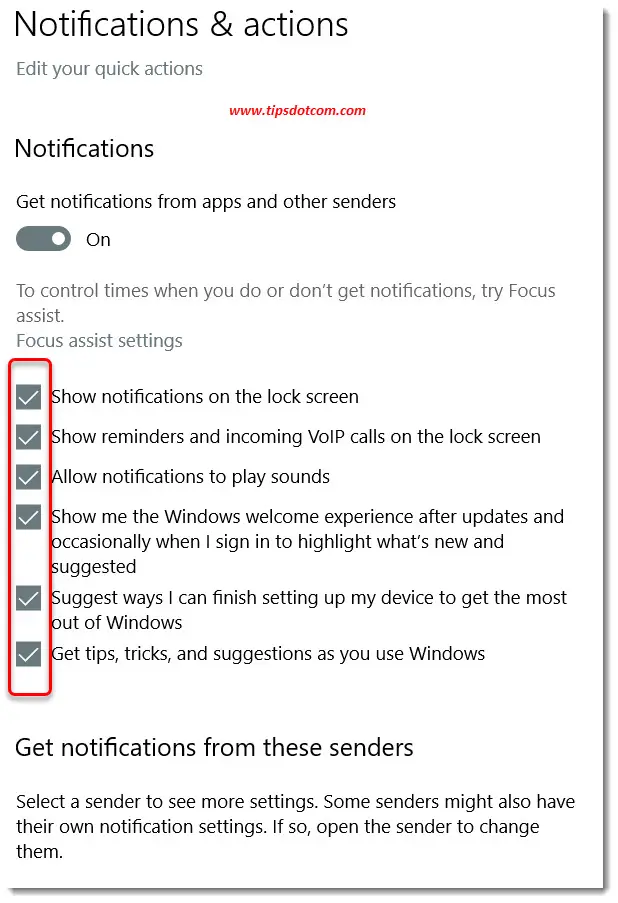
Not only that, but more importantly, you’ll also be able to access the settings underneath the heading “Get notifications from these senders”. This is a really important section if you want to be able to suppress notifications.
For example, in the beginning of this article, I mentioned that the notifications in itself disclose some information about where they come from (remember, from Chrome in the example above and more particularly from the website www.gva.be).
This is exactly where you need to look if you want to disable notifications in Windows 10 from a certain “source”.
For instance, if I wanted to stop notifications from Google Chrome, this is where I would switch the slider to the off position.
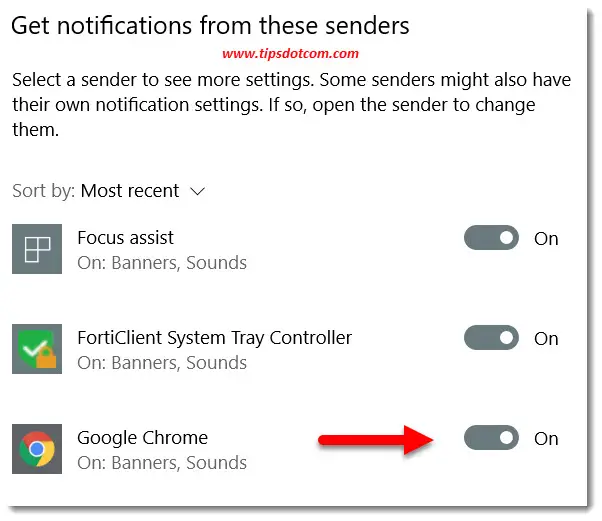
Please note that switching Chrome notifications off would completely switch off ALL Chrome notifications. If I wanted to make a selection of only some Chrome notifications, I would have to do so in Google Chrome itself. You can read more about that in my Google Chrome notifications article.
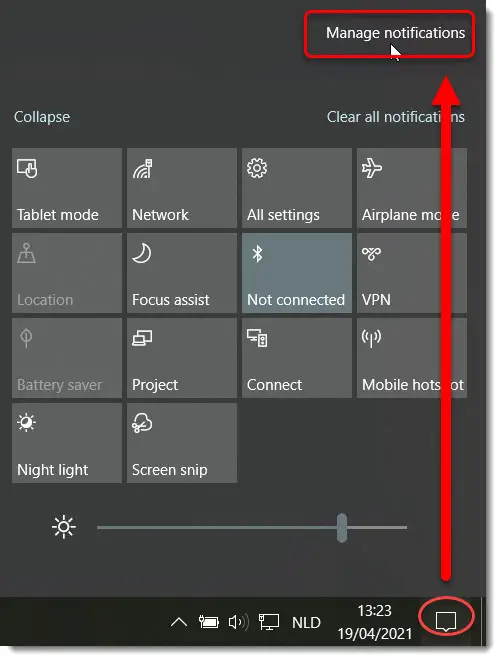
Before I forget: I’ve explained how you can get to your Windows notifications settings by clicking on the gear icon in the notification area itself, but if you want to access your notifications settings at a time when no notifications are showing, you can of course also do that. The way to do that is by clicking on the notifications icon in the bottom right corner of your screen and then clicking “Manage notifications” at the top of your screen.
With that you should be able to control and manage the number of distracting interruptions you get if you manage notifications in Windows 10.
If you've enjoyed this article or found it useful, I'd appreciate it if you'd let me know by clicking the Like (or Share) button below. Thank you!


New! Comments
Have your say about what you just read! Leave me a comment in the box below.