Google Chrome Favorites
An introduction to Google Chrome favorites: the good, the bad and the downright ugly (keep reading to discover why the latter often generates instant credibility). Working with favorites keeps your internet surfing organized and can save you lots of time and frustration. If you’ve ever faced the challenge of trying to find a certain web page back again that you had found earlier on but couldn’t find it, then favorites will prove to be a wonderful invention. Or if you just like to keep things organized.
There’s no need to worry about complication either because with the help of the following accurate instructions and observations I’m going to try to herd you towards success with internet favorites :-)
Finding Your Way Around With Google Chrome Favorites
Just for the sake of completeness: in this article I’m going to assume that you are using Google Chrome to do your internet surfing. If you’re not sure about the internet browser you’re using, please refer to my article about downloading Google Chrome, under the subheading “Understanding a few basic concepts”.
Another quick observation before I start off with Google Chrome favorites: if you’re like a lot of people and you want to open Google Chrome with Google’s search engine as start page, please feel free to refer to my article on setting your Google Chrome start page.
With that out of the way, let’s assume that you are researching a certain topic on the internet and during your search you land on a webpage that offers something interesting that you want to be able to easily find again for later reference. Then you can easily add that page to your Google Chrome favorites and label it with a meaningful name so you’ll be able to quickly find the page later when you need it.
With that specific page open in your browser, click the bookmark icon near the top right corner of your Google Chrome window (if you hover with you mouse over the icon a tooltip message “Bookmark this page” will come up).
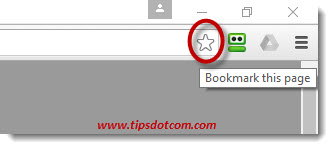
A bookmark editing popup will then appear where you can enter any descriptive name that makes sense to you for this bookmark or favorite. By default, Google Chrome will populate this field with the title of the web page that you’re currently viewing, but you can enter any name that will allow you to identify the page later on.
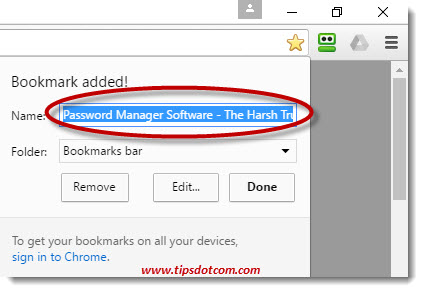
Before you save the bookmark to your Google Chrome favorites, you also have the option of saving it in a folder or even subfolder so you can place your bookmarks or favorites in categories to add more structure.
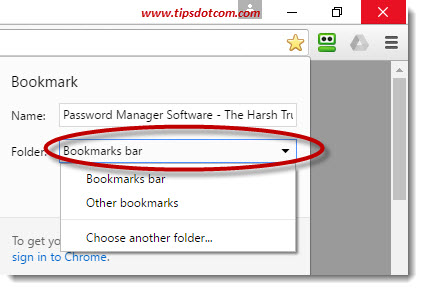
This is especially helpful if your collection of Google Chrome favorites grows into a big list, at which point it does make sense to organize them in folders.
To create a new folder, click the “Choose another folder” option (visible in the bookmarks menu in the image above) and then Google Chrome will take you to the “Edit bookmark” screen where you can create a new folder. (You can also create subfolders by first selecting the folder where you want to add a subfolder).
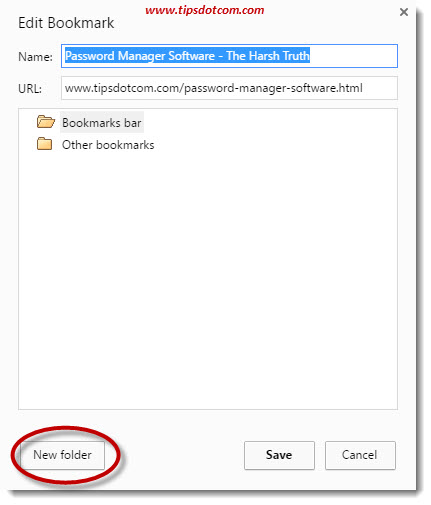
When you’re happy with the name of your Google Chrome favorite, click “done” to confirm your work.
That’s how easy it is to add any specific web page to your Google Chrome favorites for later reference.
Accessing Your Favorites
If you want to access your list of stored favorites at a later time in Google Chrome, simply start Google Chrome and click the hamburger icon near the top right corner, then select “Bookmarks” and pick any of your saved favorites.
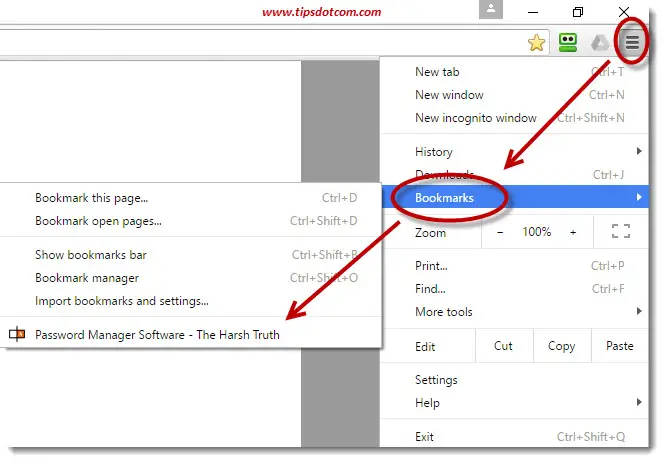
Another option (one that keeps your bookmarks more within reach at all times) is to click the hamburger icon and then select “Bookmarks” and then “Show bookmarks bar”.
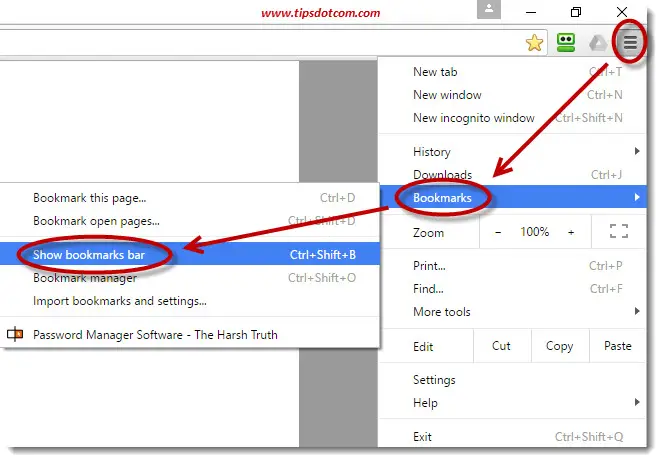
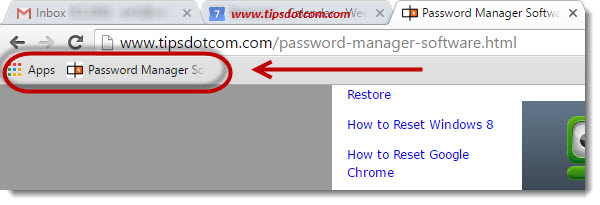
This results in the Google Chrome bookmarks bar to become visible near the top of your browser screen at all times so you can directly go to any of your favorites with a single click of the mouse.
Synchronize Google Chrome Favorites Across Devices
More and more people have more than one device in their households. You’ll find desktop pc’s accompanied by tablets, laptops, smartphones and what more. While this can add some flexibility to your digital life, it also sometimes poses an extra challenge in keeping your stuff organized.
Your Chrome browser offers the option to “sign in” to Google Chrome, so all of your favorites are synched through your account. That means that favorites you save on your desktop automatically become available on your tablet, mobile, or any other device for that matter.
What’s more, your internet history, passwords and form data will also be synchronized across your devices.
The key to synchronizing this data was already visible in the previous screenshots of Google Chrome favorites. It’s the “Sign in to Chrome” link at the bottom left corner of the bookmarks window.
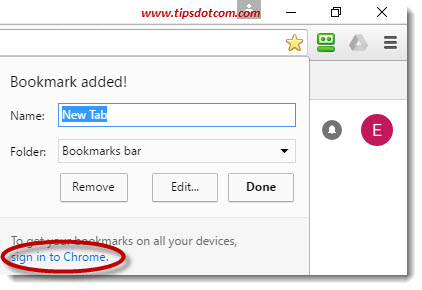
If you click that on, Chrome will display its sign in screen, where you need to enter your e-mail address to continue.
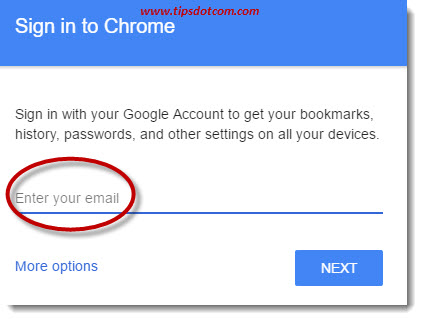
If you already have a Gmail account, you can use that e-mail address and password to sign in to Chrome.
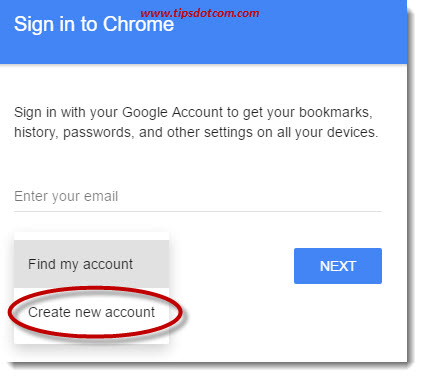
In case you don’t have an account yet, click the “More options” link, where you can select “Create new account” to get started. (Please also refer to my article on creating a Google account for more details on this).
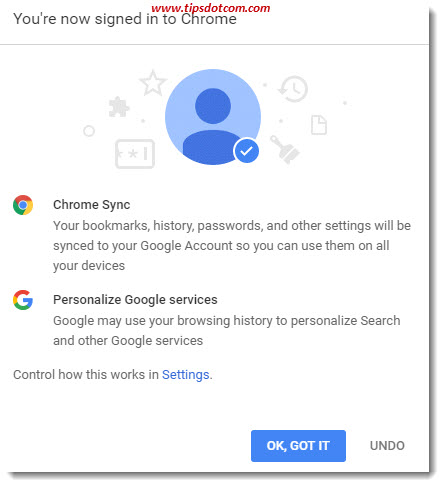
As soon as you are logged in to Chrome, you’ll get an extra confirmation screen informing you that your bookmarks, history, passwords and other settings will be synchronized across your devices.
Google Chrome Bookmarks On Your Desktop
In the beginning of this article I briefly mentioned the quick and dirty approach to Google Chrome favorites. By this I meant the Google Chrome icons that you can create on your desktop and that will open with a specific web page when launched.
With this technique you can create several different Google Chrome desktop icons that each open with a specific web page. Provided that you don’t have *too* many shortcuts like these (a clear overview gets easily lost with tens of shortcuts like these on your desktop), they can be a very convenient way of keeping your favorite web spots within reach.
It’s pretty easy to create a Google Chrome favorite desktop shortcut like that for any particular web page. With the specific web page open in Google Chrome, click on the “Restore down” icon near the top right corner of your Chrome window, like illustrated in the image below (if Google Chrome shows a “Maximize” icon rather than a “Restore down” icon, that means that your Chrome window already is “Restored down”).
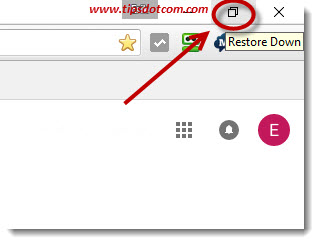
With your Chrome window “restored down” (so not taking your entire screen), you can click and drag any border of the window to resize it. You can also click and drag the window title bar to move it around on your screen.
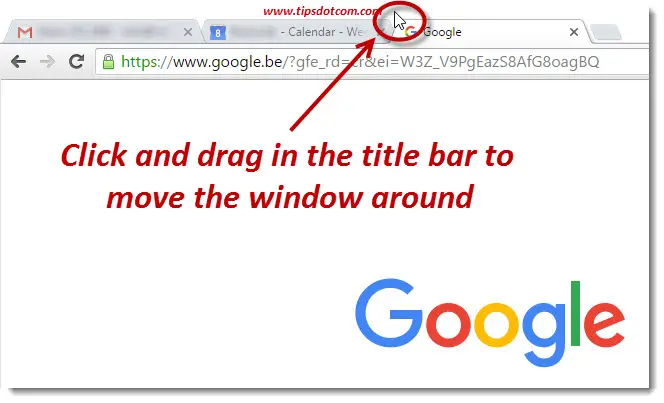
Try to move your Chrome window in a position so that next to it you have a view on an empty spot on your desktop. With the window in a position like that, you can click and drag the web page URL in the address bar to an empty spot on your desktop.
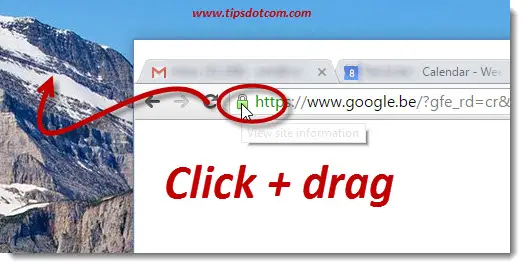
With this technique you can create Google Chrome favorite shortcuts on your desktop that will directly take you to a specific web page when you double-click it.
Back to the other Google Chrome tutorials.
If you like this page please take a short moment and leave a comment in the section below, I’d appreciate it, thanks!
If you've enjoyed this article or found it useful, I'd appreciate it if you'd let me know by clicking the Like (or Share) button below. Thank you!


New! Comments
Have your say about what you just read! Leave me a comment in the box below.