How To View Hidden Files
In this article I’m going to be talking about how to view hidden files. Hidden files are not stowaway files that are secretly hiding in your computer, eating up valuable resources and compromising the speed of your pc. On the contrary, they most often are of critical importance for your operating system’s health and well-being. And that is the number one reason why Windows wants to hide them from you. (Although there is one category of hidden files that can become a system hog if you don’t clean hidden files from time to time).
One example of hidden files or folders are files that Windows stores on your hard drive in specific folders to “remember” certain tasks or documents that you frequently work with, like Windows jump lists. Jump lists are not critical for Windows to operate properly, they are only there to make it easier for you to find stuff that you’ve recently worked with.
The Physical Burden Of Keeping A Secret
Your computer will probably not suffer any physical nor emotional distress from keeping these files hidden from you, but there may come a time when you need to see what’s living in the hidden folders on your hard drive.
Some troubleshooting scenarios require you to work with Windows hidden files and quite often will you find great computer tips and tricks that only work if you know how to view hidden files.
Similarly, if you want to remove your hidden temporary files (which can add up significantly over time), you’ll have to understand how to show hidden files.
Manipulating or working with hidden files doesn’t mean you’ll mess up your computer. As long as you know what you’re doing or if you’re following instructions that you know you can trust, things will work out just fine.
How To View Hidden Files In File Explorer
So you’ve decided it’s time to find out how to see hidden files. First thing you need to do is start File Explorer (in Windows 7 it was still called Windows Explorer but if you’re trying to figure out how to show hidden files in Windows 7, the steps are the same).
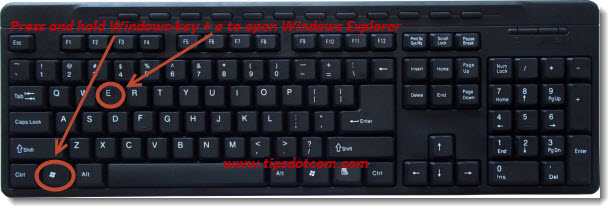
To launch File Explorer, press the Windows logo key + e on your keyboard.
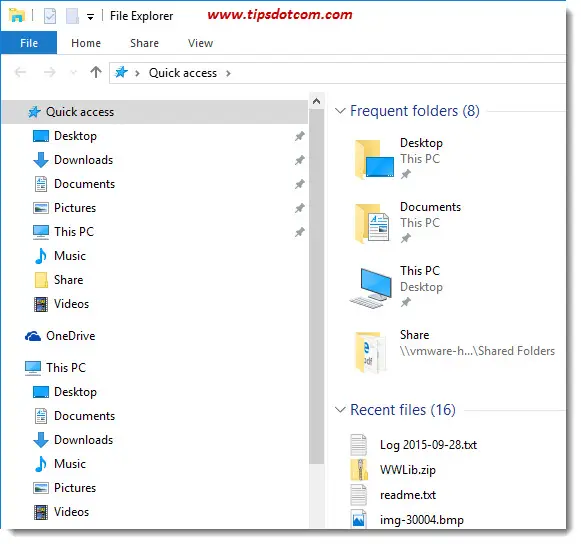
Windows opens up a File Explorer window, which will look similar to this:
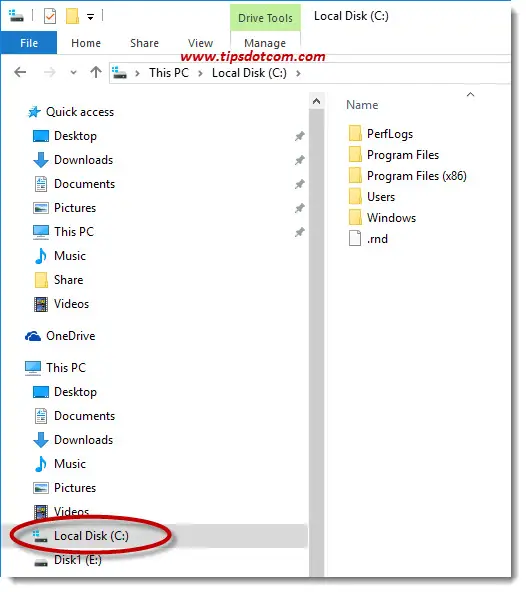
If you take a look at your local disk c: for example, you will see a number of folders and files listed in the right side of the screen. The image below shows the folders and files in my example system on local drive c:
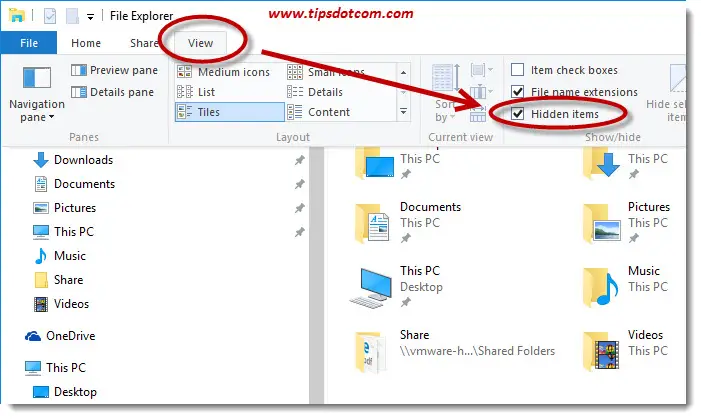
Now, in the File Explorer window, make sure to click the “View” tab, as shown in the image below and then check the box next to “Hidden items”.
Immediately the hidden folders and files will come out and show themselves in the right side of the screen. In the example below you’ll notice the two hidden folders “MSOCache” and “ProgramData” which are now visible and were hidden before.
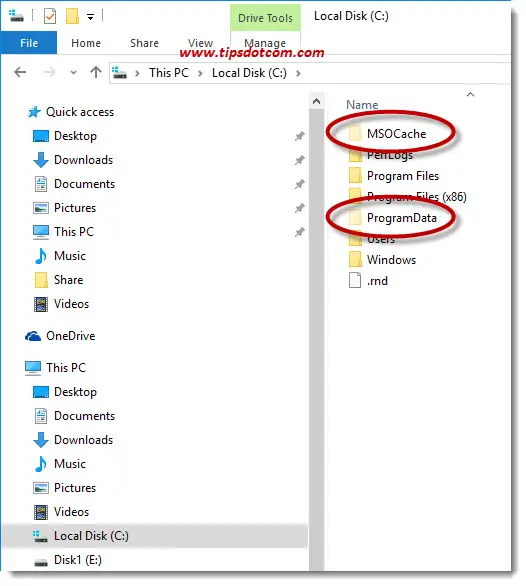
The slightly dimmed appearance of the folder icons tell you that those are hidden folders, but you have now made them visible by changing the options on how to view hidden files in your File Explorer.
I prefer to also check the box next to “File name extensions”, as this will list files with their extensions, which is so much more convenient than looking at lists of files without their extension.
For instance if you’re looking at a pdf file, it’s so much easier if the filename is listed as “readme.pdf”, rather than “readme”, which leaves you uncertain about whether the file is a pdf, a txt or any other file type.
If you've enjoyed this article or found it useful, I'd appreciate it if you'd let me know by clicking the Like (or Share) button below. Thank you!


New! Comments
Have your say about what you just read! Leave me a comment in the box below.