No Default Mail Client
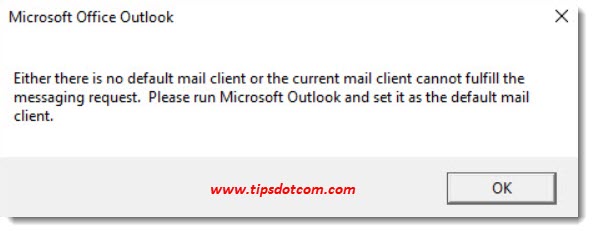
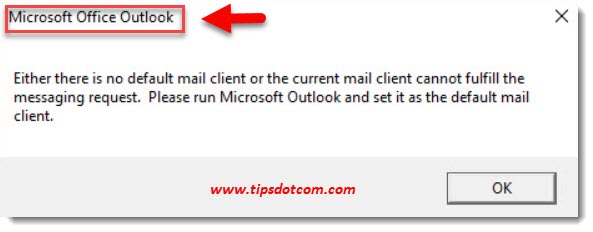
Either there is no default mail client or the current mail client cannot fulfill the messaging request. Please run Microsoft Outlook and set it as the default mail client. That’s the message I’ve been dealing with yesterday as I was helping a customer who tried to use the scan-to-email function with his HP Officejet Pro 6960 all in one printer. Turns out that this problem will also occur with other HP multifunctional devices and also other brands as well.
When looking at the default app settings in Windows 10, it quickly became clear that MS Outlook was set as the default program for sending emails, so something else had to be wrong. After a bit of searching I was able to solve this problem, so if you too are struggling with an error that there is no default mail client when scanning to email, feel free to read on.
For the sake of completeness I would also like to mention that the scan to email functionality previously worked normally on this Windows 10 computer and that the trouble started after a Windows update on the computer. One day scan to email worked fine, the next day not anymore.
No Default Mail Client And The HP Scan Application
Before we get started, here’s an image of the MS Office Outlook error message that appeared when trying to scan to email:
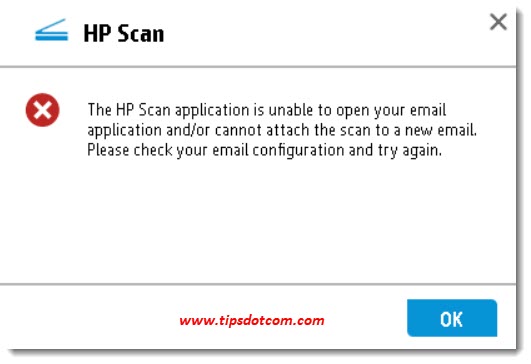
Upon closer inspection there was also a second error message, this time from the HP scan software (this one was hidden behind another window, but I noticed it because its icon showed up on the Windows taskbar). This one said: “The HP scan application is unable to open your email application and/or cannot attach the scan to a new email. Please check your email configuration and try again”.
The first suspect when you get an error about no default mail client being present when you want to scan to email is usually the scan software, especially if your default email application is set properly. In my case, the default email application was set correctly and I will describe what I did then further on. If you also made sure that your default email application is set correctly you can skip the next part and jump to the next step. If not, let’s first check that default application. Here’s how to do that.
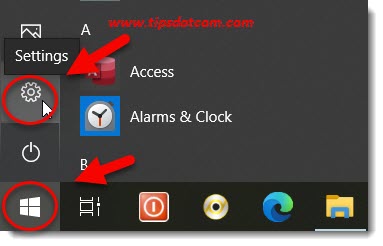
First, click the Windows start button in the lower left corner of your screen and select settings.
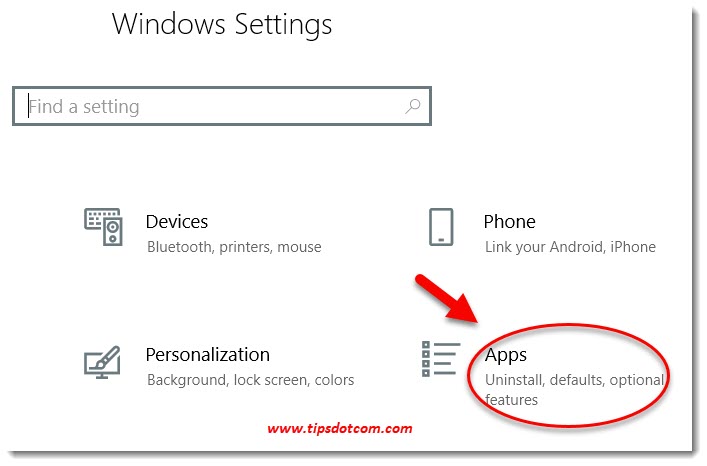
Then, in the Windows settings screen, click Apps:
In the Apps window, click “Default apps” in the left hand side of the screen and look under “Email” in the right hand side. Make sure that the correct mail client is selected as your default mail app (in my case Outlook) or change it by clicking it.
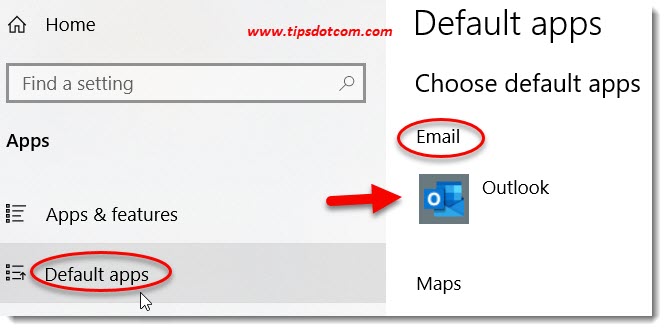
Once you’ve selected the correct default email application you can close the settings window.
Now, as I mentioned before, the “no default mail client” error will sometimes also appear when your default mail application is correctly configured. That’s when you need to start thinking about a “repair install” of the program that is causing the issue.
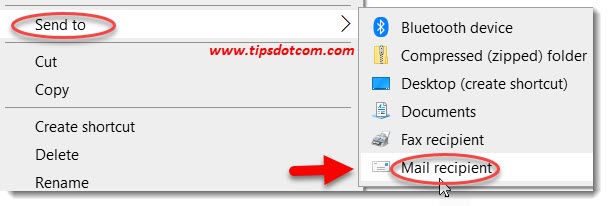
Another hint that there is something wrong with the default mail application is when you right-click a file and send to an email recipient. You can easily check this out, for instance with a random pdf file that you have on your hard drive.
Go to the pdf file, right click it with your mouse and select “send to” and then “mail recipient”.
You may then get the following error message: “There is no email program associated with the requested action. Please install an email program or, if one is already installed, create an association in the Default Programs control panel”.
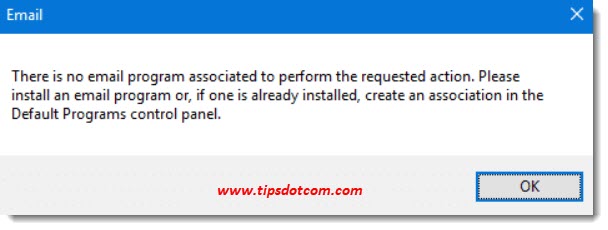
If you also get this error when trying to send a file to an email recipient, chances are you need to perform a repair install of the program that is causing the issue.
For me, it was Microsoft Office. I found that out by looking again at the error message that said that no default mail client is installed when I tried to scan to email:
The title bar in this window says “Microsoft Office Outlook”, which pointed me in the direction of a repair installation (which solved the problem).
To do a Microsoft Office repair installation, press the Windows logo key + r on your keyboard.
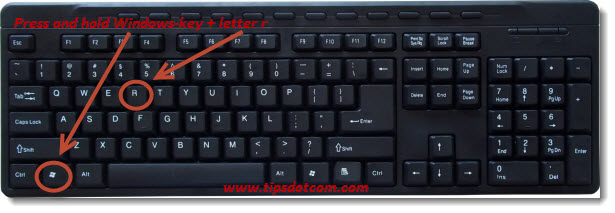
This should open up the run box:
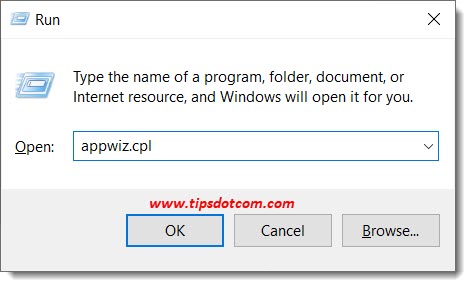
In the run box, type appwiz.cpl and click ok.
Now Windows will open the programs and features screen. Look for Microsoft Office and right-click, then select “Change”.
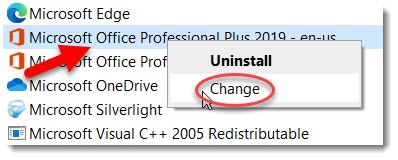
If a user account control window pops up, click yes to continue.
Now Microsoft Office will give you the choice between a quick repair and online repair.
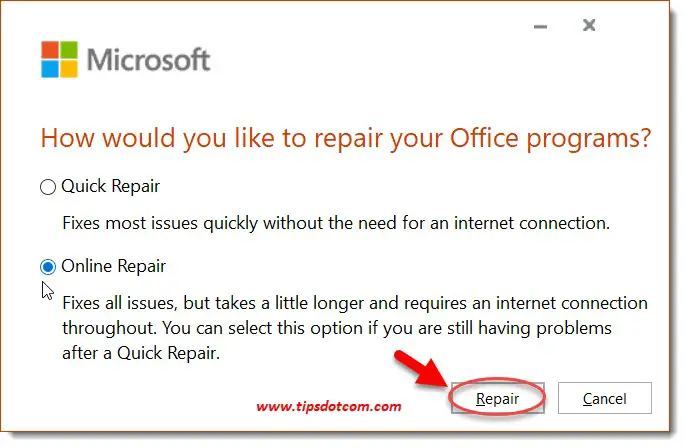
I selected “quick repair” the first time because I wanted to save some time, but after that I still had the error message that there is no default mail client or the current mail client cannot fulfill the messaging request when I tried to scan to email. So then I repeated the previous steps and selected the “online repair” option, which indeed took a while longer to complete. But it was worth the wait, because the scan to email function now worked properly again.
If you've enjoyed this article or found it useful, I'd appreciate it if you'd let me know by clicking the Like (or Share) button below. Thank you!


New! Comments
Have your say about what you just read! Leave me a comment in the box below.