Remote Desktop Please Wait
You get a remote desktop please wait blue screen when you’re trying to connect remotely to your computer via a Microsoft remote desktop session. No matter how long you wait, the session seems to be stuck on the login screen, showing you a blue screen with a message that says please wait. I know from first hand experience how frustrating this can be and I have wasted quite a bit of time figuring out how to get around this. That’s why I decided to put together the steps here that will help you work around the issue and successfully connect to your computer again.
This is what the remote desktop blue screen looks like:

Not very exciting ...
If the computer that you are trying to connect to is on a remote location, this remote desktop please wait issue can get especially annoying, because you might think you need to get over there in order to be able to physically sign in to the computer. On top of that, when you are trying to connect remotely to your computer and all you get is some strange blue screen that’s stuck in no man's land, you may start to imagine all kinds of scary scenarios about the state your computer’s actually in. For all you know it might be unresponsive because of a hack and all your files are being encrypted while you are fruitlessly trying to get a connection.
The good news is that this remote desktop please wait issue is a known “bug” in Windows 10 (and I’ve seen it happen with Windows 11 as well), so you don’t need to panic about cyber attacks right away.
Anyways, let’s get to the actual steps you can take to get connected to your remote computer.
Getting Past The Remote Desktop Please Wait Blue Screen (Easy Method)
The easiest way to get past the remote desktop please wait blue screen that I have found is by using a handy tool from Microsoft’s Sysinternals system tools.
The Microsoft Sysinternals Remote Desktop Connection Manager is what you need and you can download it for free here (link will open in a new window).
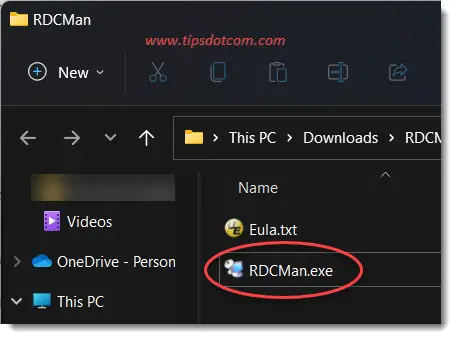
Once you have downloaded the tool, extract the files and double click the RCDMan.exe file to launch the application.
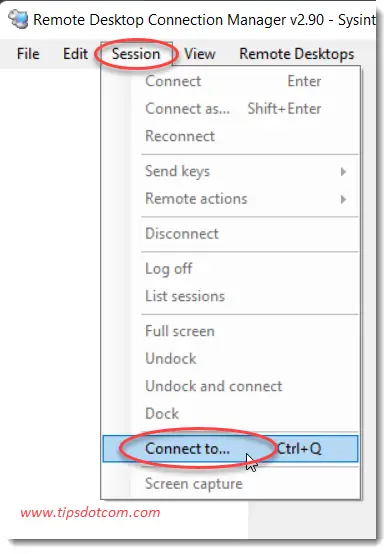
Then click on “Session” and “Connect to …” to:
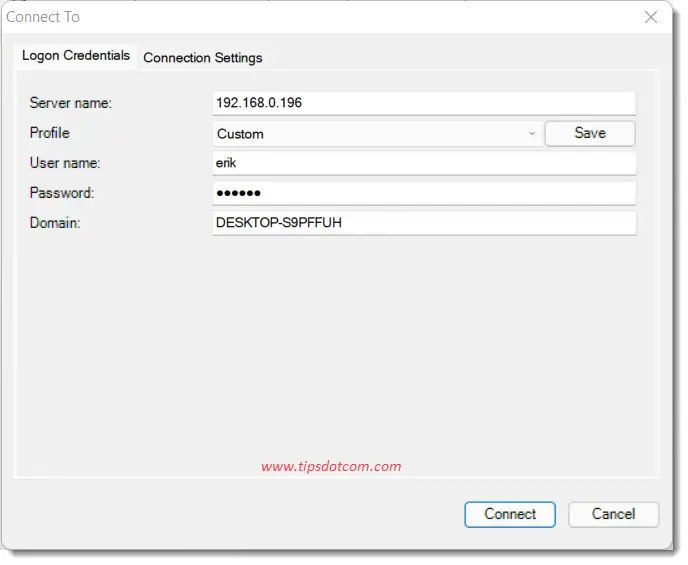
Now enter your computer’s ip address or computer name like you normally would do in the remote desktop connection screen and enter your credentials, then click “connect”:
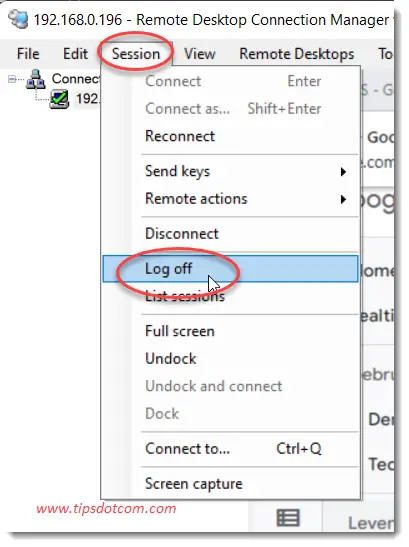
Remote Desktop Connection Manager will now open a session on your remote computer, which will allow you to work on the computer. You can also use it to look for the remote desktop session that’s stuck and log off the session.
To do so, click on session and log off.
Once the troublesome remote desktop session has been logged of, you should be able to remotely connect to your computer again like you used to do before the whole remote desktop please wait issue started.
Remote Desktop Please Wait - Somewhat Less Easy Solution
I’ve seen some cases where even with the remote desktop connection manager it didn’t work to get past the blue please wait screen. Another thing that you can try then is disabling the network level authentication (NLA), although I wouldn’t recommend leaving NLA disabled as this is less secure.
In order to get past the remote desktop please wait blue screen with NLA disabled, you need to create a simple .rdp file with a tiny modification that will force a Windows logon when starting your remote desktop connection. It’s just a tiny bit complicated to create and edit this file but if you carefully follow the steps outlined below it will work.
To get started, click the Windows start button and when the Windows start menu appears, type “mstsc” (without the quotes).
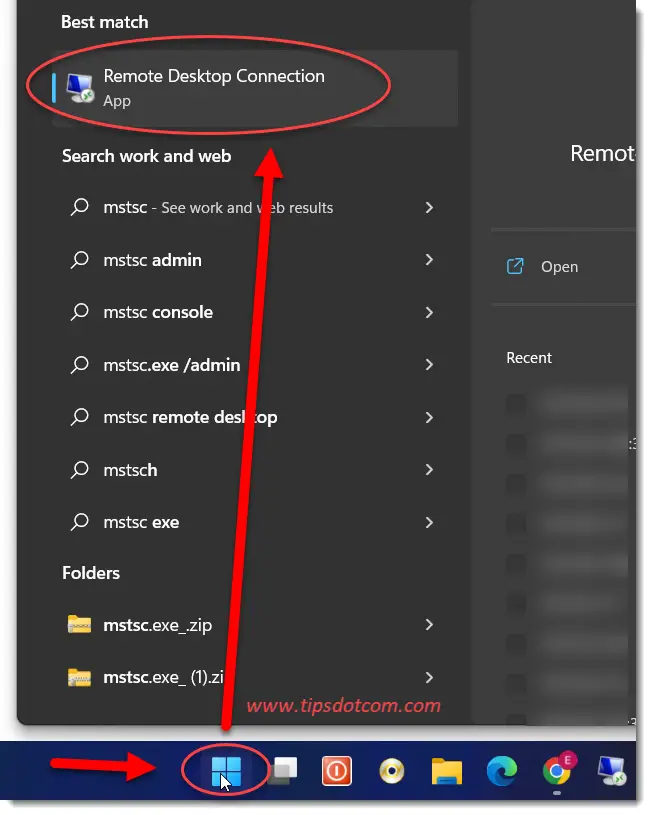
Windows will then show the remote desktop app under best match in the Windows start menu. Click that to open the remote desktop application.
Remote desktop will open with a screen that looks like this:
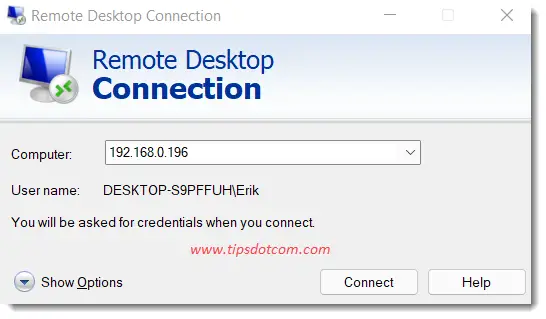
It will probably also contain the ip address or name of your remote computer.
Now click the “Show options” button.
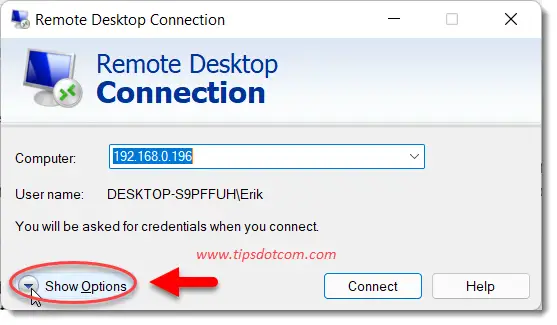
That will open up the remote desktop extra options:
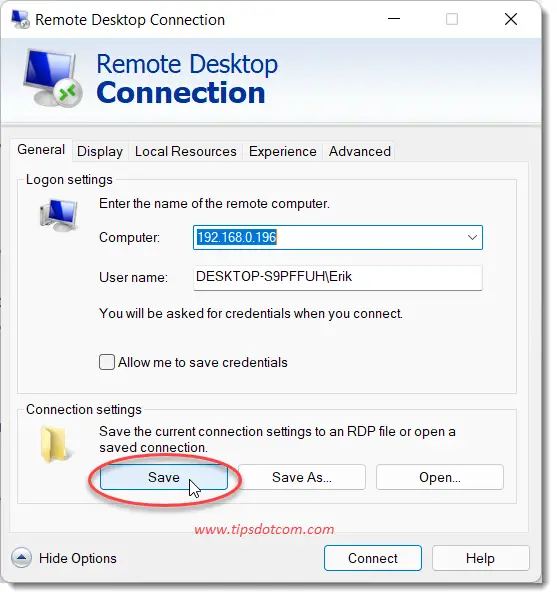
Here you can click the “Save” button to save your remote desktop file as an .rdp file.
Save it somewhere in a location where you can easily find it. You will need to edit the .rdp file with a text editor (like Notepad) in the following steps. You can save the .rdp file on your desktop if you like.
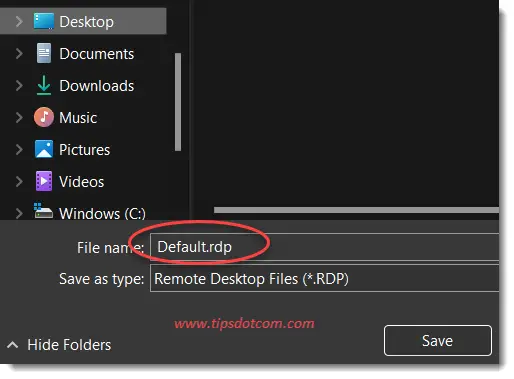
By default it will offer to save the file as “Default.rpd”, but you might want to give it a more meaningful name, like for instance “work-computer”.
Once you have saved the file, click that Windows start button and type “Notepad” (without the quotes) to search for your Notepad text editor.
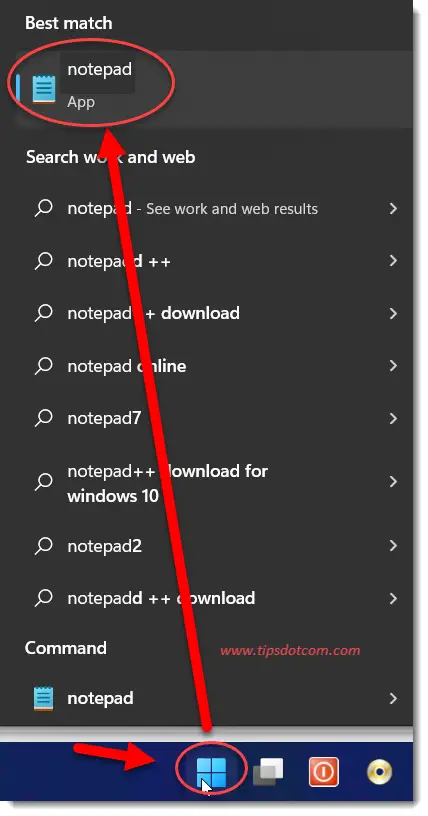
Click the Notepad app under “Best match” to open Notepad.
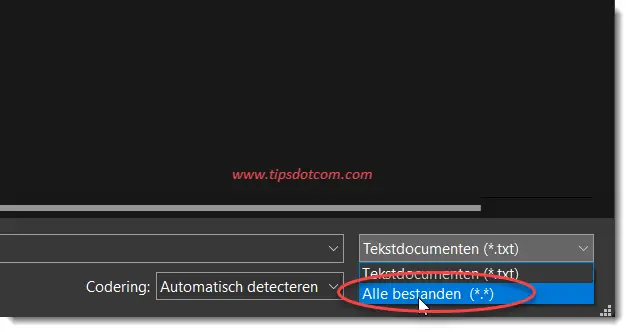
In Notepad, click “File” -> “Open” and make sure to set the file type to “all files”:
Now navigate to where you saved your .rdp file and select the file to open it in Notepad.
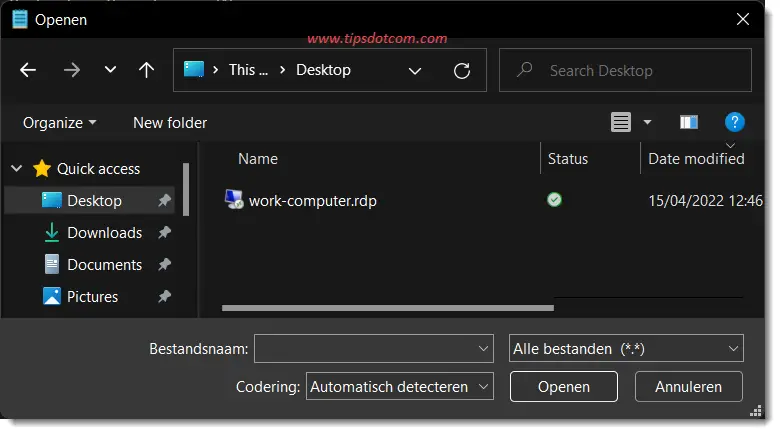
With the file open, scroll all the way to the bottom of the file and press the ENTER key at the end of the last line in order to add an extra line of text.
Then, type “enablecredsspsupport:i:0” (without the quotes) or copy and paste from here so that you don’t make any typo’s (it has to be exact or it will not work). This is to turn of the Network Level Authentication and force Windows login.
Now save the file and quit Notepad.
If you now navigate to your modified .rdp file and double click it to launch, it will start the Windows remote desktop application and upon connection you will see a Windows style login screen.
Here you can enter your credentials and you should be able to sign in to your computer without the remote desktop please wait blue screen.
As mentioned above, it’s best to revert to re-enabling NLA after you’ve successfully connected to your computer (by removing the last line in your .rdp file), because this is less secure.
Final Thoughts
The remote desktop please wait blue screen issue is a known annoyance and Microsoft seems to leave us hanging here as there is no permanent solution that I know of. It seems to happen every now and then when a remote session is stuck in a loop and it can happen when you least expect it.
People have reported the issue when they were trying to connect via a VPN connection as well as regular connections without VPN.
Once I was notified of a user who managed to get past the remote desktop please wait screen simply by entering the computer’s ip address instead of the machine name, but that certainly doesn’t seem to always work.
Anyways, as annoying as this is, I hope that this article has helped you to solve the issue so that you no longer have to wait indefinitely on a screen that says please wait.
If you've enjoyed this article or found it useful, I'd appreciate it if you'd let me know by clicking the Like (or Share) button below. Thank you!


New! Comments
Have your say about what you just read! Leave me a comment in the box below.