Remove Life At A Glance In Windows 10
More people are looking for ways to remove life at a glance in Windows 10 than there are people who are actually using it. In Windows 8 Microsoft ditched the Windows start button and as a result people went massively overboard trying to get their beloved start button back and now something similar has happened with the introduction of life at a glance in the Windows 10 start menu. Except this time people want to get rid of this newcomer.
Talk about how people are creatures of habit :-)
Whether you have installed the free upgrade to Windows 10 on your Windows 7 or Windows 8 computer, or you are working on a computer that came with Windows 10 freshly installed, chances are that your Windows 10 start menu has this typical section called “Life at a glance”.
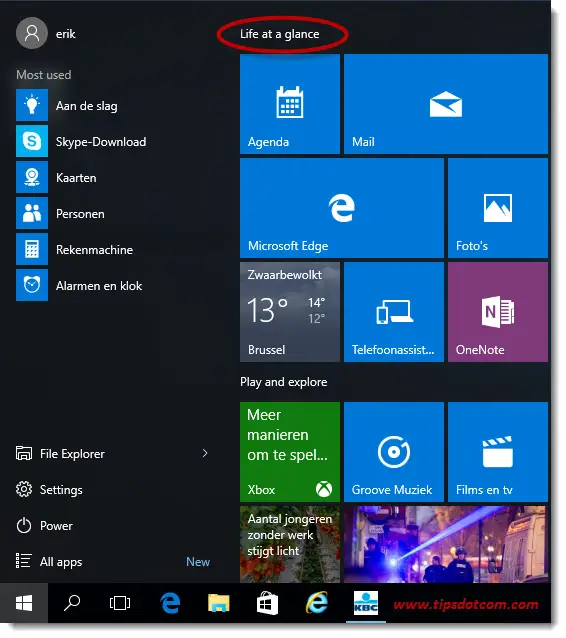 The typical "Life at a glance" heading in the Windows 10 start menu
My article on customizing the Windows 10 start menu also touches briefly on this subject, but let’s see here how to remove life at a glance in Windows 10.
How To Remove Life At A Glance In Windows 10
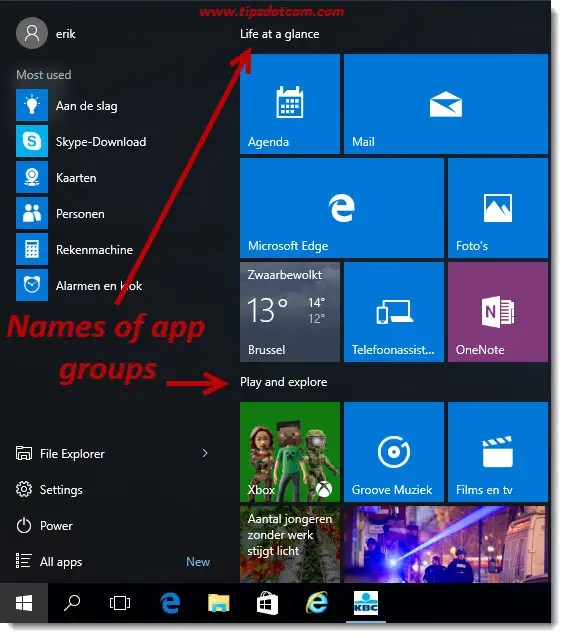
First of all you need to understand that the words life at a glance are the name of a group of apps in your Windows 10 start menu.
Now if you take another look at the Windows 10 start menu of this example, you can see how the apps are organized in two separate groups. You can move entire groups around and change the apps in these groups, but let’s first see how to remove life at a glance in Windows 10.
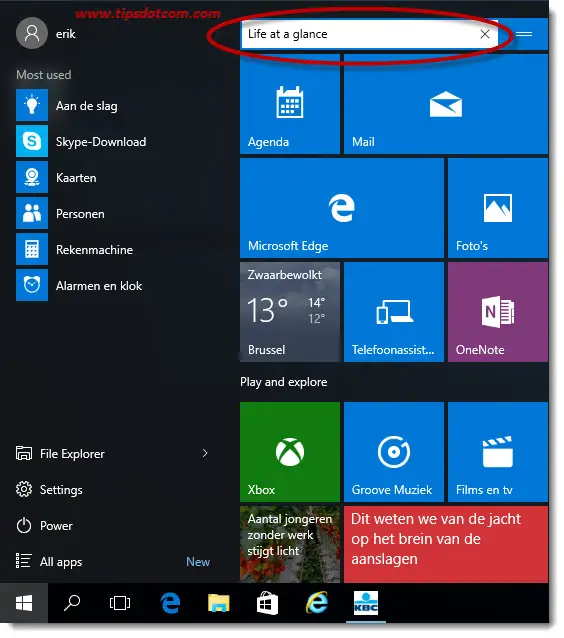
If you click the words life at a glance with your mouse in the Windows 10 start menu, you’ll notice how they change to an input box where you can change the name of this app group in your start menu. You can also use the backspace key or click the “x” that appears on the right of the input field to remove life at a glance in Windows 10.
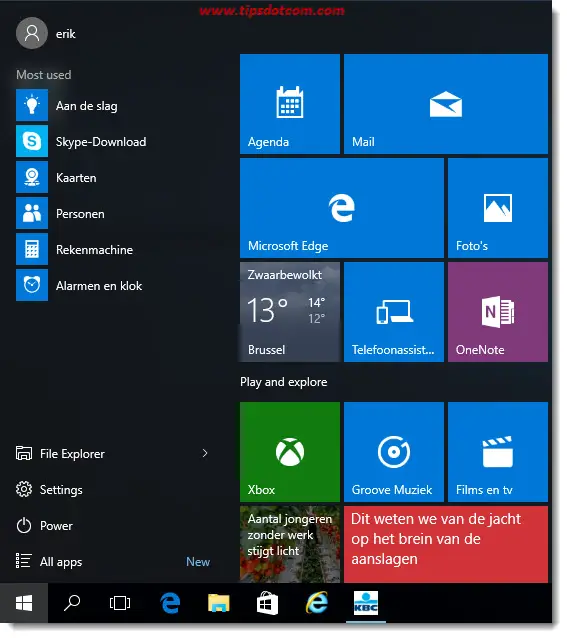
That will result in a Windows 10 start menu without the life at a glance app group heading.
If you are not happy with the apps in the life at a glance group and you want to get rid of the apps as well, simply right-click any app in the group and select “Unpin from start”.
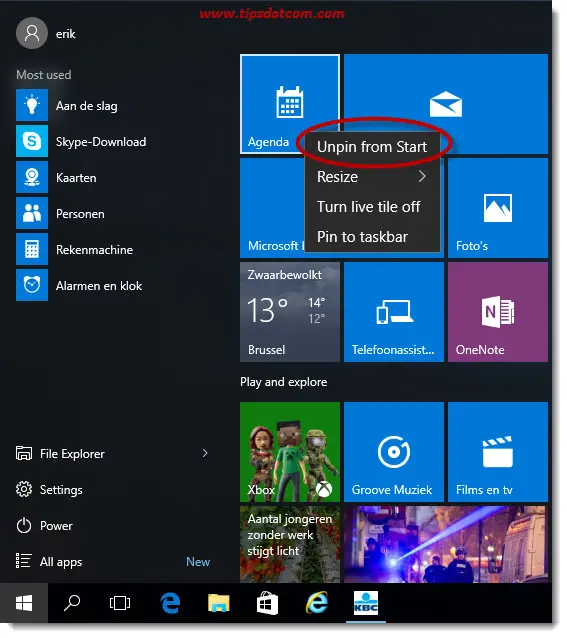
You can repeat this for any app you don’t want in your Windows 10 start menu.
Organizing The Apps That You Actually Use
Ok, now that you know how to remove apps from your Windows 10 start menu, let’s take a look at how you can move the apps or programs that you use most in a prominent spot.
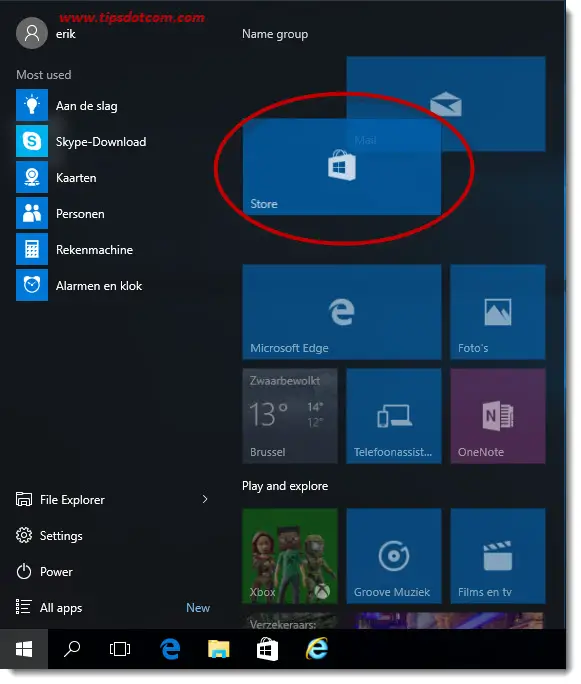
Suppose you want to move the “Store” app to the empty spot that we just created by unpinning the app in the top left corner of the first app group in our Windows 10 start menu.

You may have to scroll down (notice the vertical scroll bar on the right of the Windows start menu in the image above) to locate the app or program that you’re looking for, but once you have located it, you can simply drag and drop the app in position.
While dragging, you’ll notice how the other app tiles move out of the way to make place for the app your dragging around.
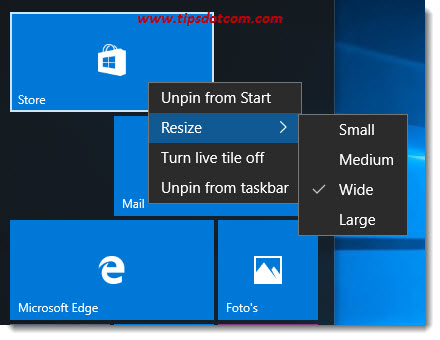
If the app or program tiles are too wide to fit next to each other, you can always right-click the program tile and select resize to change the dimensions.
Creating Your Own Program Groups
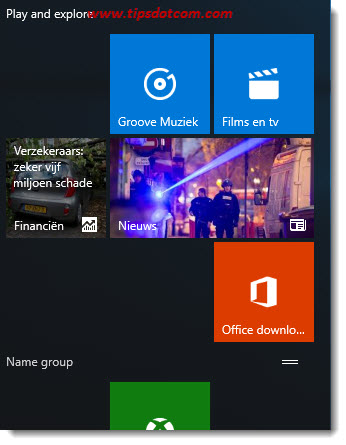
Now that you know how to remove life at a glance in Windows 10, you might also be interested in knowing how you can create and organize your own groups with programs that you use frequently. In order to create a new group, simply click any program tile and drag it outside its group. This will automatically create a new group, as indicated by the blue horizontal bar behind the Xbox app in the next image.
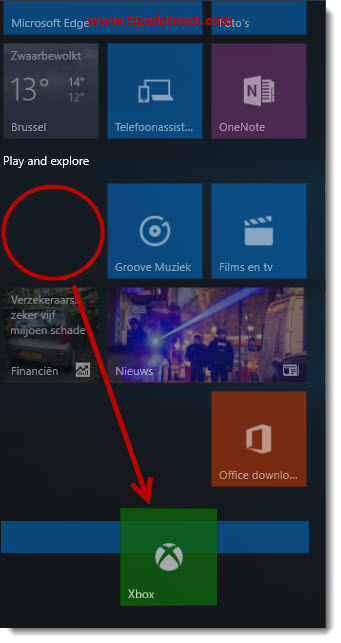
Much in the same way as described in the beginning of this article, you can simply click the header of your newly created group ("Name group in the image below) to modify the name.
What About Missing Apps Or Programs?
What if you’re looking for a program to drag and drop in a position at the top of your Windows 10 start menu but you can’t find it, even if you scroll down in the start menu? Well, not ALL programs that are installed on your computer are necessarily present in the start menu. This has been described in earlier computer tips and tricks about the start menu.
If that’s the case with a program that you want to pin at the top of the start menu, simply click the Windows 10 start button and start typing the first letters of the program you’re looking for.
If you start typing when the Windows 10 start menu is showing, Windows 10 will immediately and automatically change to search mode and as you can see in the image below, simply typing “inter” results in a list with matches being shown.
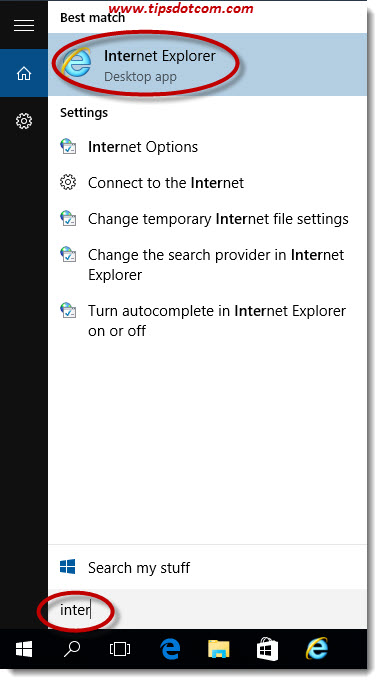
As soon as the app or program you’re looking for appears in the “Best match” results, you can right-click it and select “Pin to start”, which will result in the app tile being added in your start menu. The program will be added at the bottom of your start menu, so you may have to scroll down in order to find it.
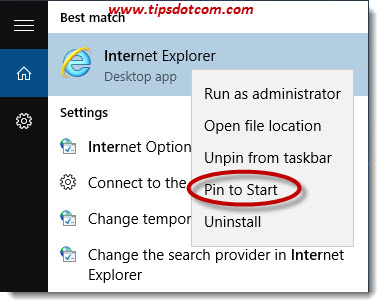
Once you have it there, you can easily click and drag it in any location, pretty much in the same way as described above.
Not only can you remove life at a glance in Windows 10, but the new start menu offers a lot of room for customization as well. It’s a petty that so many people still don’t know how to organize the start menu according to their preferences. I hope my article helps a few others in finding their way around the start menu.
If you've enjoyed this article or found it useful, I'd appreciate it if you'd let me know by clicking the Like (or Share) button below. Thank you!


New! Comments
Have your say about what you just read! Leave me a comment in the box below.