Screenshots With Multiple Monitors
Making Windows 10 screenshots with multiple monitors is incredibly easy thanks to the new and improved screen capture tool(s) that come with Windows. Workplace setups with 2, 3 or even more displays are pretty common these days and Microsoft has adjusted the built-in screenshot tools that come with Windows 10 accordingly.
I have been watching and using several screenshot utilities available in the market as well as the ones built in to Windows 10 (obviously I use screenshot utilities to include the screenshots in my articles). With some of the more significant Windows updates there has been some evolution in the screenshot possibilities that are already available in Windows 10.
Both Windows 10’s built-in snipping tool and the Snip & Sketch app allow for screenshots with multiple monitors and also if you’re wondering how to take a screenshot of one screen with dual monitors will these tools have you covered.
Let’s find out how.
Snip & Sketch Screenshots With Multiple Monitors
If you’re not sure whether or not you have Snip & Sketch on your pc, don’t worry because you most probably will. Please check out my article about shortcuts to Snip & Sketch and the Windows 10 snipping tool. It’s a great refresher on how to easily access and use these tools.
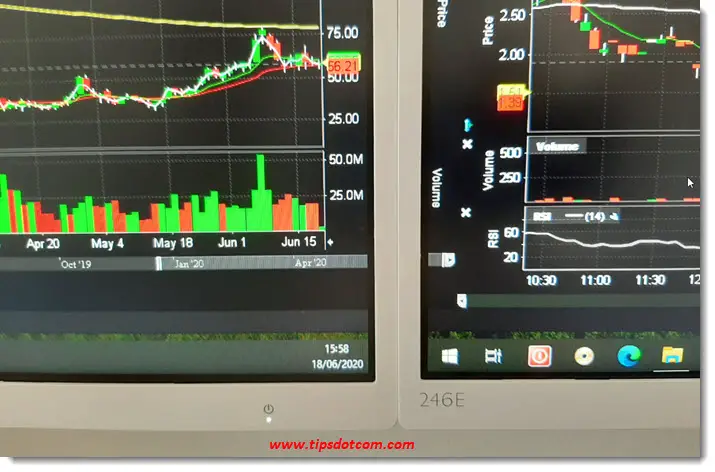
To explain how to take screenshots with multiple monitors I have included an image here of 2 monitors sitting right next to each other so you can see the borders of the monitors in the image (of course the technique to take screenshots with multiple monitors will also work if your monitors are a little wider apart).

Anytime you want to take a screenshot, you can use your Snip & Sketch keyboard shortcut
Windows key + SHIFT + s
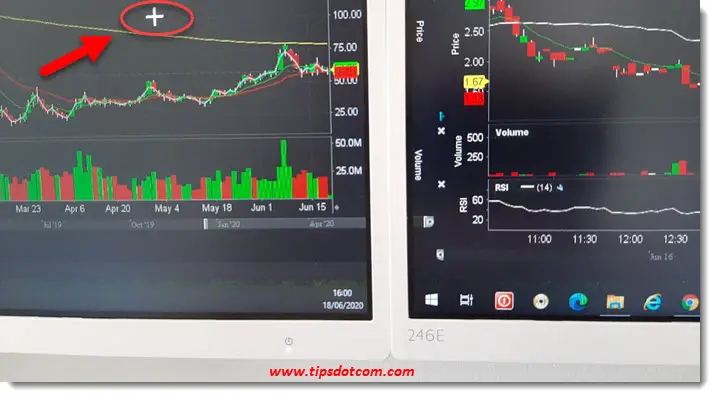
and your screen will go dim (on all your monitors). Your mouse pointer will turn into a crosshair that you can use to mark one corner of the area that you want to capture.
You can now position the crosshair in one position on one of your monitors …

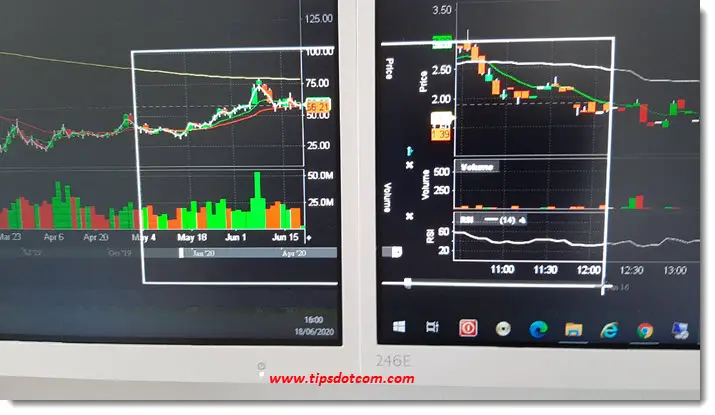
… and then click and drag across the borders of both monitors to the opposing corner of the area that you want to capture.

It should be noted that in the images I included here, I just randomly selected an area for my screenshot across multiple monitors. It’s just to demonstrate how it works.
This is also how to take a screenshot of one screen with dual monitors (You then obviously only drag the area that you want to capture on one monitor).
Once you’re done selecting the area that you want to include in your screenshot, Snip & Sketch will open the image in the Snip & Sketch editor, where you can mark and highlight things, just like you can in the “old” Windows 10 snipping tool.
Speaking of which, the Windows 10 snipping tool supports the same way of taking screenshots with multiple monitors, so if you still prefer working with that, you can. (As mentioned above, if you want a quick recap about snipping tool - and Snip & Sketch, feel free to check my article on the topic).
With this article I hope that I have pointed you in the right direction for making screenshots with multiple monitors. One other technique that may require special attention is taking screenshots of scrolling windows. At this point I’m not sure if we can pull that off with Snip & Sketch, but I might look into it and write another article about it.
If you've enjoyed this article or found it useful, I'd appreciate it if you'd let me know by clicking the Like (or Share) button below. Thank you!


New! Comments
Have your say about what you just read! Leave me a comment in the box below.