Shadow a Remote Desktop Session in Windows 10
I thought shadowing a remote desktop session in Windows 10 was going to be a point-and-click proposition. Until I actually had to do it. As it turns out, there are a few tiny configuration steps you need to take before you can start shadowing an RDP session in Windows 10. This is different from Windows server operating systems, where no extra preparation is required to be able to shadow a session. With a Windows 10 host on the other hand, there simply are a few key points you need to take into consideration before you can successfully shadow a remote desktop session.
To put this into perspective, on a Windows Server system you can simply go to the remote desktop connections overview, pick a session, right click and select “Shadow” and boom you’re done. It doesn’t get any more straightforward than that.
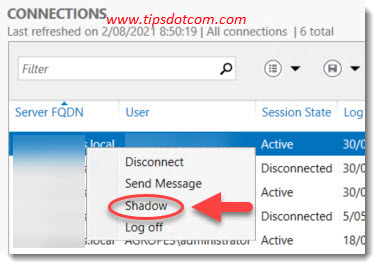
If you want to shadow a remote desktop session on a Windows 10 host however, things get a bit more tricky. You will have to do some preparation steps before you will be able to successfully shadow a session on a Windows 10 host computer. But once you have configured the host correctly, you will have no issues connecting to an active remote desktop session. In fact, you will even be able to shadow the console session. So let’s see how to answer the main question here. How to shadow a remote desktop session in Windows 10?
1. Configure The Remote Session Host Group Policy
On the Windows 10 host that you want to shadow, you need to configure the group policy setting that will allow for the shadowing of sessions. Open the group policy editor and go to:
Computer Configuration -> Policies -> Administrative Templates -> Windows components -> Remote Desktop Services -> Remote Session Host -> Connections
Now look for the policy with the name “Set rules for remote control of Remote Desktop Services user sessions”. Set the configuration for this policy to enabled.
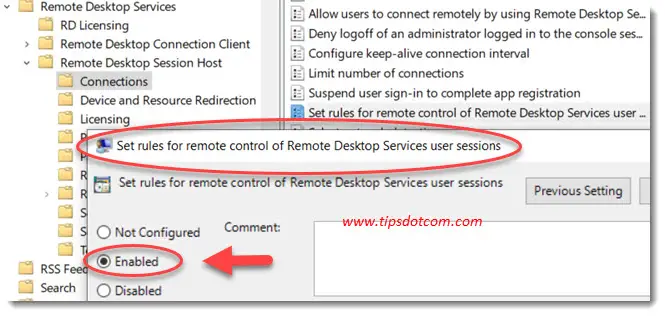
Now you have a number of different options that will define whether you can shadow a session with full control permissions or only viewing permissions, as well as the ability to define whether or not the person in the active session needs to grant permission for the session to be shadowed.
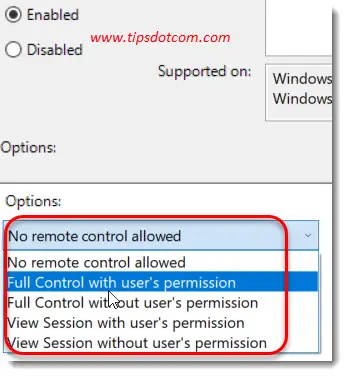
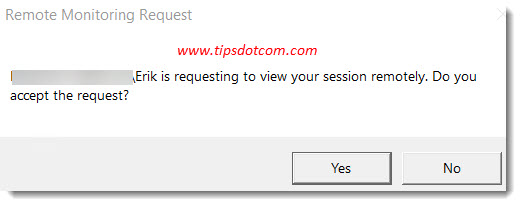
For example, if you set the policy to a setting “with user’s permission”, the user in the active session will get a notification when you try to shadow a remote desktop session on his or her Windows 10 computer. The user will have to accept the request before you can connect to the session.
Choosing a setting “Without user’s permission” allows you to start shadowing a remote desktop session right away without requiring any action from the user at all.
Alternatively you can also make a change in the Windows registry to allow shadowing of remote desktop user sessions. If you have set the group policy setting as described just above, you don’t have to change any registry settings, but if you prefer to change the registry rather than modifying group policy settings, you need to go to the following registry key:
HKLM\SOFTWARE\Policies\Microsoft\Windows NT\Terminal Services

Look for a DWORD parameter called “Shadow” and set the value according to the settings listed in this table:
| 0 | disable remote control |
| 1 | full control with user’s permission |
| 2 | full control without user’s permission |
| 3 | view session with user’s permission |
| 4 | view session without user’s permission |
2. Download Microsoft PSTools
If you want to connect to and shadow a remote desktop session in Windows 10 on a remote computer, you’ll need to be able to figure out which sessions are active on the host computer so that you can select the correct session to connect to. For that purpose we are going to be using a command called qwinsta, which will allow you to list all the existing sessions on the computer. If you can run qwinsta on the remote computer itself, it will show a list of all the current sessions and you’ll be able to see which is the active one.
I’m going to assume here that you’re not able to run qwinsta on the remote computer, since you don’t already have a remote desktop connection to it. So we are going to use a utility called psexec that will allow us to run commands remotely on the computer.
You can download Psexec as part of Microsoft’s PStools here.
The download is a zip file, which you will have to extract so that you can access psexec.
3. Run PSExec to Identify Remote Sessions
In a command prompt, navigate to where you downloaded and unzipped PSExec. Now you are ready to use psexec to remotely launch the qwinsta command on the host computer.
Type the following command:
psexec -u name-of-remote-computer\username -p “password” -s \\ip address of the remote computer qwinsta
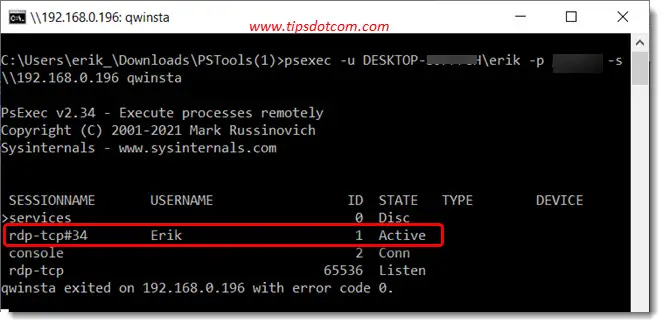
Please note that you must use a user account which has administrator privileges on the remote computer.
You should now get a list of the sessions on the remote computers, where you will see which session is active (or you can choose the console session if you want to shadow the console session in Windows 10).
Now you are ready to proceed to the next step, which will be to launch the remote desktop session.
4. Launch Remote Desktop With Shadow Parameter
In this example I’m shadowing a remote desktop session in Windows 10 without user’s permission. I will shadow session 1 as that was the active session in the previous step. The command is:
mstsc /shadow:1 /v:192.168.0.196 /prompt /noConsentPrompt
Obviously replace the ip address with the ip address of the remote computer that you want to shadow a session on.
The remote computer will now prompt for user credentials to log on to the session.
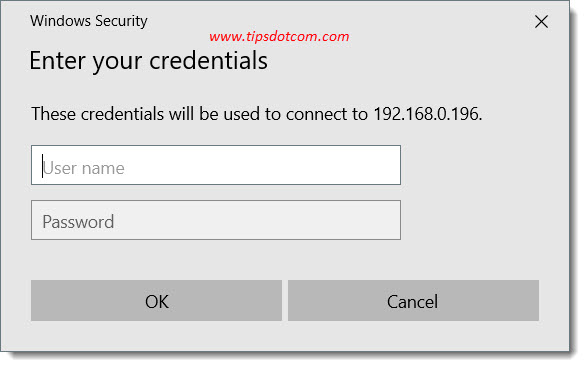
After providing the correct user credentials, we are now able to successfully shadow a remote desktop session in Windows 10:
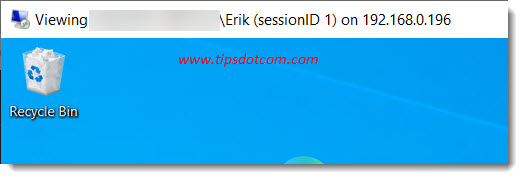
In conclusion we can say that it does take a bit of preparation before you can shadow a remote desktop session in Windows 10, but if you follow the steps described here, you should be able to get it done without any problem.
If you've enjoyed this article or found it useful, I'd appreciate it if you'd let me know by clicking the Like (or Share) button below. Thank you!


New! Comments
Have your say about what you just read! Leave me a comment in the box below.