Windows 10 Mail Gmail Settings
Getting your Windows 10 mail Gmail settings correct isn’t hard. Nevertheless, I receive a lot of questions about syncing Gmail accounts with Windows 10’s built-in mail program, so I decided to create this tutorial to help you out.
If you follow the step-by-step instructions laid out here, you’ll quickly see your Gmail messages appearing in your Windows 10 mail app and of course you’ll also be able to reply to your correspondents from your Windows 10 mail app.
There's one caveat though: you’ll need to know your Gmail account password in order to be able to set up everything correctly. (Tip: If you’re having trouble remembering all your accounts and passwords, check out my password manager software article).
Configuring Windows 10 Mail Gmail Settings
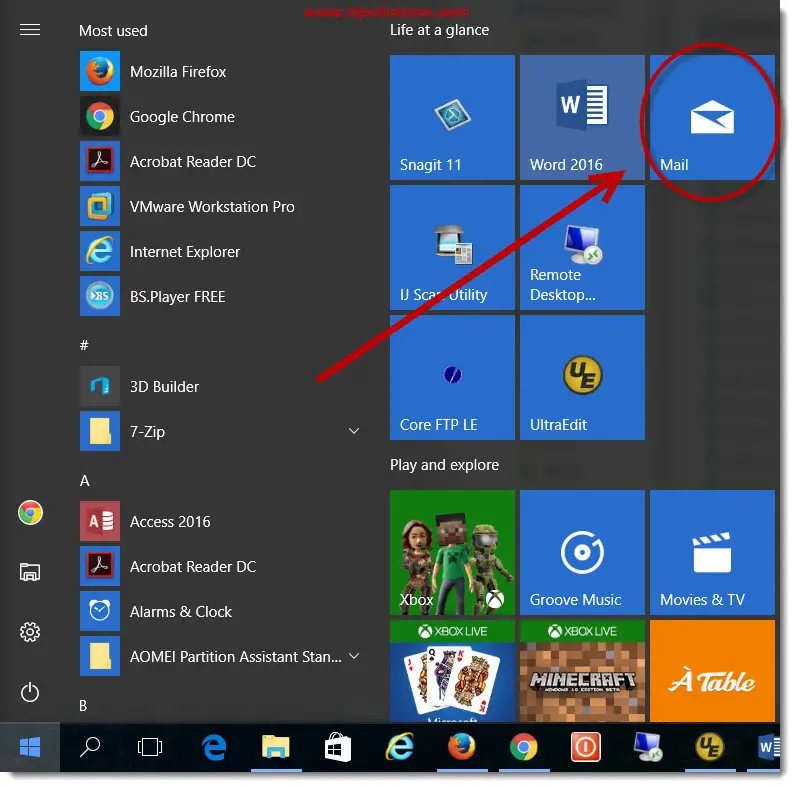
In order to get started configuring your Windows 10 mail Gmail account, launch your Windows 10 mail app. To do so, click your Windows 10 start button in the bottom left corner of your screen and click the mail app.
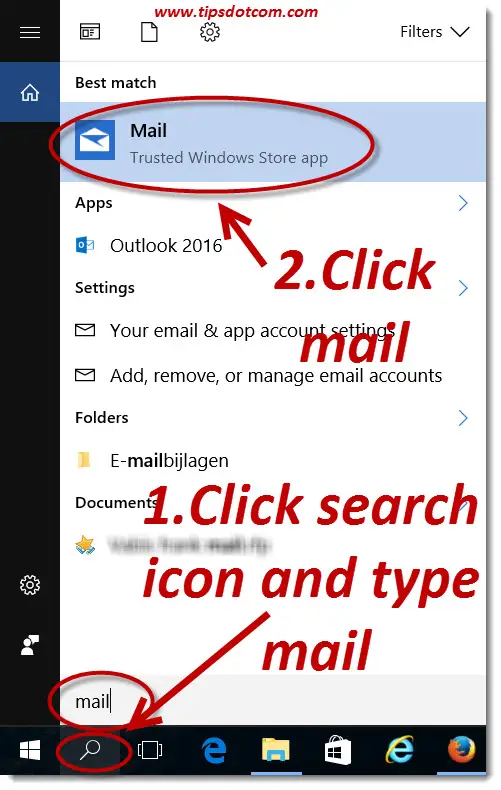
If you don’t see the mail app in your Windows 10 start menu, click the search icon and type “mail” (without the quotes) to find the mail app (see my computer tips and tricks tutorial article for the Windows 10 start menu if you don’t know how to add the mail app to your Windows 10 start menu). Click the mail app that appears beneath the “Best match” heading to launch your mail program.
Now with the Windows 10 mail app open, we’re ready to add the Windows 10 mail gmail settings.
Click the gear icon (like illustrated in the image below) to get started.
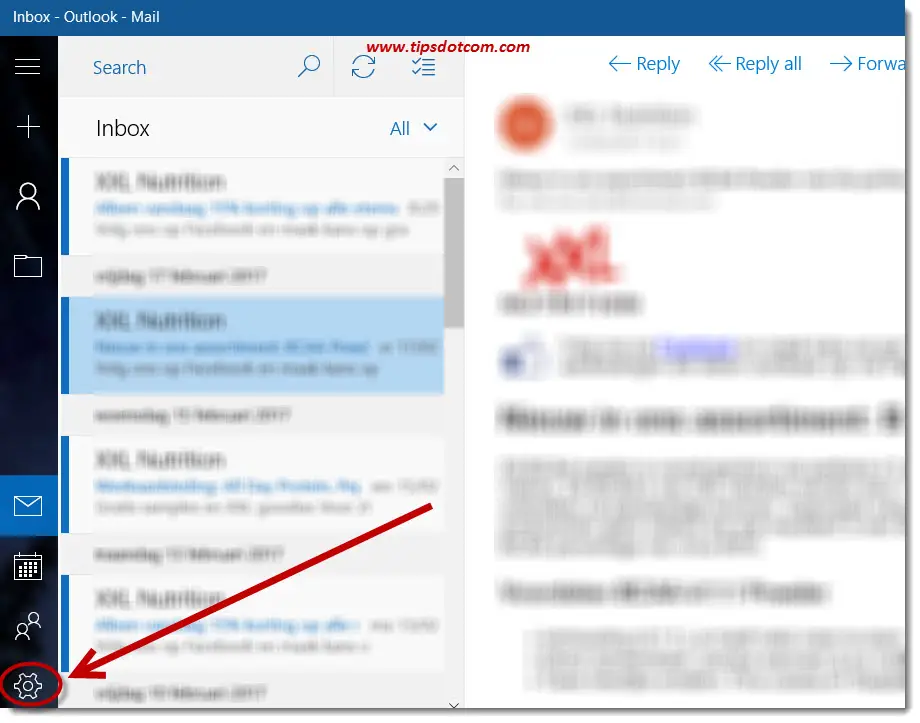
That will open up the settings panel. Click “Manage accounts” to proceed.

Now you’ll see the accounts section of your Windows 10 mail app. Any mail accounts that are already set up will appear in this screen. To continue adding your Windows 10 mail Gmail account, click “Add Account”.

Windows will now offer you a choice of types of e-mail accounts that you can add. Select “Google” to set up your Gmail account in your Windows 10 mail app.

Now you’ll see the “Connecting to a service” window, where Windows wants you to enter your Gmail e-mail address. Type your Gmail address and click the “Next” button.

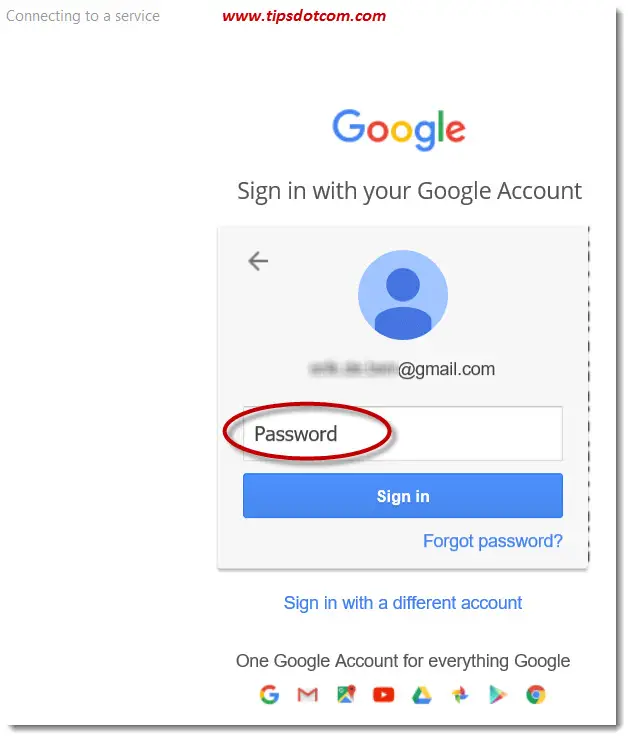
Then you’ll have to enter your password and click the button that says “Sign in” in order to proceed.
Now you’ll have to grant Windows access to a number of services to be able to continue. The reason for this is for instance if you want to delete one of your e-mails from your Gmail inbox via the Windows 10 mail app, the app will need permission to do this in your Gmail account.

After that Windows will inform you of the successful creation of your Windows 10 mail Gmail account so click “Done” to head over to your inbox.

In your inbox you should normally see the messages of your Gmail account.

If you see other messages in your inbox, that’s probably because you have more than one mail account in your Windows 10 mail app and you need to switch to the correct mail account. In order to do so, click the hamburger icon (the one with the three horizontal lines in the top left corner) to fold open the mail app’s menu. Then select the correct (Gmail) account from the ones listed.
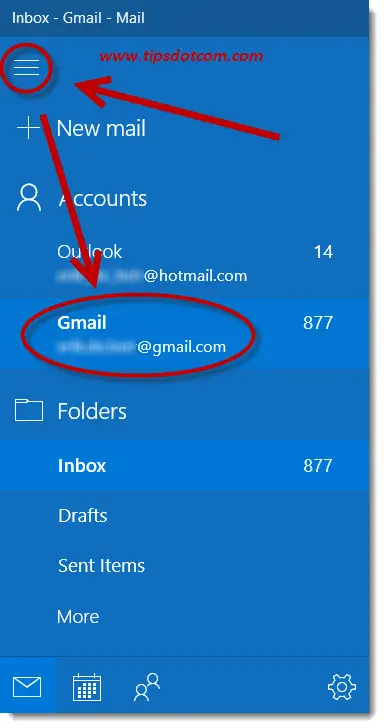
This way you can easily switch between accounts with your Windows 10 mail app. That’s basically how easy it is to set up a Windows 10 mail account to sync with Gmail.
I hope this tutorial helped you to set up your Windows 10 mail sync with Gmail. If it did please leave a short note in the section below, I’d appreciate it, thanks!
If you've enjoyed this article or found it useful, I'd appreciate it if you'd let me know by clicking the Like (or Share) button below. Thank you!


New! Comments
Have your say about what you just read! Leave me a comment in the box below.