Getting Your Windows 10 Print Screen Right
A good Windows 10 Print Screen says more than a thousand words. Even if this sounds cheesy it’s still true. But how do you do that and how do you get it exactly right? In this computer tips and tricks tutorial I will take you through print screen land and show you all the interesting corners. Taking a print screen is easy, but taking one that’s absolutely right makes all the difference and is actually just as easy.
So why not do it like a pro?
I mean, why just take regular screenshots when you can miraculously transform them into a contemporary knock-your-socks-off sophisticated vision of awesomeness?
Here’s what I will show you in this article:
- How to make a screenshot of your entire screen or portion of the screen
- How to make screenshots when working with multiple monitors / displays
- Adding text or notes in your print screen
- Capturing scrolling windows
Making A Simple Windows 10 Print Screen
The most basic approach to make a screenshot in Windows 10 is by using the PrtSc button on your keyboard.
Usually this key is located to the right of the numbered F1 to F12 function keys at the top of the keyboard. It’s the key marked with PrtSc and sometimes you’ll also find SysRq on the key. I’ve circled the key in red on the keyboard in the image below.
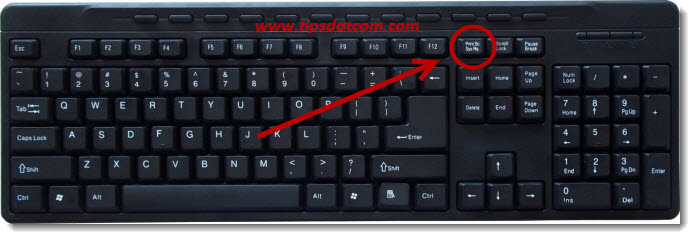
Whenever you want to make a Windows 10 print screen simply press the PrtSc button on your keyboard and then ...
... yeah then wat?
At first sight it may look as if nothing happens when you do that, but very likely your computer has a process that is doing something funky in between the software on your PC and the clipboard. (The clipboard is where stuff goes whenever you use the copy command in Windows to paste it somewhere else later on).
So, armed with this knowledge you now know that the results of the Windows 10 print screen key may reside on your Windows clipboard.
Best way to find out? Launch a program that knows how to deal with the graphical nature of the pixels that make up the image of your screenshot. One that’s included in Windows 10 is “Paint”, so let’s launch Paint to take a look at the picture of your screen.
To make that happen, click the magnifier glass in your task bar and type “Paint” (without the quotes). Then click the Paint desktop app below “Best match” (as shown in the image below).
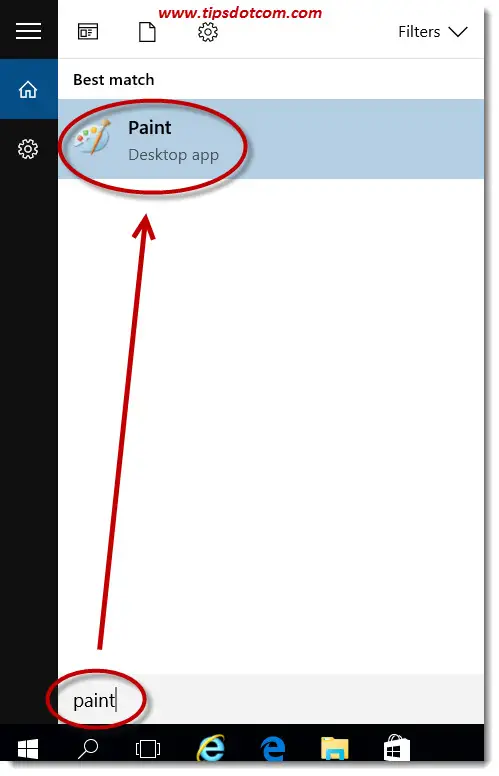
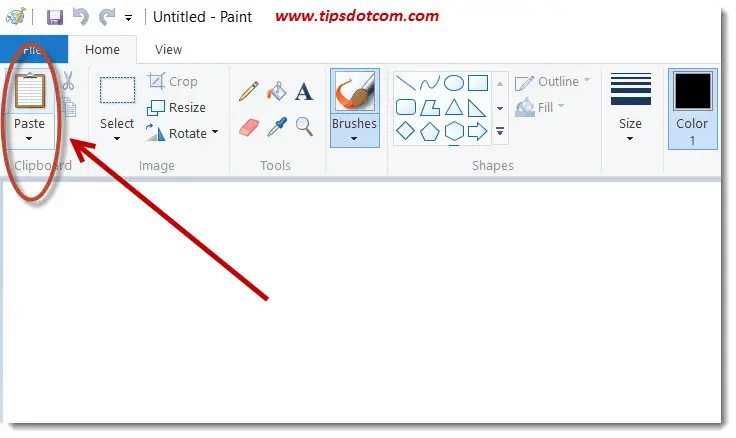
As a result, Pint will open with a new, untitled document. The first command on the ribbon in the “Home” tab is “Paste”, which you can click to paste the image from your Windows 10 print screen command.
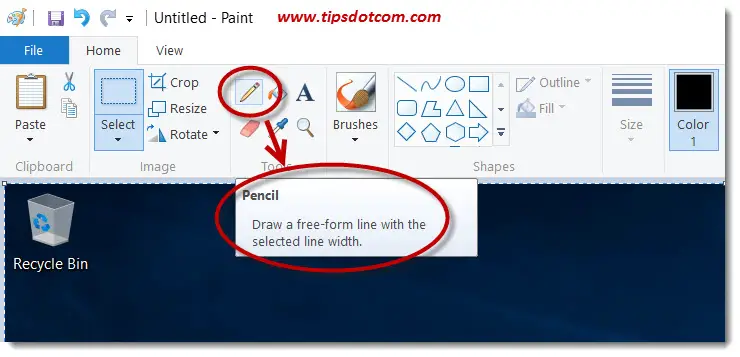
In the image below you can see how that resulted in the image of my desktop with the Recycle Bin in the top left corner.
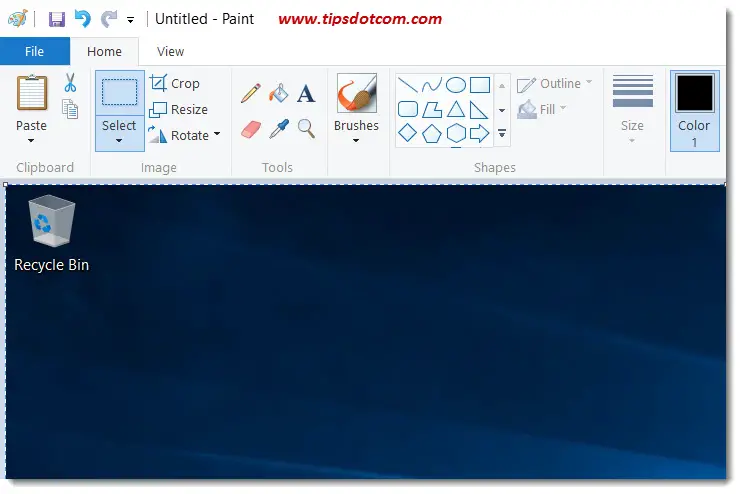
The ribbon in Paint is populated with a number of tools that you can use to edit you screenshot. The pencil icon, for instance, allows you to draw lines with the mouse. There’s also an entire range of shapes that you can use to further enhance your image. In addition to that, you can click the "A" to add text in your image.
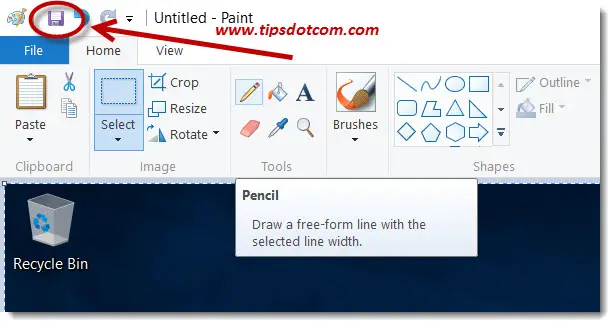
Exploring all the possibilities of Paint here would lead us too far, but if you need to save your screenshot in a file (for instance to send it to a recipient as an e-mail attachment), you can click the little disc icon in the top left corner to save your Windows 10 print screen file.
Selecting Only A Portion Of The Screen
The PrtSc button works fine if you need to take a screenshot of your entire screen. Sometimes this is fine, but there may be situations where you only need a certain area of the screen. Also, if you’re working with multiple displays, you’ll notice that the PrtSc button captures an image of your entire (extended) screen, including everything that’s visible on ALL your displays.
More often than not this is not what you want. You can use the ALT + PrtSc keyboard combination if you want to make a screen image of only the active window.
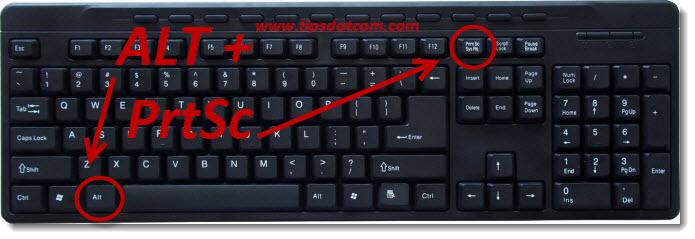
With this technique you can resize your active window to a smaller size before you make the Windows 10 print screen. You’re still confined though to the shape and size of the active window.
Another option, which allows you to define more freely which area of the
screen you want to capture, is to use the Windows 10 snipping tool. The
sniping tool allows you to drag with your mouse over any area of your
screen and make a screenshot of that. (If you want to find out more about the snipping tool or Snip & Sketch, feel free to check my article on Windows 10 snipping tool here).
In order to launch the snipping tool, click the search icon in your Windows 10 task bar and type “snipping” (without the quotes). Then select the snipping tool desktop app right beneath the “Best Match” heading.
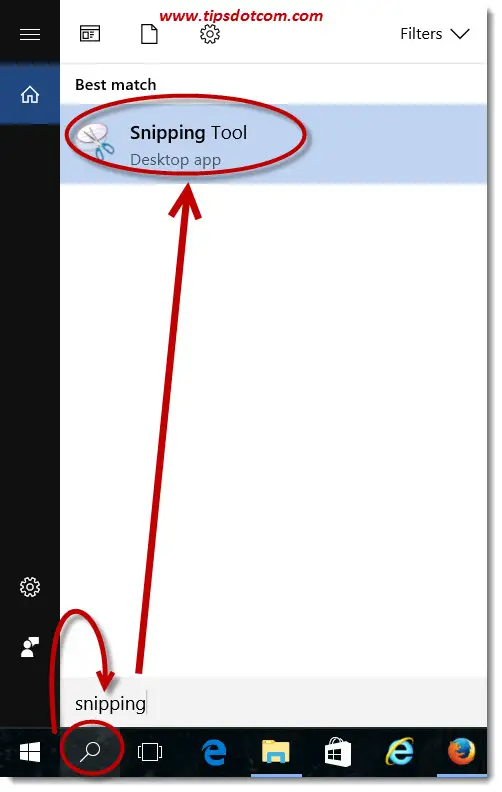
Windows will now open the snipping tool which allows you to select any area of your screen to make a screenshot.
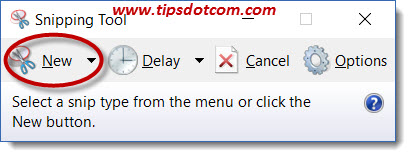
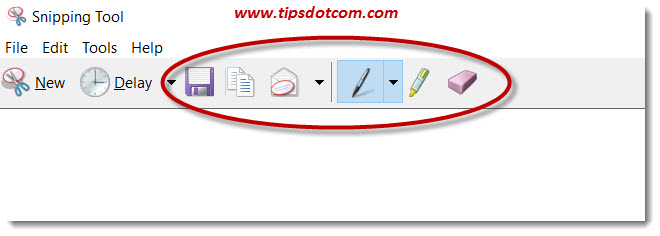
As soon as you drag over an area to make your print screen, the snipping tool adds a number of editing tools in its menu (the pencil icon already looks familiar and the disk icon also allows you to save your screenshot in a file).
Even More Advanced Screenshots
The techniques described above all allow you to make Windows 10 print screen images for free. You don’t need any commercial software to make decent screenshots.
However, for certain rather specific screen capturing needs you can still turn to commercially available software that will take your Windows 10 print screen capabilities to an even higher level. One example where the Windows 10 snipping tool won’t be able to help you is when you need to capture an image of a webpage where you need to scroll in order to see the entire page. The snipping tool won’t let you capture that as a whole.
A commercially available software solution that I like to use is called Techsmith’s Snagit. (All screenshots on this site are made with Snagit). Beside capturing screenshots from scrolling windows, Snagit also includes features to add watermarks, capturing multiple areas of the screen, capturing fixed regions and more.
Snagit is not free, but you can start with a free trial version that allows you to check out whether the software will do what you need it to do before you need to purchase a license.
I hope this article was helpful, please leave a short message below if it was. I would appreciate it a lot, thanks!
If you've enjoyed this article or found it useful, I'd appreciate it if you'd let me know by clicking the Like (or Share) button below. Thank you!


New! Comments
Have your say about what you just read! Leave me a comment in the box below.