Starting With The Windows 10 Start Menu
The Windows 10 start menu is back! Microsoft’s previous version of Windows (Windows 8) came without a start menu and featured a start screen with larger app tiles that nobody really liked. Microsoft has listened and put the start menu back in Windows 10. The bad news is: it’s different.
Indeed, the new start menu in Windows 10 looks a bit different from the start menu in your earlier version of Windows, but it works almost identically. Click the start button in the bottom-left corner of your screen and the start menu appears, giving you an overview of all programs and apps that are installed on your computer.
Getting To The Windows 10 Start Menu
Getting started with Windows 10 is easy: as soon as you power up your pc, Windows 10 will load to greet you with a locked screen, which could look a little like the image below.
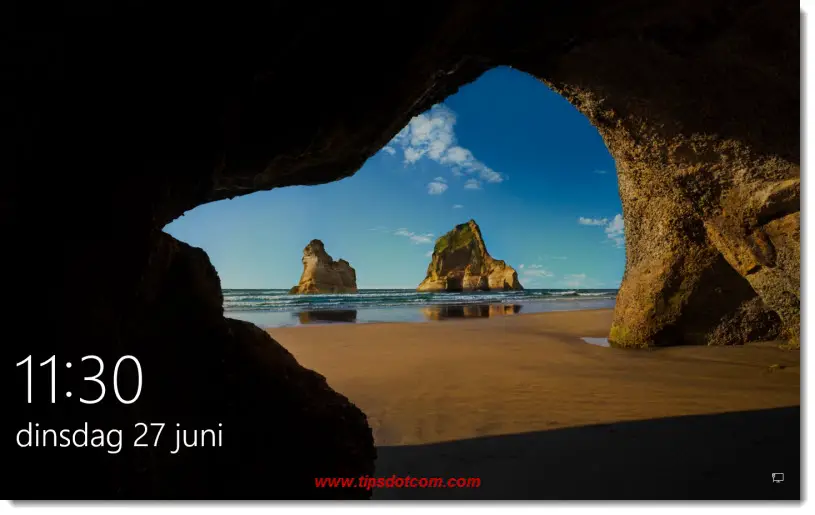
This is called the lock screen. (The terminology can come in handy, for instance if you want to search for ways to change the lock screen wallpaper).
Windows doesn’t really offer a clue on how to get started, but as soon as you click any mouse button or press any key on your keyboard, the lock screen slides away. On touch screen devices, you can simply tab the screen to slide the lock screen out of the way.
When you do, Windows wants you to sign in by clicking your user account or the “sign in” button and entering your password.
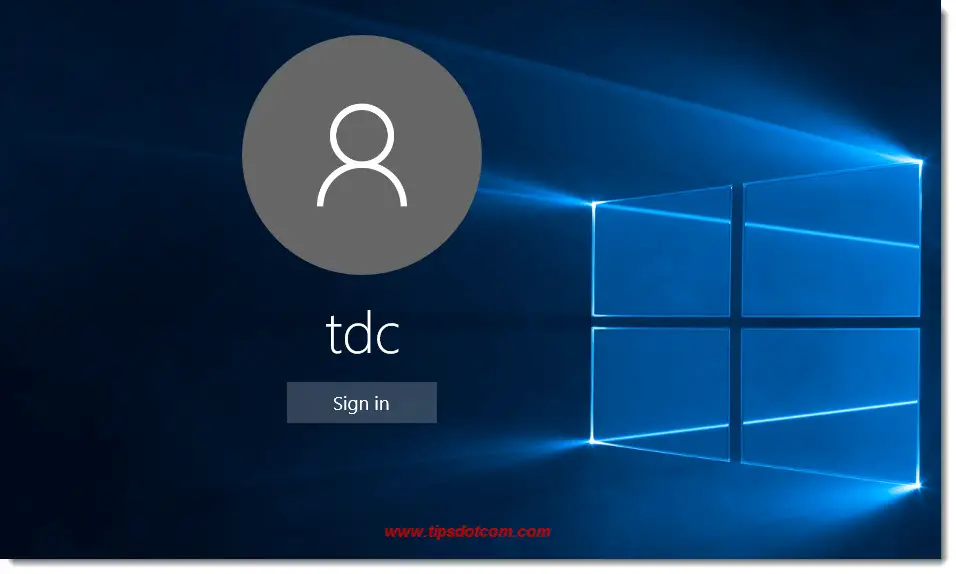
Depending on your particular situation, several scenarios are possible:
- You see your name and e-mail address. If that’s the case, type your password to sign in to Windows. You’ll find your Windows 10 start menu as you left it.
- You don’t see your name but you do have an account on the computer. Look in the bottom-left corner of your screen. There’s a list of accounts on the computer.
- If you’re on a
computer you’ve recently bought with Windows 10, use the account that
you created when starting the computer for the first time. Windows 10
lets you create an account during the setup process when you first power
up your new computer.
For a better understanding of working with multiple accounts, please refer to my article about Windows user accounts.
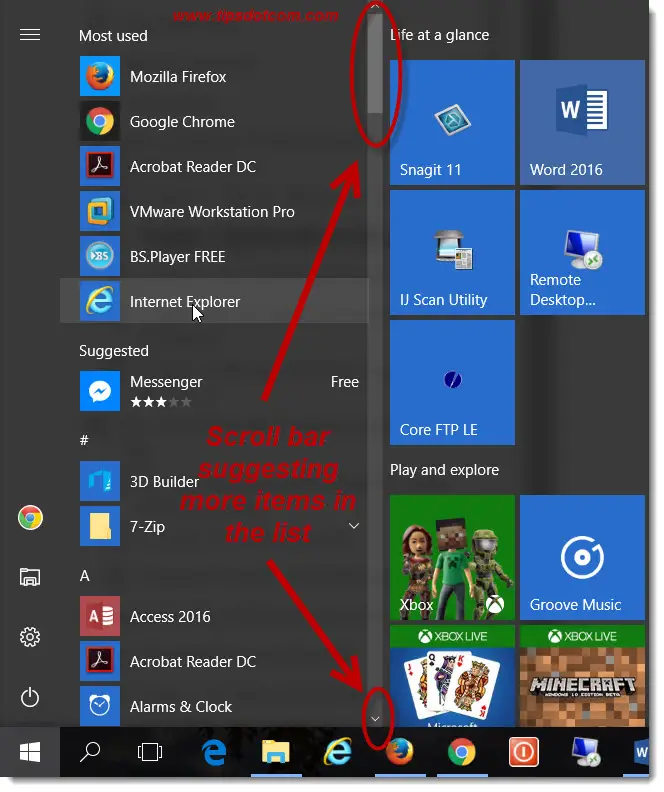
Once you are signed in in Windows 10, getting to the Windows 10 start menu is easy: click the Windows 10 start button in the bottom-left corner of your screen to open the start menu. This is what the start menu looks like on a desktop computer.

The right-hand side of the start menu combines a number of tiles that you can use to start apps or programs on your computer.
The left side of the start menu displays the stuff that you most recently used on your computer, along with an alphabetical listing of programs that are installed on your computer.
The Windows 10 start menu looks a little bit different from the start menu in previous Windows versions. One of the reasons is that Windows 10 was designed to run on both desktop computers and tablets. Windows 10 can run in tablet mode (you can switch tablet mode on or off) so if you are using it on a tablet and in tablet mode, the start menu will look a bit different from the start menu in desktop mode. (below is an image of the start menu in tablet mode).
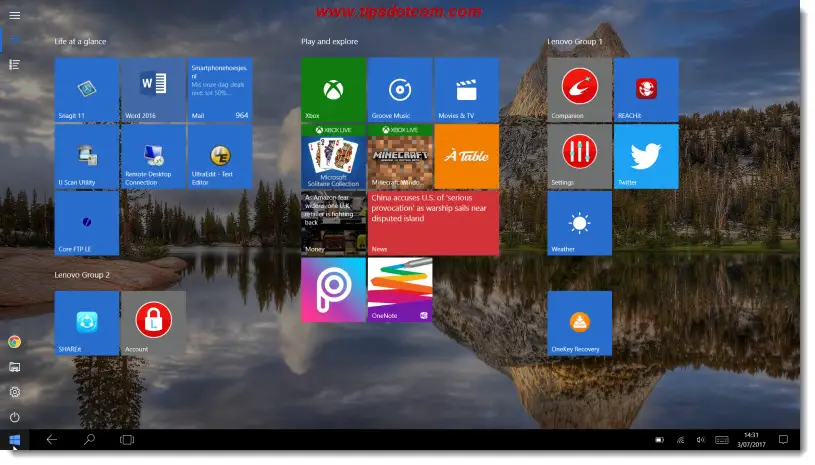
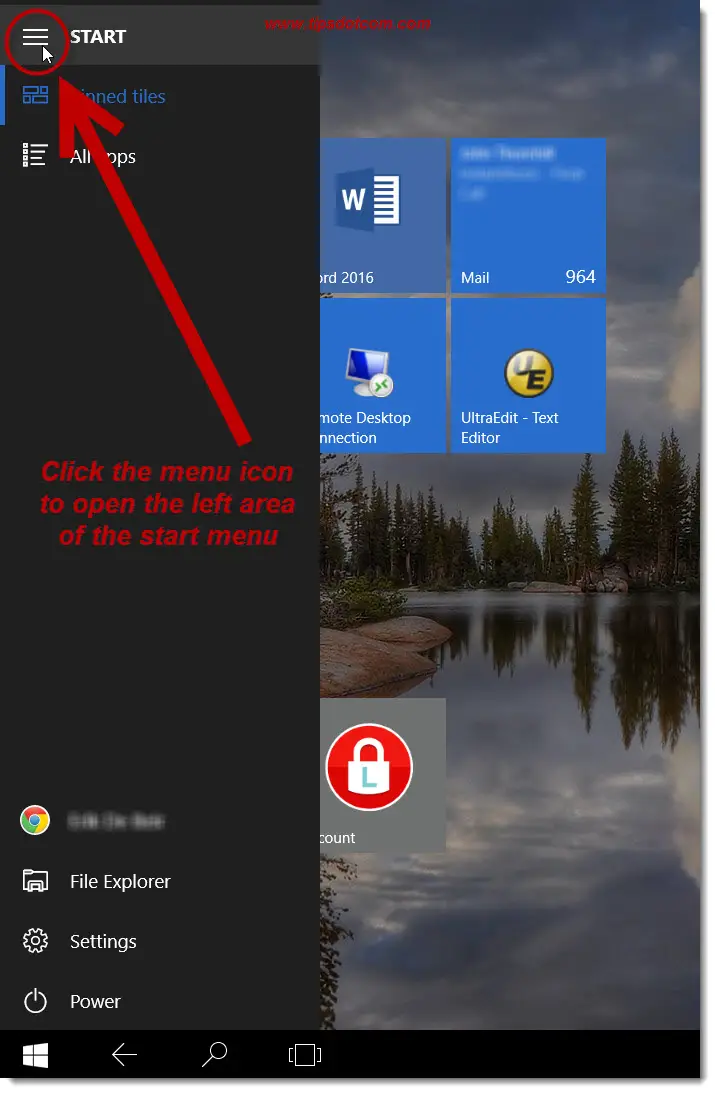
In tablet mode, the start menu will cover the entire screen and the left panel with recently used stuff isn’t visible right away. In order to pull up the left panel, tap the menu icon on the top-left corner of the screen.
The tiles in the start menu represent apps or programs that you can
start on your computer and some of the tiles in your start menu may be
dynamic tiles. This means that they are constantly updating to reflect
the latest status, for instance showing your next appointment in your
calendar app or displaying the first few lines of recent mail messages.
Your start menu will change if you add or remove programs on your computer, or as you go along and customize the start menu.
Why don’t you go ahead and try to launch any of the programs on your start menu by clicking the program’s tile. If you can’t find the program you’re looking for, try scrolling through the alphabetical list of programs in your Windows 10 start menu.
You can open or launch multiple apps or programs and have them running on your computer, but typically, the last program you’ve launched will cover your screen, hiding other open apps from the view.
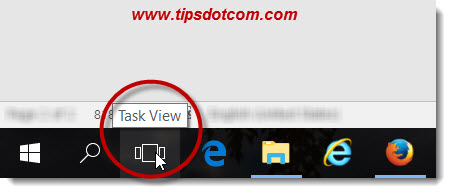
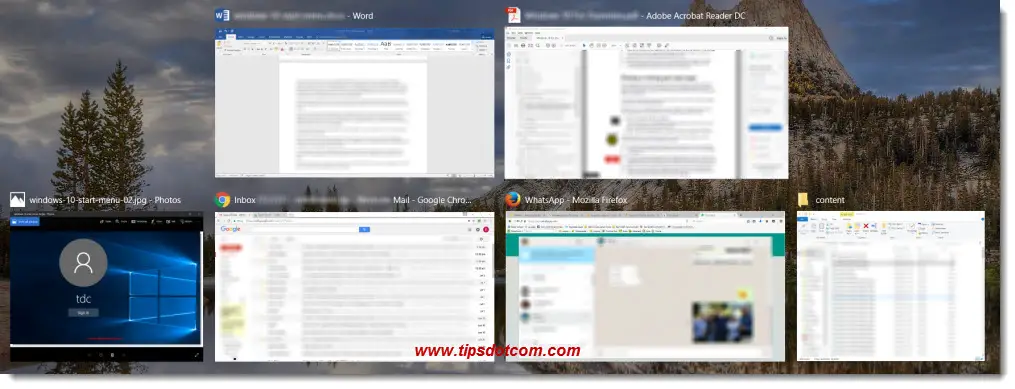
In order to switch from one app to another, you can click the “task view” icon in your taskbar, which will give an overview of open apps on your computer.
You can then click any of the apps or programs in the overview to switch to that particular program.
Apps or programs that are currently open on your computer also appear on your Windows 10 taskbar (the horizontal bar at the bottom of your screen). You can also switch to any program by clicking its icon on your taskbar.

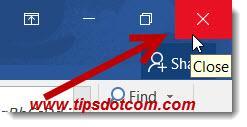
To close an app or program, click the “X” in the top-right corner of the program window.
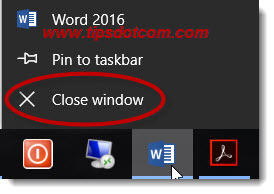
Alternatively, you can also right-click the app’s icon on your taskbar and select “close” from the menu.
Adding Or Removing Stuff In The Windows 10 Start Menu
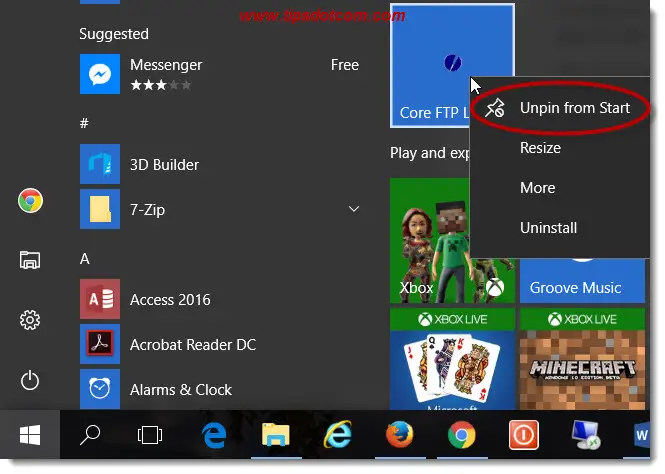
Removing items from your Windows 10 start menu is easy: simply right-click the item and select “Unpin from start”.
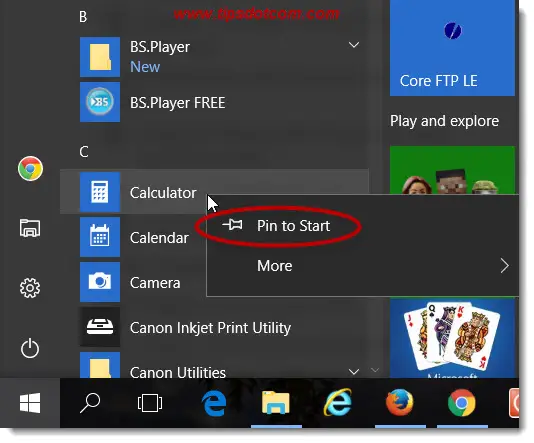
To add a program to your start menu, click the start button in the bottom-left corner of your screen, scroll through the alphabetical list of programs and right-click the program you want to add to your start menu. Then select “Pin to start”.
Organizing Your Start Menu
Now that you know a bit more about the tiles and programs on your start menu, one of the next things you can do is take a look at how to get things more organized.
You can create groups of related programs, name these groups and move them around on your start menu in any order you like.
Maybe you’ve already noticed the “Life at a glance” group and “Play and explore” that Windows 10 has created for you in your start menu.
Tiles that belong to a group are separated from other groups by having slightly more space between them. You can easily move program tiles into groups, move entire groups around in your start menu, rename groups or get rid of the “Life at a glance” and “Play and explore” sections if you don’t like them.
It’s easy to organize your Windows 10 start menu according to your own preferences. Please refer to my next free tutorial about customizing your Windows 10 start menu to learn all about it. If you like this tutorial, please leave a short comment in the section below, I’d appreciate it a lot, thanks!
If you've enjoyed this article or found it useful, I'd appreciate it if you'd let me know by clicking the Like (or Share) button below. Thank you!


New! Comments
Have your say about what you just read! Leave me a comment in the box below.