Windows 10 System Restore Point
The settings to create a Windows 10 system restore point are disabled by default in Windows 10. That's because with Windows 10, you have a number of newer refresh and reset programs at your disposal which are pretty powerful in case you need to troubleshoot your computer. I talk about these programs more in detail if you follow the link above, but in case you're still interested in creating a restore point you can read on here. It never hurts to create a Windows 10 system restore point. Especially right before you install a new piece of software or connect new hardware, creating a system restore point can help prevent many headaches. Next to a full system back up, a system restore point can be used to return your computer to the peaceful state of mind it used to be in before you got into trouble.
As said, Microsoft is phasing out the infamous system restore points that have helped thousands of people get out of trouble even since the introduction of Windows XP and is now moving towards the newer Refresh system. Knowing how restore points work and how you can create your own restore point will never hurt though and in some cases might even prove to be your only hope of recovery when things really go south.
Create Your Windows 10 System Restore Point
In order to create a system restore point, click the Windows 10 start button and type “system restore”. Windows’s search system will show “Create a restore point” under the “Best match” heading even before you are finished typing.
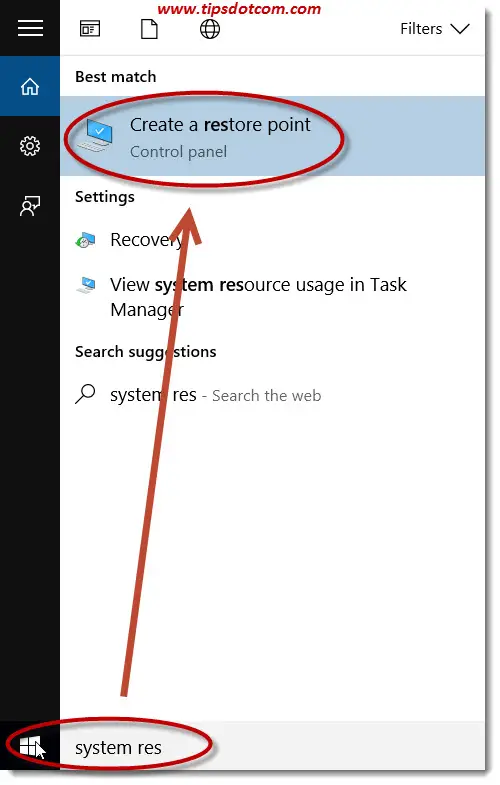
Click the “Create a restore point” link under best match to continue.
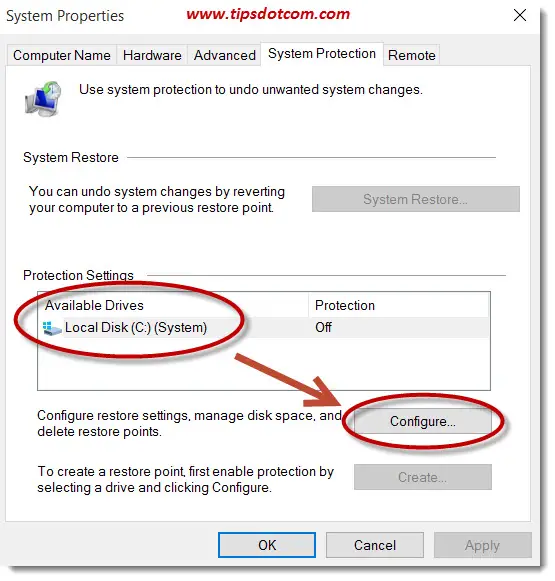
Windows will then show the system properties screen with one or more available drives in the section under “Protection settings”. By default, the button to create a restore point is greyed out, which is in line with what I wrote above about system restore being replaced by other recovery options. Click your local system disk (usually drive c:) and then click the button “Configure” to proceed with the system restore utility.
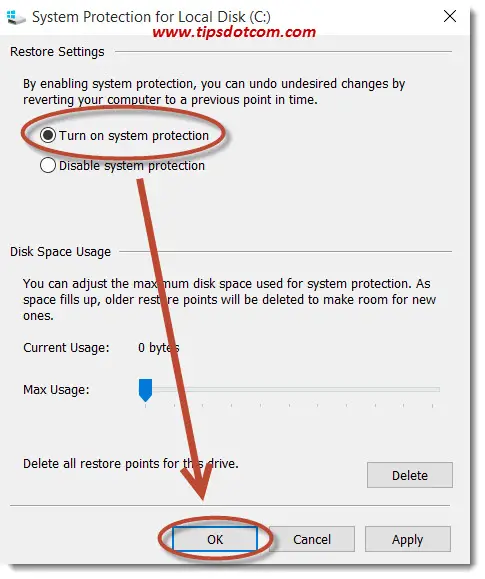
That will open the system protection window for your system drive. Select the radio button next to “Turn on system protection” and then click the ok button.
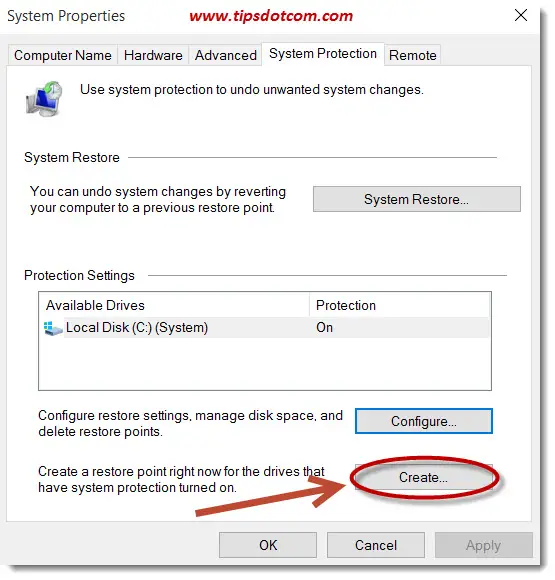
Now you will land once again in the system properties screen, but this time the button that says “Create” to create a restore point will be activated so you can click that in order to create your system restore point.
Type a name for your restore point, for instance “created before installing firefox” so that you will easily recognize why the restore point was created later on.
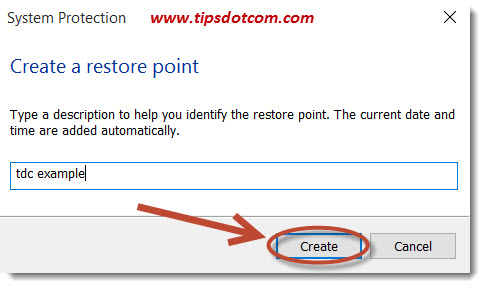
Windows will then create the restore point that you can use later on for troubleshooting in case your computer doesn’t run well anymore.

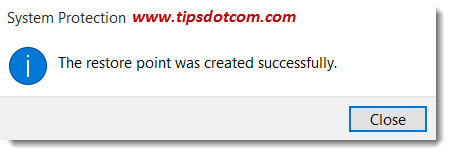
After a while Windows will inform you that your restore point is ready.
This is in short how you can create Windows 10 system restore points. Feel free to leave a comment below to share how this worked out for you. I'd appreciate it, thanks!
If you've enjoyed this article or found it useful, I'd appreciate it if you'd let me know by clicking the Like (or Share) button below. Thank you!


New! Comments
Have your say about what you just read! Leave me a comment in the box below.