Windows 10 User Management
One computer, several different users. Understanding Windows 10 user management is key to a smooth computer experience in this scenario. Setting up separate user accounts on your Windows 10 computer is easy and keeps everybody’s work separate. You can work with your documents and e-mails in your own private environment and sign out when you’re ready. During this break, somebody else can work on the computer and later, when you sign back in, you’ll find everything waiting the way you left it.
No more frustration when household members mess up your documents or destroy folders while playing games and no more missed e-mail messages if everybody has their own, personal e-mail inbox.
Using a password not only takes care of your privacy, but also avoids trouble if your account is linked to your credit card. A good password will also keep you out of trouble with unexpected game charges or online purchases you didn’t do.
Working with Windows 10 user accounts is your answer to a more streamlined digital life.
Understanding Windows 10 User Management

With Windows 10 user management you’ll introduce yourself by clicking your username so that Windows can present your desktop, documents, favorites, e-mail program and other personal stuff exactly the way you left them, ready for you to continue working the way you want.
When starting your computer, Windows 10 will show the different users accounts you can choose from to identify yourself on the computer.

If you don’t see a similar user selection screen at startup on your computer, don’t worry. That means that there’s only one account set up on your computer so Windows automatically takes you to the desktop of that account.
Nothing wrong with that, you just need to set up an additional account for every other user that will be working on the computer (if you want to keep files, music, pictures, emails and other stuff separated). From that moment on, you’ll also be given the user account selection screen at startup so that you can click your own user account and identify yourself with your password. You’ll also be able to personalize your account with your picture if you want to.
Creating A New User Account
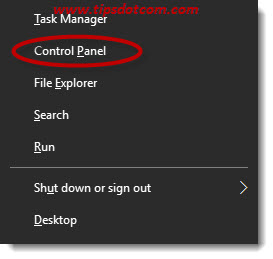
To create a new user account, press the Windows logo key + x on your keyboard.

In the quick links menu, select “Control panel” to open up the Windows 10 control panel.
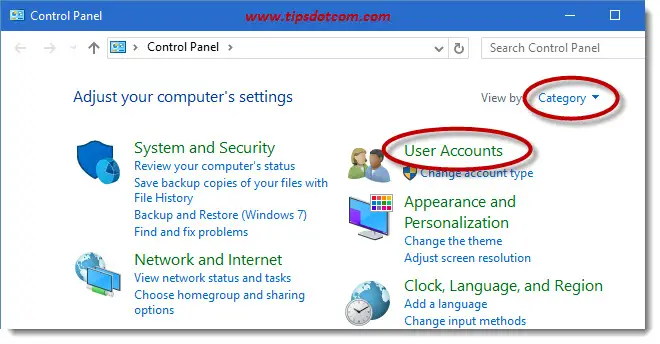
In control panel, make sure that “view by” is set to “Category” and select “User accounts”.
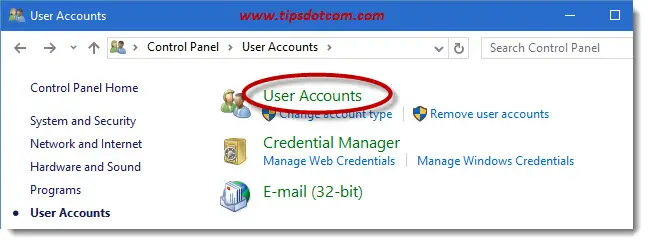
Then, in the user accounts screen, once again click “User accounts” to go to the next screen.
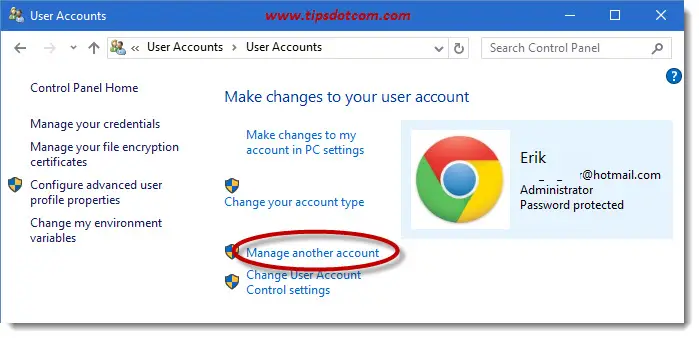
In the next screen, click “Manage another account” to continue.
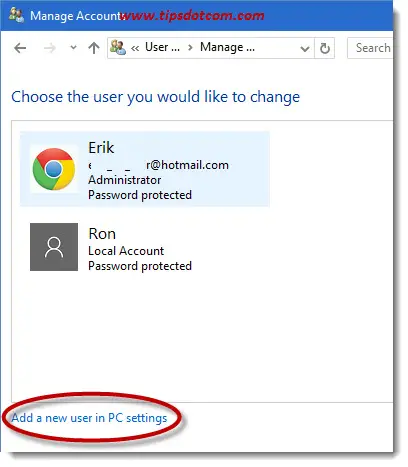
The “Manage accounts screen” will now display showing the user account(s) that currently exist on your computer. Users accounts with administrator privileges are displayed with the word “Administrator”. Click the “Add a new user in PC settings” link at the bottom of the window to proceed.
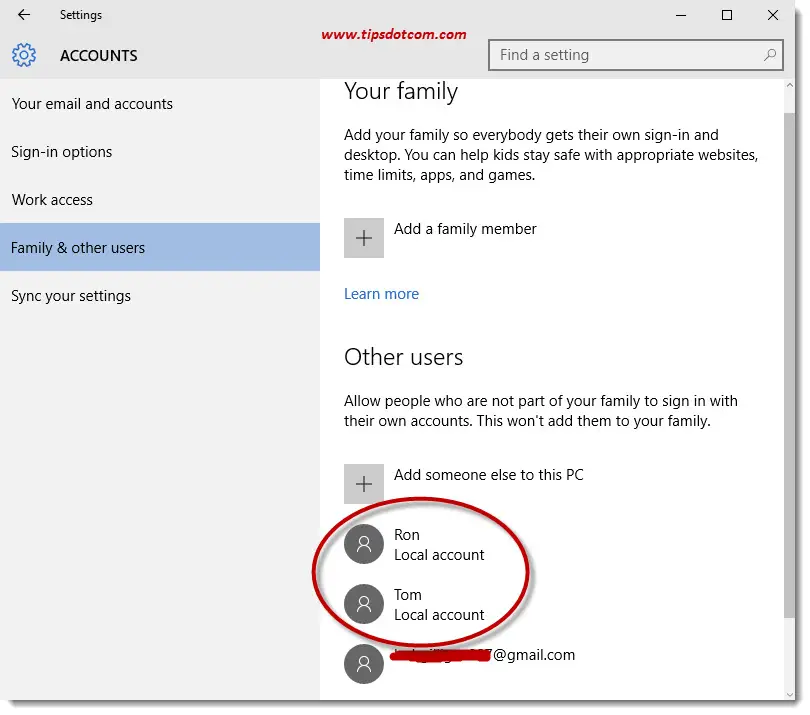
In the next screen you’ll notice two sections: “Your Family” and “Other Users”. The former allows you to create a user account for your children or spouse with the option of setting up parental controls for the account. You can read more about this in my article on Windows 10 family features.
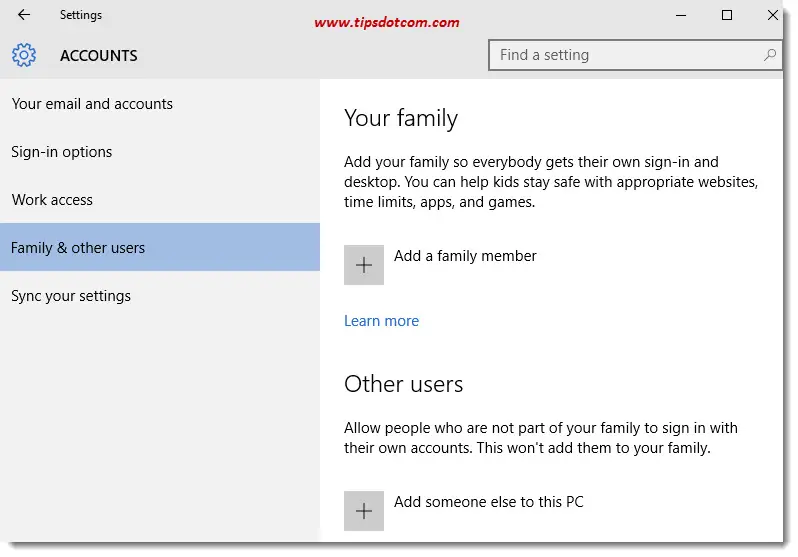
Here I continue with the option to “Add someone else to this PC” under the "Other users" section, which opens up the next Windows 10 user management screen where you will be asked about the sign in habits of the person using the account.
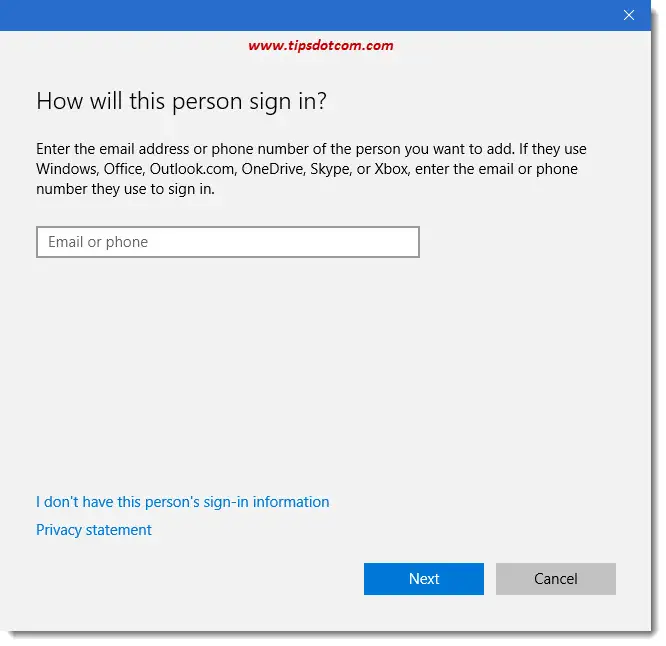
Two scenarios can unfold here. Either the user account you want to add in Windows 10 user management is a Microsoft account or the user you want to add is someone who doesn’t have a Microsoft account. (If you’re not sure what a Microsoft account exactly is you can read about it in my article about creating a Microsoft account).
Scenario 1: Adding A User With A Microsoft Account
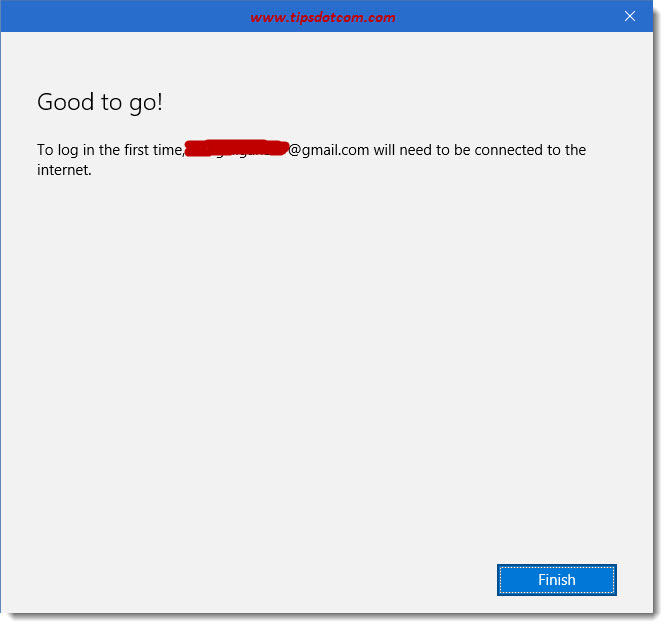
This is the simplest of the two scenarios. All you need to do is enter the e-mail address associated with the Microsoft account and click next.
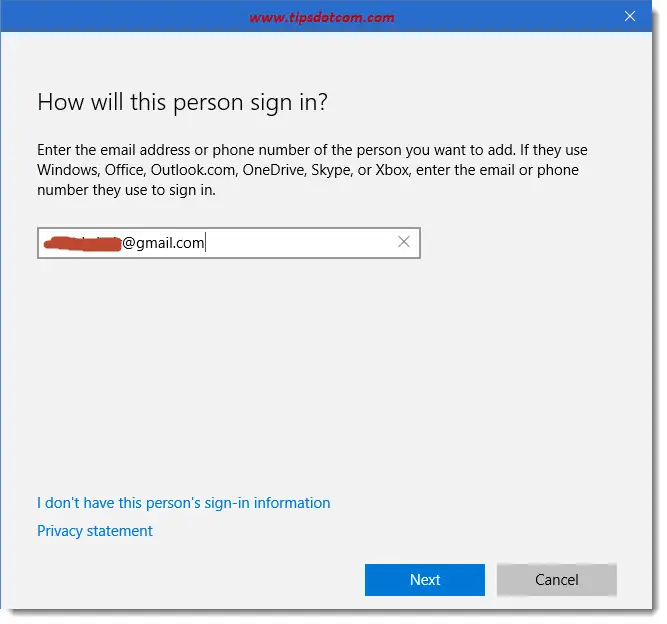
Microsoft can find all the information it needs in the Microsoft account
data and will swiftly inform you that the computer is ready to be used
with the newly added user account.
Scenario 2: Adding A User With A Local Account.
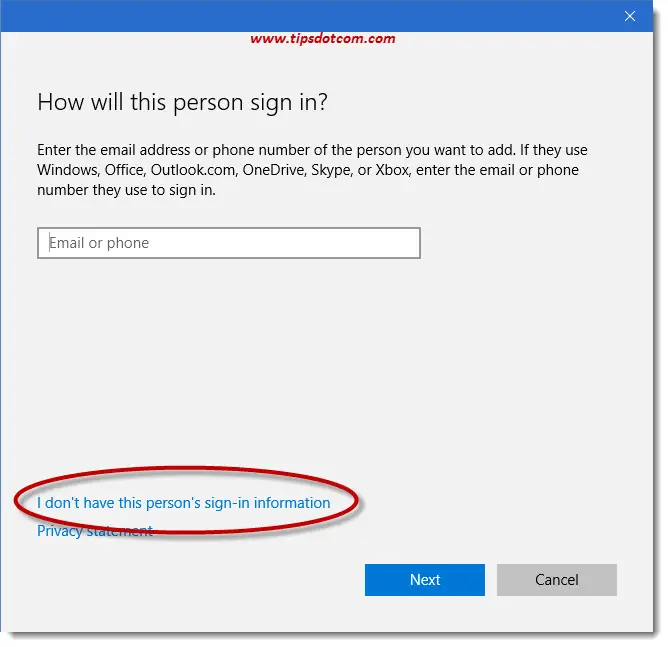
To add a user with a local account, click the link that says “I don’t have this user’s sign-in information” in the “How will this person sign in” screen.
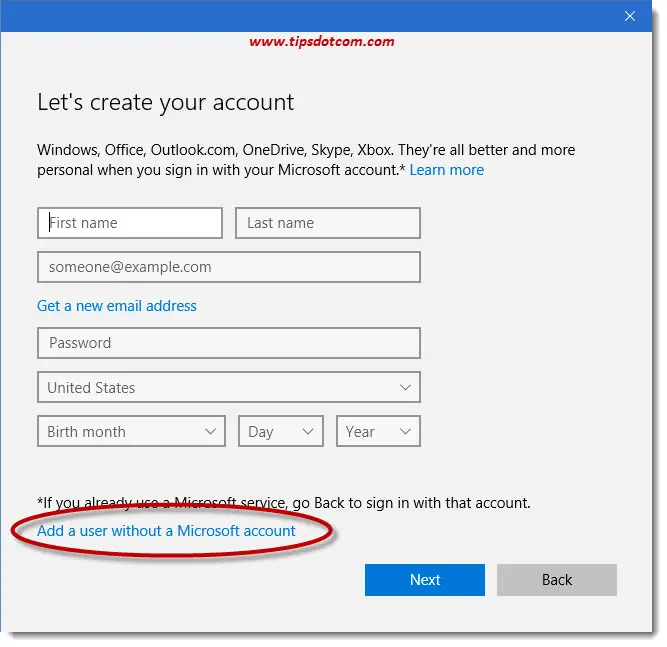
In the next Windows 10 user management screen you’ll find the link to create a local account without a Microsoft account (pretty much like in previous versions of Windows).
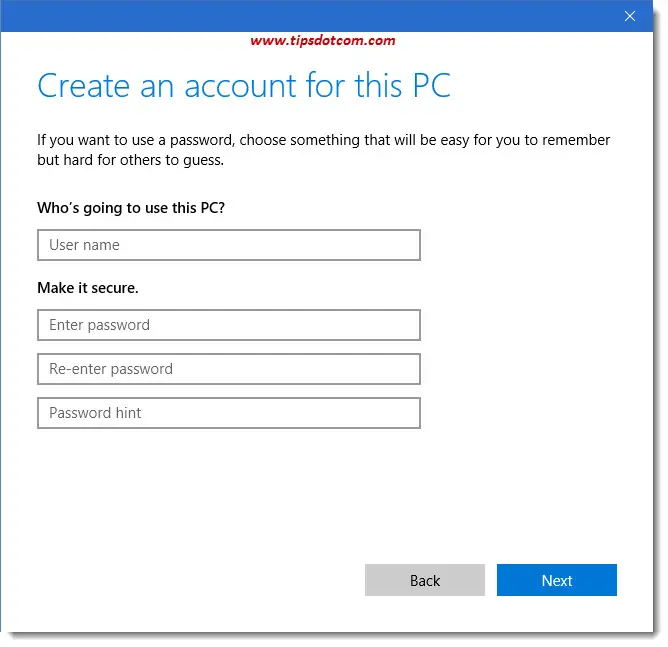
When creating the account, enter the username for the account and a password to secure the account on the computer. You also have to enter a password hint before you can continue. The password hint will appear on screen whenever you try to log on to the account with a wrong password.
When this is done you’ll see the account you just created along with any other accounts that currently live on the computer and the words “local account” next to the accounts that aren’t Microsoft accounts.
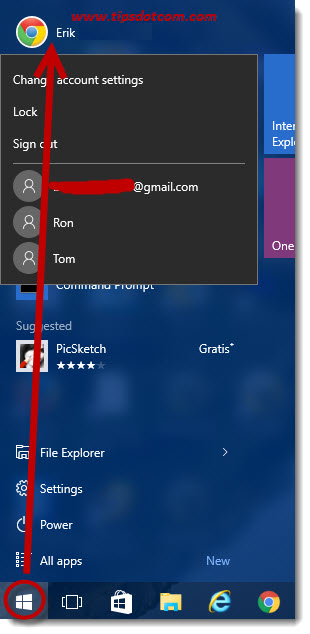
You can switch between users by clicking on the Windows start button and then clicking on the account name at the top of the Windows 10 menu. There you can click to sign out or click one of the other accounts listed to switch to another user account.
In conclusion I'd like to say that creating separate user accounts with Windows 10 user management is one of the most basic computer tips and tricks that helps people to keep their private files and e-mails organized in their own "space", eliminating issues and frustration. If you found this article helpful, please leave a short message in the section below, I'd appreciate it, thanks!
Interested in more? Why not sign up for my free newsletter on my tips and tricks homepage?
If you've enjoyed this article or found it useful, I'd appreciate it if you'd let me know by clicking the Like (or Share) button below. Thank you!


New! Comments
Have your say about what you just read! Leave me a comment in the box below.