Windows 11 Start Menu Back to Windows 10
Setting the Windows 11 start menu back to Windows 10 is one of the first concerns people seem to have when they work with Windows 11 for the first time. The Windows 11 start menu doesn’t have the live tiles with dynamic content that were characteristic for Windows 10 and also it’s situated in the center of the screen rather than on the left.
There are a few settings and tweaks that you can use to modify the Windows 11 start menu, but if you really want your Windows 11 start menu like Windows 10, you’ll have to use Explorer Patcher to get the job done.
Don’t worry if this sounds complicated, in what follows I’ll show you exactly how you can change your Windows 11 start menu and I’ll show you what Explorer Patcher is, where to get it and how to use it.
Let’s jump right in.
Windows 11 Start Menu Classic Layout
As mentioned before, to set your Windows 11 start menu back to Windows 10 requires the help of a utility called Explorer Patcher, but before we get into that, let’s first take a look at the built-in possibilities that Windows 11 has to offer you.
Here’s an image of what the Windows 11 start menu typically looks like, positioned in the center of the screen.
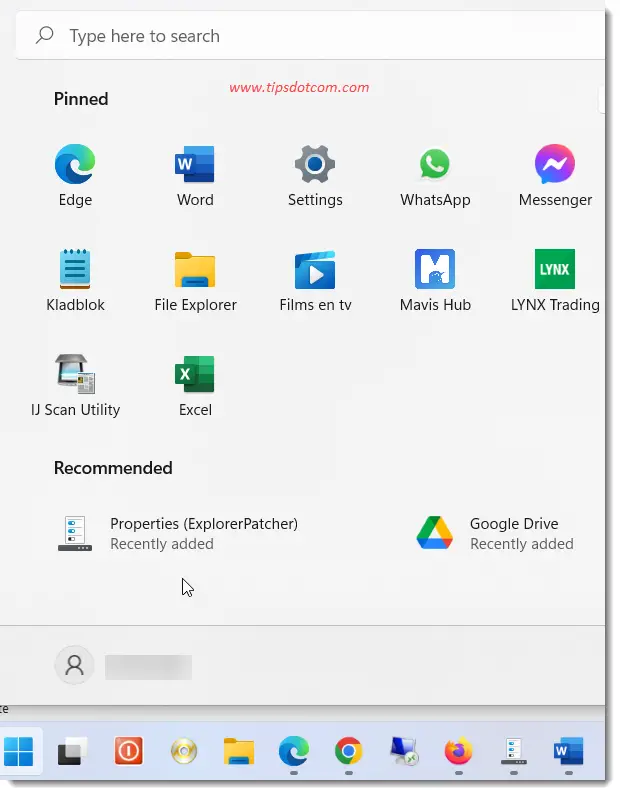
You’ll recognize the “Pinned” and “Recommended” section, which are characteristic for the start menu in Windows 10. Both of these sections have received quite a bit of criticism and if you prefer to have these removed, I have two separate articles that describe in detail how to deal with them (Windows 11 start menu recommended icons and Windows 11 start menu pinned icons).
Besides the recommended and pinned sections, the fact that the Windows 11 start menu sits in the center of the screen seems to be bothering quite a lot of people. If you prefer to have the start menu at the left, like the classic Windows 10 start menu, there’s a setting for that.
Let’s see how that works.
How to Position The Windows 11 Start Menu at The Left of The Screen?
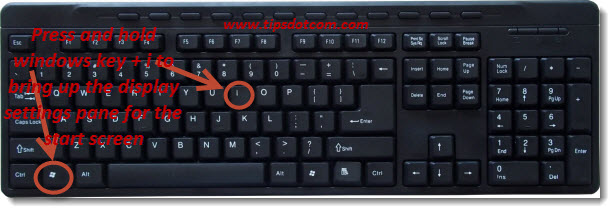
1. Press the Windows logo button + i on your keyboard to go to the settings menu.
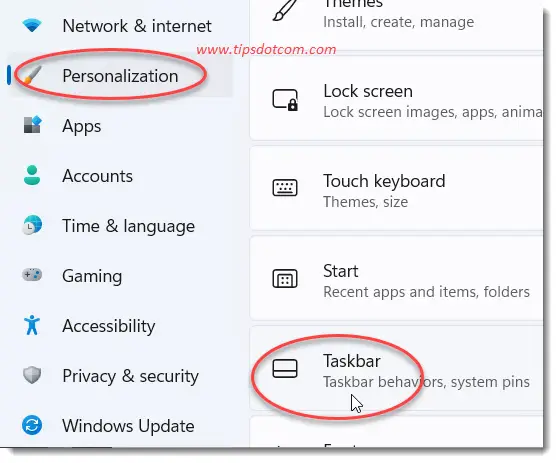
2. In the settings menu, click on “Personalization” and then “Taskbar” (you may have to scroll down a bit to get to “Taskbar”).
3. In the taskbar settings, scroll down to where you see “Taskbar behaviors” and click on “Taskbar alignment”. This is where you can choose between “Left” or “Center” for the Windows 11 start menu position.
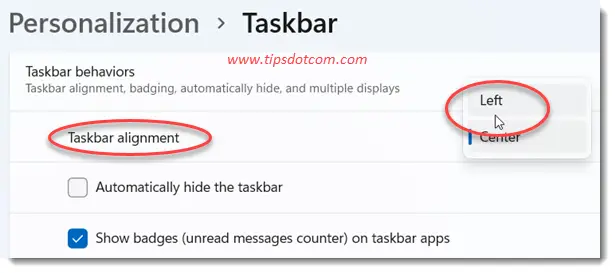
That puts the Windows 11 start menu back in the left corner, like with the classic Windows 10 start menu.
So now the position has changed, but the start menu still doesn’t look very much like the Windows 10 start menu. We have a little more work to do in order to set the Windows 11 start menu back to Windows 10.
This is where Explorer Patcher comes in. Explorer Patcher is a tiny open source utility that will help you revert the start menu back to the “classic” layout. You can download Explorer Patcher here.
Once you’ve downloaded Explorer Patcher, double click the file to open it. Explorer Patcher will now present you with a lot more options to customize your start menu and taskbar.
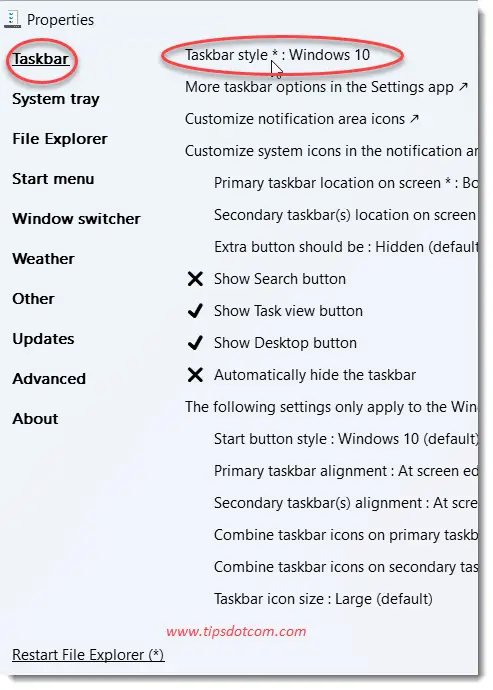
For starters, in the “Taskbar” section, select “Windows 10” as your taskbar style.
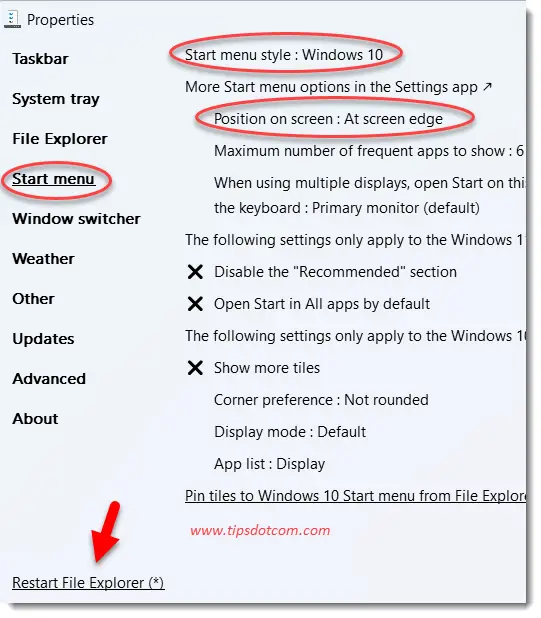
Next, in the “Start menu” section, set the “Start menu style” to Windows 10, set “Position on screen” to “At screen edge” and then click “Restart File Explorer” at the bottom of the window.
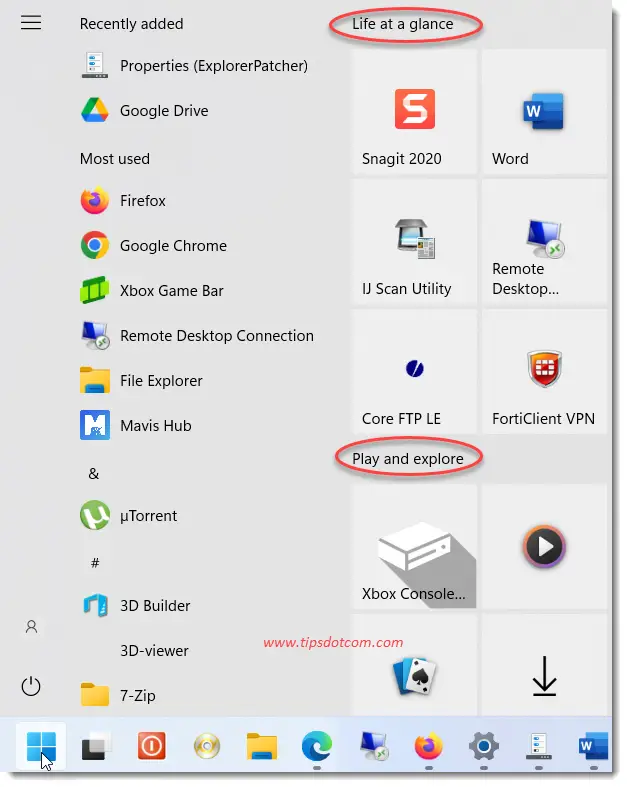
It will take a few moments and then your Windows 11 start menu classic layout will appear, including the “Life at a glance” and “Play and explore” subheadings.
Now your start menu already looks a whole lot more like the classic Windows 10 start menu.
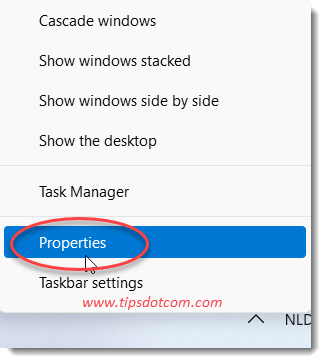
Anytime you want to come back and revisit your Windows 11 start menu options, or if you want to play around with other options in Explorer Patcher, you can right click your taskbar and select “Properties” to further customize your start menu and taskbar settings.
Explorer Patcher has a whole bunch of other options besides setting your Windows 11 start menu back to Windows 10. I’ll list a few examples below, but this list isn’t exhaustive:
- Show separators between taskbar toolbars
- Show command prompt instead of powershell in Win + x menu
- Add shortcut to program settings in Win + x menu
- Disable Office hotkeys
- Disable rounded corners for application windows
- Customize notification icons
- And more …
In short, there are a lot of options that you can control with Explorer Patcher and it will go a long way in getting your Windows 11 start menu back to Windows 10.
Why People Want to Set The Windows 11 Start Menu Back to Windows 10
The new Windows 11 start menu has been received with a lot of criticism among users. Every time Microsoft releases a new version of Windows with a change in the start menu, people seem to get upset about the changes. That’s totally understandable, because most of the time, people don’t like (too much) change.
That being said, especially with the introduction of Windows 8, Microsoft had done a horrible job with the start menu. It was so bad that they decided to revert back to a more Windows 7-ish version of the start menu when Windows 10 came.
But then again, it’s also true that people are generally inclined to want to stick with what they have become used to. With the introduction of Windows 10, people were still looking for ways to morph the start menu back to a Windows 7 style and now that Windows 11 is here, people are searching high and low for ways to revert back to the “classic” Windows 10 start menu.
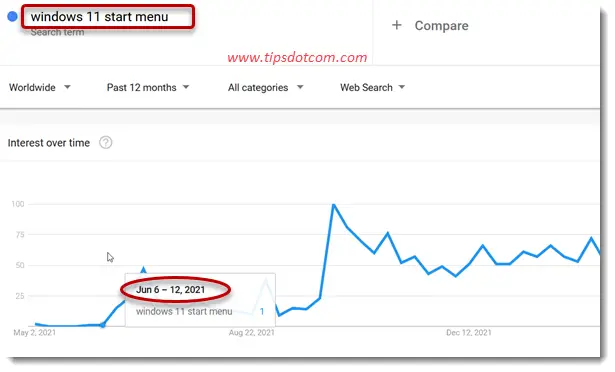
The image below shows a Google Trends overview of the search phrase “Windows 11 start menu”, which started to get traction on June 6, 2021.
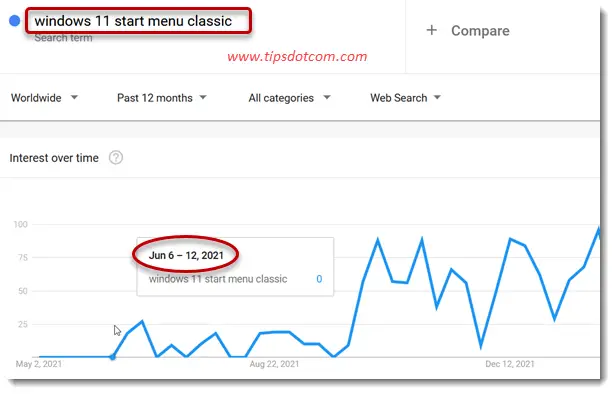
That’s exactly the same date as when the search term “Windows 11 start menu classic” started to emerge (image below), indicating that people were already looking for ways to revert their Windows 11 start menu back to Windows 10 at the same time.
Whether we like it or not, we are creatures of habit, and whenever a new iteration of Windows will come out, we will likely be searching for ways to revert the start menu back to the Windows 11 start menu classic layout.
Luckily, with Explorer Patcher, you now have a way to customize your Windows 11 start menu to your likings, so you don’t have to depend on Microsoft’s default start menu style for Windows.
Click here to go back to the main Windows 11 Start Menu Survival Guide.
If you've enjoyed this article or found it useful, I'd appreciate it if you'd let me know by clicking the Like (or Share) button below. Thank you!


New! Comments
Have your say about what you just read! Leave me a comment in the box below.