Windows 11 Start Menu Recommended Icons
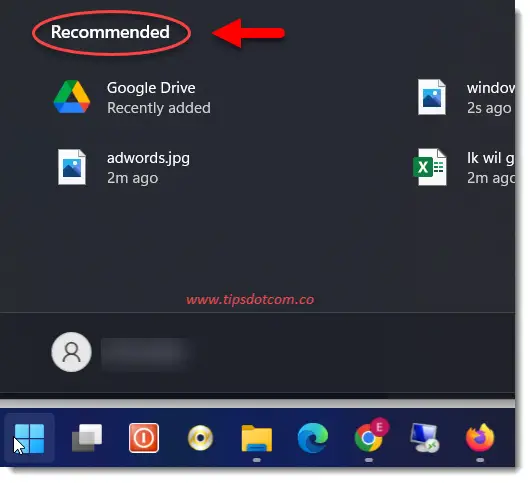
The Windows 11 start menu recommended icons represent files on your computer that you’ve recently worked with, whether these are documents, photos or videos. In theory, you spot the name of any document, program or app that you want to work with, you click it and the requested item leaps up on your screen and you’re good to go. In reality, finding what you need on the Windows 11 start menu can be a little more challenging. Especially if you let Windows decide which icons are “recommended” for you. If you prefer to keep a little more control over the items that appear on your start menu, there are a few easy tricks that you can use to organize your start menu the way you want it, not the way Windows is guessing you want it.
Even though the start menu looks and feels a bit different from how it used to look in Windows 10, the basic way it works is still the same. With just a few simple tips you’ll get sooo much better at finding precisely what you need, even in a crowded Windows 11 start menu.
So let’s start by taking a look at the recommended icons section in the start menu.
Windows 11 Start Menu Recommended Icons - What’s Up With That?
The “Recommended” section on the Windows 11 start menu takes up quite a bit of space, leaving less room for the icons you actually want to have on your start menu. If that’s not sad enough, the icons under the section “Pinned” in the start menu are also a bunch of icons that Windows decides should be there, and they might not necessarily be the icons that you want there. I have created a separate article about the Windows 11 start menu pinned icons, so feel free to check that out as well.
There can be a number of reasons why you’d want to remove recommended icons from the Windows 11 start menu, for instance if you don’t want anybody else to see what documents you’ve recently worked with. Or maybe simply because they take up too much space and make your start menu too crowded. This raises the all-important question:
How to remove Windows 11 start menu recommended icons?
To remove Windows 11 start menu recommended icons, simply right-click the icon and select “Remove from list”. This removes the icon from the recommended section in your start menu. Repeat this for any other icon in the recommended section.
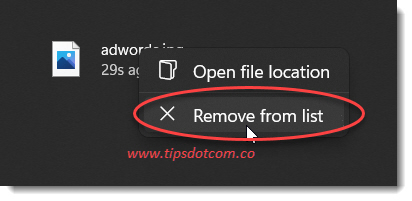
Obviously, this can become a bit tedious if you have a bunch of recommended icons and on top of that, Windows will keep populating the recommended icons sections as you go. That’s right, Windows 11 recommended icons keep changing according to the documents you use so you might be wondering if there’s any way that you can simply disable the entire recommended icons section in your start menu.
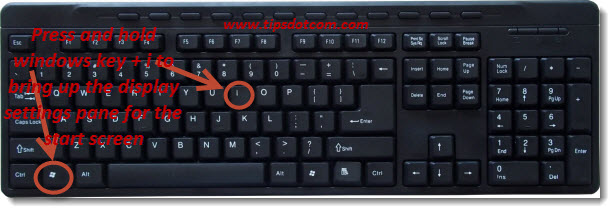
If you want to remove the entire recommended icons section from the Windows 11 start menu, press the Windows logo key + i on your keyboard to bring up the settings menu.
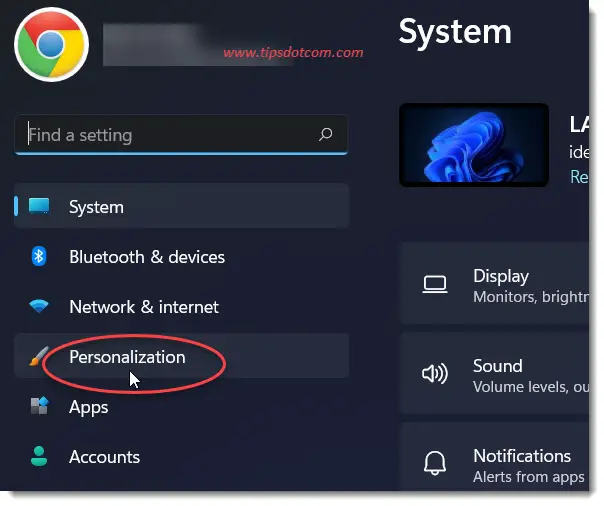
The settings menu will look something like this, where you can click the “Personalization” to go to the relevant settings.
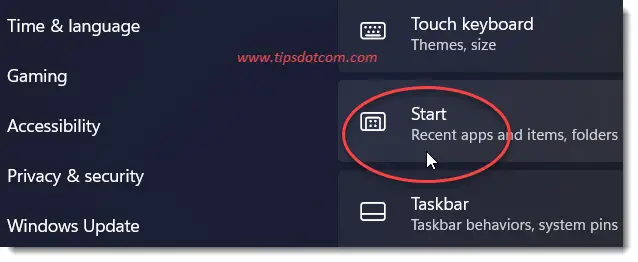
Now scroll to “Start” and click to open the start menu settings.
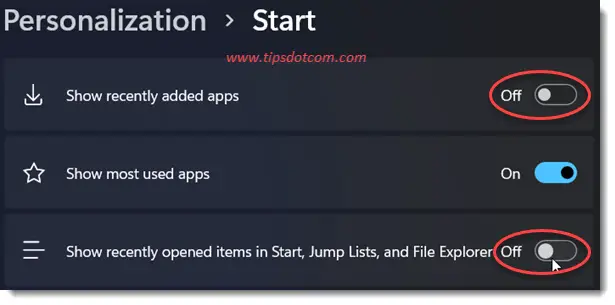
In the start menu settings, switch both of the following settings to the “Off” position:
- Show recently added apps
- Show recently opened items in Start, Jump Lists, and File Explorer
Your Windows 11 start menu recommended icons section will now look like this:
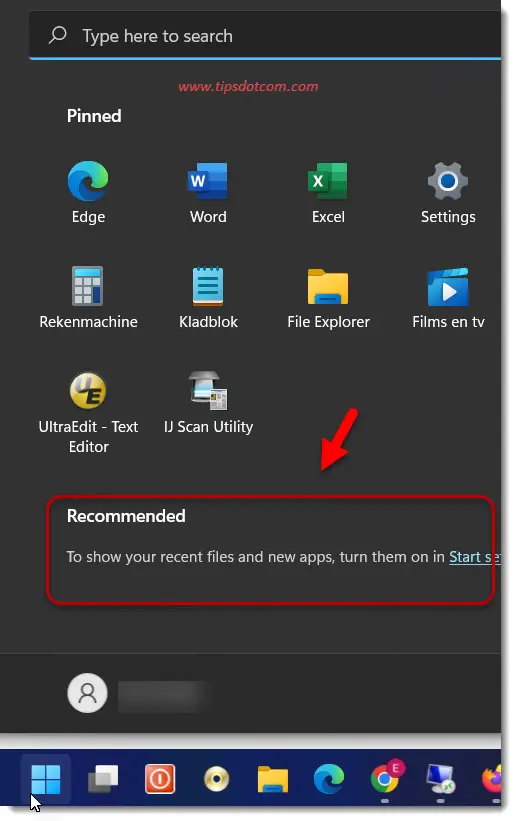
As you can see, the section subheading is still there, but no more space is taken up by any icons. It now says: “To show your recent files and new apps, turn them on in “Start Settings”, where “Start Settings” is a direct link to the relevant settings where you’ve just disabled them in the previous step.
In the current Windows 11 version, this is as far as you can go to eliminate the recommended icons in your start menu. If you really want to push it and also remove the subheading itself, you can download and install “Explorer Patcher”, a free open source utility that will allow you to hide the Windows 11 start menu recommended icons section, including the subheading.
How to Hide Windows 11 Start Menu Recommended Icons Section With Explorer Patcher
You can download Explorer Patcher free here.
If you download Explorer Patcher, you can double click the file and after a few moments you’ll see the Windows 11 taskbar change to take on a characteristic Windows 10 style. You can now right click the taskbar and select “Properties”.
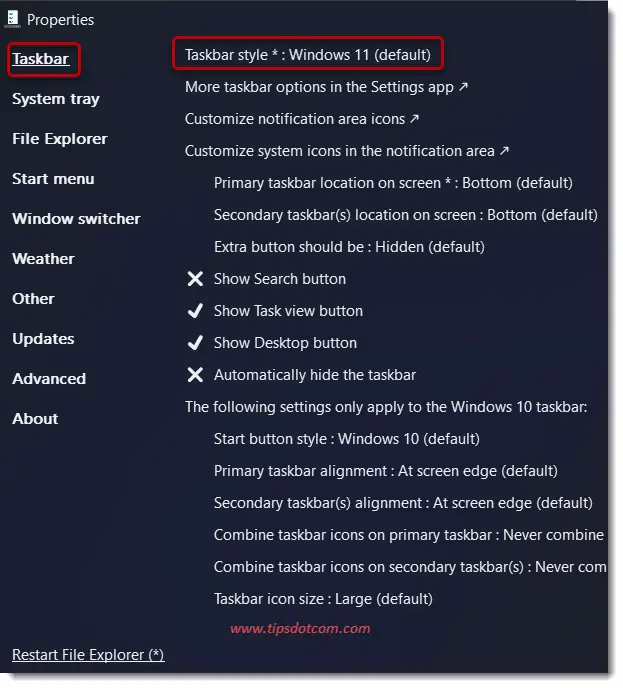
That will bring up the Explorer Patcher properties window.
Explorer Patcher will then show you all kinds of customization options for your Windows 11 start menu and taskbar.
In the “Taskbar” section, you can select the Windows 11 style or you can even select a Windows 10 style if you prefer to have the classic Windows 10 style taskbar even if you’re running Windows 11.
In the “Start Menu” section you can put a checkmark next to “Disable the recommended section” which will completely hide the recommended section from your Windows 11 start menu.
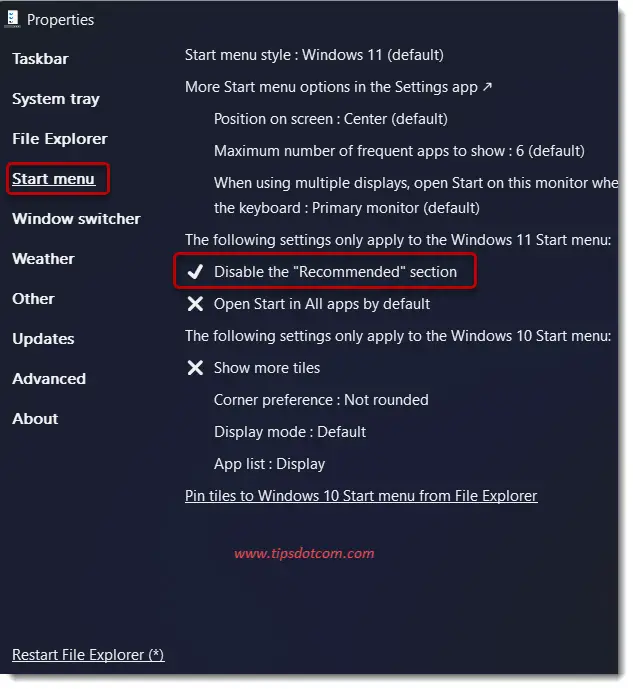
When you’re ready, click the “Restart File Explorer” link in the bottom left corner of the Explorer Patcher screen and wa-la, your changes are being applied.
This is what the Windows 11 start menu looks like without the recommended icons.
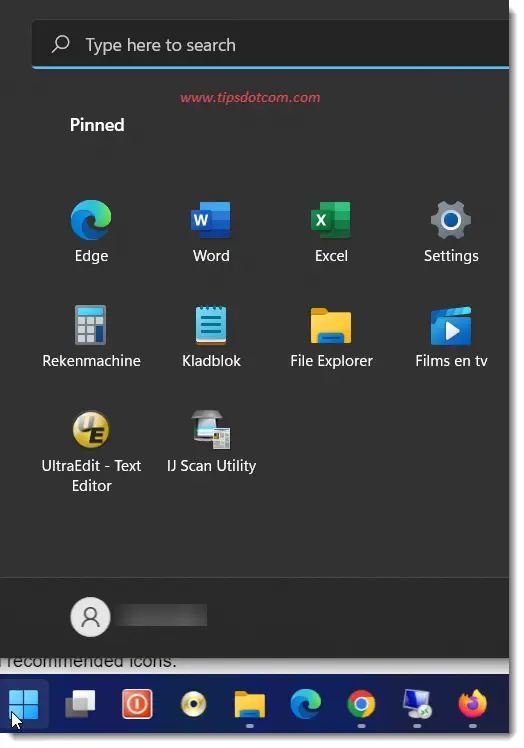
As you can see, Explorer Patcher has a lot of other options that allow you to customize the Windows 11 start menu, taskbar and other options, which you can explore and play with. In the scope of this article I only wanted to show this as an option to hide the Windows 11 start menu recommended icons.
I hope you enjoyed the article. If you did, please consider giving it a like or leave a short comment below. Thanks!
Go back to the main Windows 11 Start Menu Survival Guide page.
If you've enjoyed this article or found it useful, I'd appreciate it if you'd let me know by clicking the Like (or Share) button below. Thank you!


New! Comments
Have your say about what you just read! Leave me a comment in the box below.