Windows 8 Storage Spaces
With the arrival of Windows 8 storage spaces, you now have a great tool at your disposal to create cheap redundancy for all of your important data.
However performant and reliable NTFS and ReFS file systems may be, they will not protect you from losing your files in the event of a hard disk failure. Modern hard disks are impressively better and faster than their counterparts from only a couple of years ago, but they still do have one thing in common. Eventually, they die.
You may not realize it or you may not see it coming, but sooner or later in the history of every hard disk comes a time when it simply stops working. And when this happens, there’s a good chance that it will be at a time when you least expect it.
You might wonder how it is even possible that humanity has discovered penicillin and space exploration yet we are unable to bring forth a simple hard drive that will not fail. Sadly enough though, this is a reality we as computer users have to deal with.
Heck, this is even the reason why more expensive server or professional workstation computers are equipped with RAID systems, where two or more hard disks work together and each keep a copy of the data they hold. If a disk dies in a RAID configuration, we rely on the other disk(s) holding the copy of the data while replacing the failed disk with a new one.
Protecting Your Files With Windows 8 Storage Spaces
Windows 8 storage spaces brings this concept of keeping multiple copies of your precious files to the realm of the home desktop (storage spaces are not available on tablets with Windows 8 RT). You can now add a cheap second hard drive to your system and let Windows 8 take care of redundancy. Windows also gladly accepts external USB drives as a spare drive and the drive capacity doesn’t even have to match the capacity of your original drive.
Redundancy means that Windows will make sure to keep at least two copies of your files on separate drives at any given time. This is not the same as running a backup on your computer to create a spare copy of your files, but I will come back to the difference later. Let’s now first focus on how to create Windows 8 storage spaces.
I’m assuming that you have added two or more extra hard drives to your system and that these drives are available to be used in a storage space. Please note that any files that are already present on the disks you plan to use in storage spaces will be deleted.
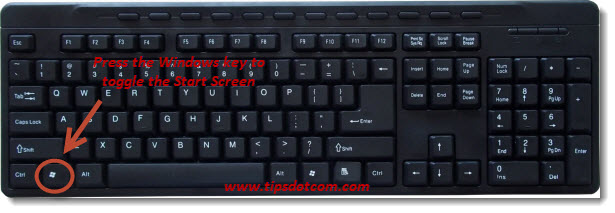
In order to create a storage space, go to the Windows 8 start screen by pressing the Windows key on your keyboard.
With your Windows start screen displayed, start typing the letters “storage” (without the quotes), which will make the Windows search function come up with a list similar to the one in the image below.
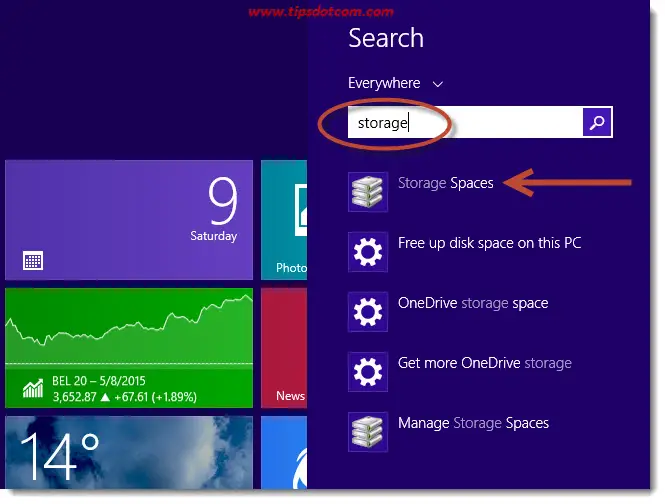
Select “storage spaces” to open up the Windows 8 storage spaces manager.
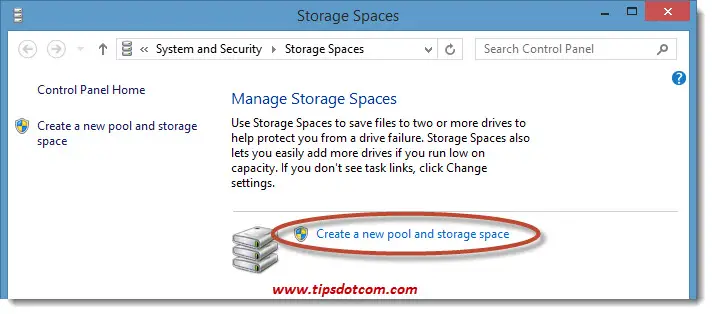
Click “create a new pool and storage space” in order to get started.
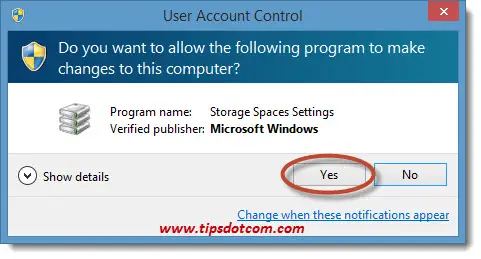
If the Windows user account control dialog comes up, click yes to continue.
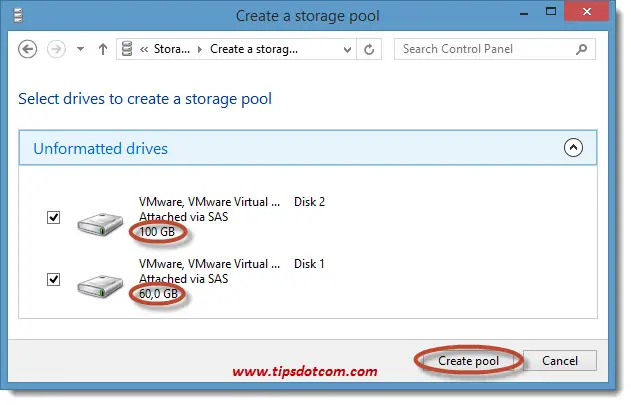
Now the “create a storage pool” window will appear, showing you a number of hard disk drives it detects in your system that can be used to take part in the storage pool.
In my example I have provided two hard disks with different capacities, one 100 GB drive and a second drive with 60 GB capacity. Make sure to select the appropriate drives and click “create pool”.
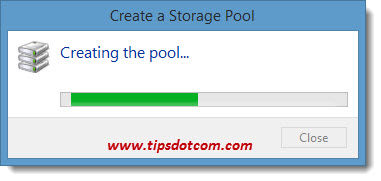
Windows will go on to allocate the drives and create the pool.
Then Windows will show a screen similar to the image below, where you get to give the storage space a name, assign a drive letter, decide upon the file system and set the resiliency type.
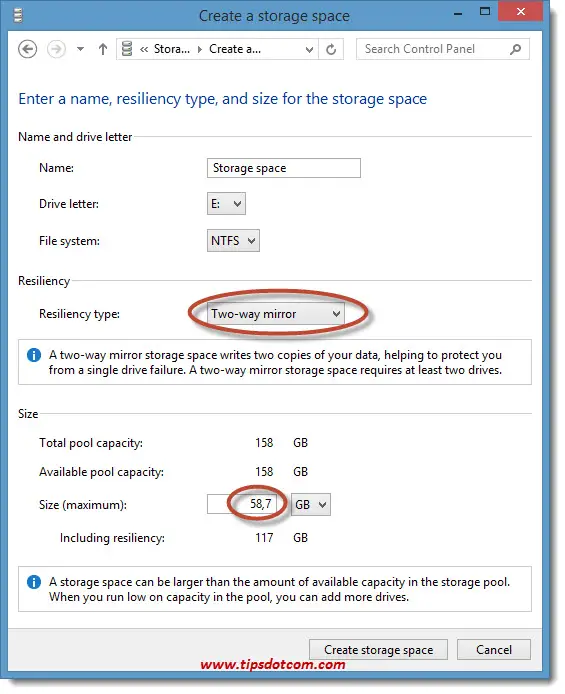
In the example above, you can see that the maximum size for the storage space is only 60 GB (well, actually 58.7, but let’s not get caught up in rounding to decimal places here). That’s because the total capacity of your storage space will always be determined by the smallest participating drive. Every file that lands on your storage space will automatically be copied on all participating drives, so once the smallest drive is full, so will be your storage space.
The other parameters of interest in the storage space are:
Drive letter: You can set the drive letter that will appear in Windows explorer for your storage space.
The resiliency type of your storage space is an important setting and cannot be changed once your storage space is created. If you change your mind on the resiliency type, you have to remove and recreate your storage space. The image below shows the different options.
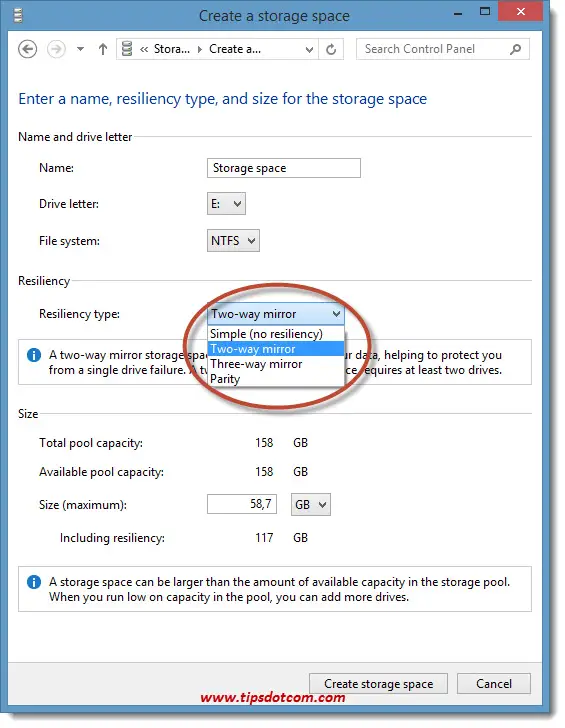
Resiliency type: The options in this scroll down list depend on the number of connected hard drives. If there’s only one available hard disk, the only option will be “simple (no resiliency)”. This option doesn’t make a lot of sense. If this one drive crashes, you will still lose all of your data. Data redundancy requires at least two disk drives.
Two way-mirror and three-way mirror offers you the option to have a copy of your data on two or three hard disks, depending of course on how many disks you have hooked up to your system. Please note that the maximum capacity of a two-way or three-way mirror is equal to the capacity of the smallest disk in the mirror.
You can also set the resiliency type to “parity”. In this case Windows will not keep exact copies on all the different drives in your storage group. Windows will distribute the files over the different disks in such a way that it can always recover your files in the event of a hard drive failure. Parity is mostly used in configurations with more than two disks and for usage with larger files (for instance video files).
Another choice that you have when working with Windows 8 storage spaces is the file system. In the image below you can see the available options: NTFS and REFS (Resilient file system).
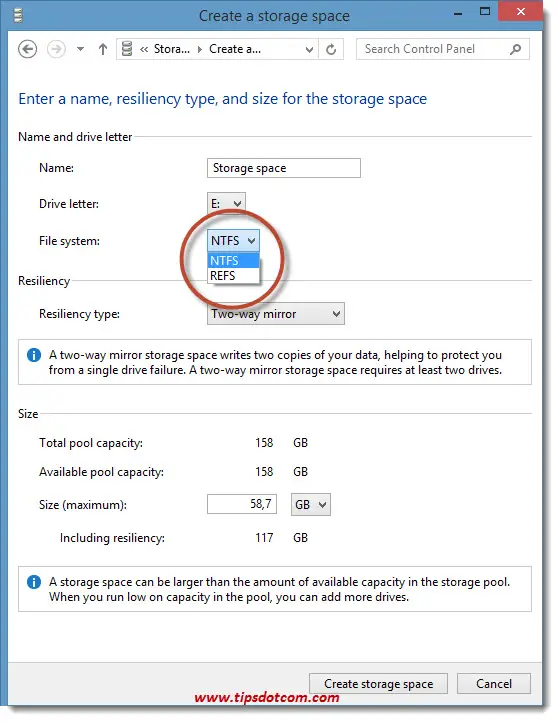
Earlier versions of Windows used to work with FAT file systems (dating from 1977!). With the introduction of Windows XP came NTFS file systems, which are more performant, more secure and offer better reliability. REFS is the successor of NTFS file systems and offers possibilities for spreading data over several disks of different sizes and can also be used for bootable system disks.
If you are happy with your Windows 8 storage spaces parameters, click the “create storage space” button and Windows will start working on it.
As soon as the process is completed, you will get an overview screen with the results.
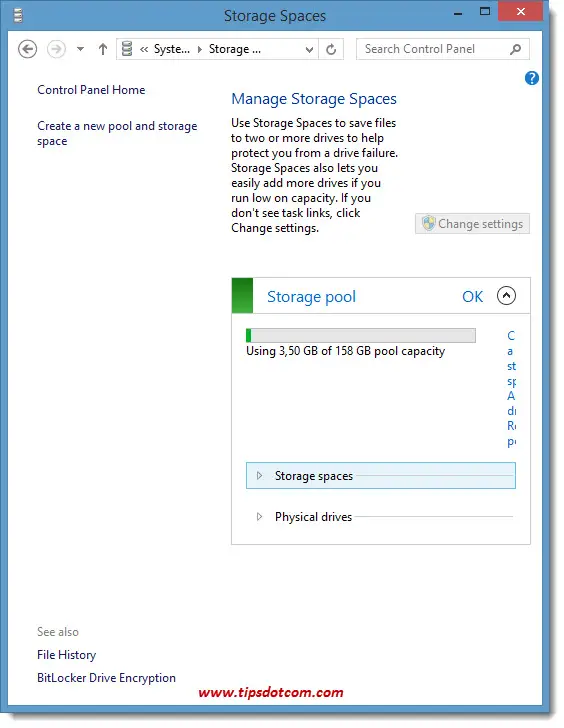
From that point on, you can use your storage space to work with your files like any other drive in Windows explorer, knowing that your data is always protected from disk failures by a copy on one or two extra drives.
Have you worked with Windows 8 storage spaces? What do you think of this feature? Please take a moment and leave a comment below. I’d appreciate the gesture, thanks!
If you've enjoyed this article or found it useful, I'd appreciate it if you'd let me know by clicking the Like (or Share) button below. Thank you!


New! Comments
Have your say about what you just read! Leave me a comment in the box below.