Using Windows 8 System Restore
In this Windows 8 System Restore article I will show you how to use System Restore correctly, how you can use it to repair your computer when things go wrong and I’ll also talk about a few common mistakes people sometimes make when using this built-in Windows recovery function.
In some cases (not always), System Restore can save your day in the event you experience something catastrophic on your computer. You can think of it as a built-in safety net in Windows. Suppose, for instance, that something goes wrong with your computer, maybe as a result of installing a new driver or because a nasty piece of spyware has made its way into your pc. Sometimes problems can even occur as a side-effect of seemingly innocent events, such as when your computer lets you know that there are Windows updates available and installation of these updates get you into trouble.
You’d be surprised how many problems occur when Windows tries to update itself :-)
(Even if only one in every 100,000 Windows updates goes wrong, with nearly 1.5 billion Windows pc’s worldwide (according to Net Applications), that’s still 1.5 million problematic updates.)
Update: please also check out my article on creating Windows 10 system restore points.
Windows 8 System Restore – Timetravel
Suppose your computer got seriously messed up because a software- or driver- or update installation went wrong, or maybe simply because you accidently clicked on a button that you didn’t need to click. Your computer is really stuck, your blood pressure is rising and you are gripped with fear that you’ve lost huge amounts of work or maybe even all your personal files or photo’s or that important e-mail with your holiday-booking confirmation.
Wouldn’t it be nice then, if you could just go back in time up ‘till the point when your pc was humming along nicely and there wasn’t even a single sign of catastrophe on the horizon?
System Restore Windows 8 lets you do exactly that. With system restore you can bring your computer back to a point in time when it felt better. How does that work? Windows has this ability by creating “System Restore Points” from time to time. Each of these System Restore Points can be used to bring your computer back in the state it was when the Restore Point was created. (A similar concept also exist on Apple computers and there it’s called “Time Machine”.)
If you are afraid that your files and documents that you have saved or e-mails that you have received will be lost when your use System Restore to bring your computer back to a point in time in the past, don’t worry. Files and e-mails remain, they won’t be deleted by system restore.
When Are System Restore Points Created?
Good question! When doing a Windows 8 System Restore, you get to choose from a list of previously made System Restore points to repair your computer. Windows 8 creates System Restore Points automatically when you install new software, when new updates are being installed or when drivers are updated.
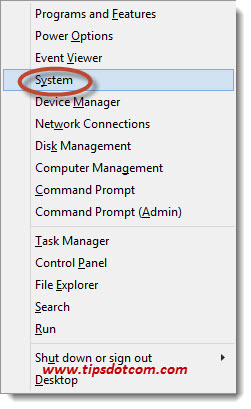
But you can also create System Restore Points manually. To create a restore point manually, press the Windows-key + x on your keyboard ...

...and select “System” from the menu.
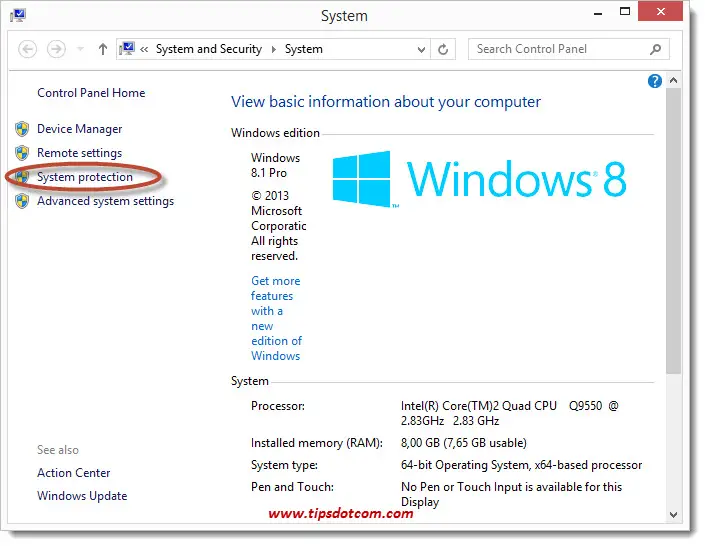
Then, in the resulting System information window, click on “System Protection”.
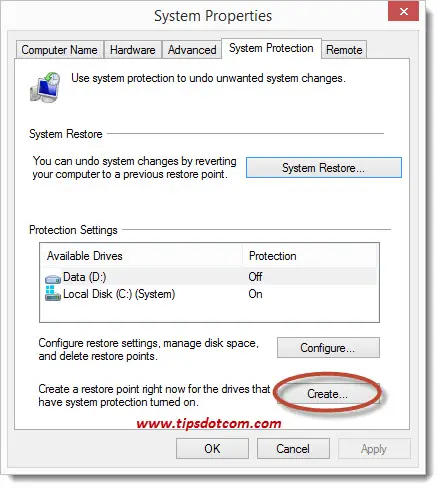
Now, you will have the “System Properties” window on your screen, in which you can click on the “Create” button to initiate the manual creation of a restore point (make sure you are on the “System Protection” tab).
Now, Windows will prompt you for a description for the restore point, which will help you later on to remember why the restore point was created. The date and time will be added automatically by Windows.
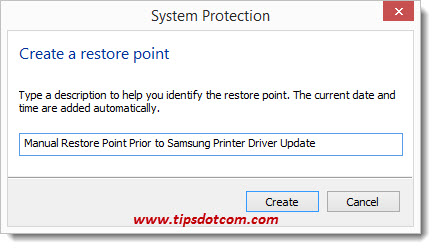
If you click the “create” button, the restore point will be created.

When Windows 8 System Restore is finished, you will see the restore point created successfully message.

Repairing Your Computer With System Restore
If at some point your pc isn’t feeling very well, you might want to turn to system restore to bring it back to a healthier state.
On your keyboard, press the Windows-key + x ...

...and select “System” from the menu.

This will open the “System” dialog window, where you need to click “System Restore” (on the “System Protection” tab).
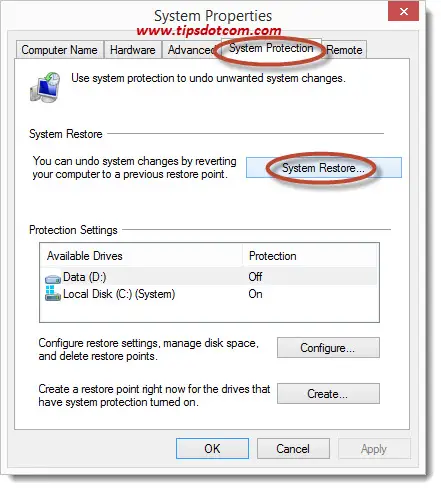
Next, you will see the System Restore (Restore system files and settings) window on your screen.
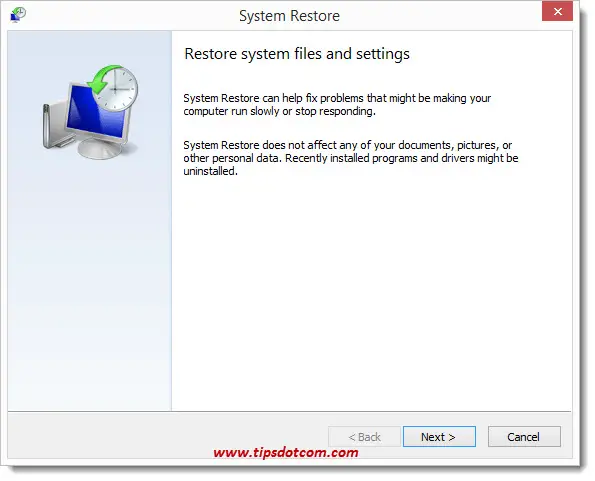
Click next to proceed to the list of available restore points.
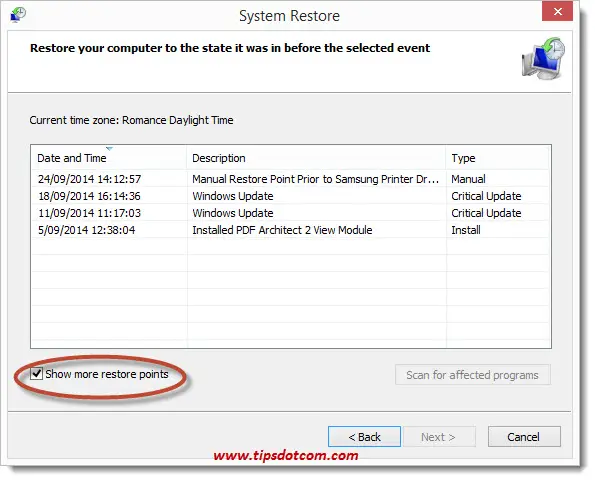
Notice the check box “show more restore points”, which will allow you to get a more complete overview of all available restore points.
Now you can select the restore point that you want to use and click next to start the repair process.
You will then get an overview of the selected restore point.
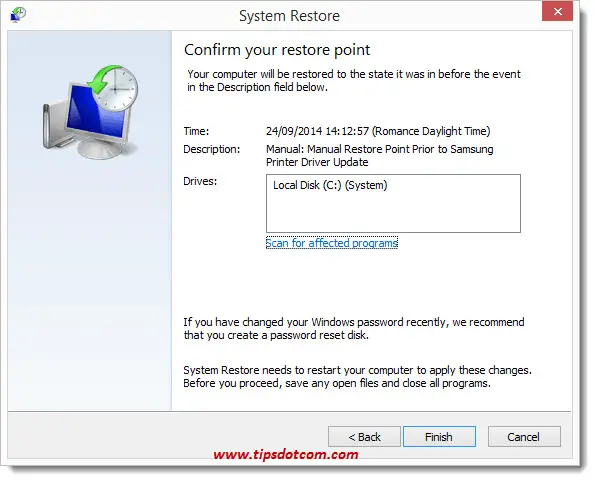
Click finish to proceed with the recovery operation.
A final warning message will come up to let you know that the restore operation cannot be interrupted. Click yes to proceed.
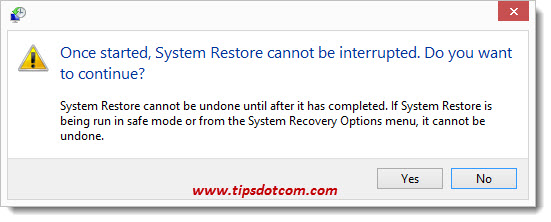
Windows 8 System Restore will then start the operation.

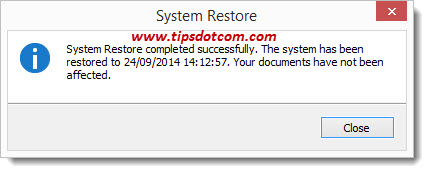
When the Windows 8 System Restore is completed, your computer will reboot and let you know that the restore operation was successfully completed.
If you've enjoyed this article or found it useful, I'd appreciate it if you'd let me know by clicking the Like (or Share) button below. Thank you!


New! Comments
Have your say about what you just read! Leave me a comment in the box below.